(9) Unscrew the marked nut.
(10) Reattach retainer wrench to joint flange.
(11) Screw on new collared nut and tighten care-
fully in stages until the previously value of torque to
rotate is exceeded by 0.5 N·m. (4.4 in. lbs.).
CAUTION: The total friction moment must not be
obtained by slackening the collared nut. Avoid over-
tightening the collared nut otherwise the compres-
sion ring inside will be compressed and will have to
be replaced. This requires total disassembly of the
gear set.
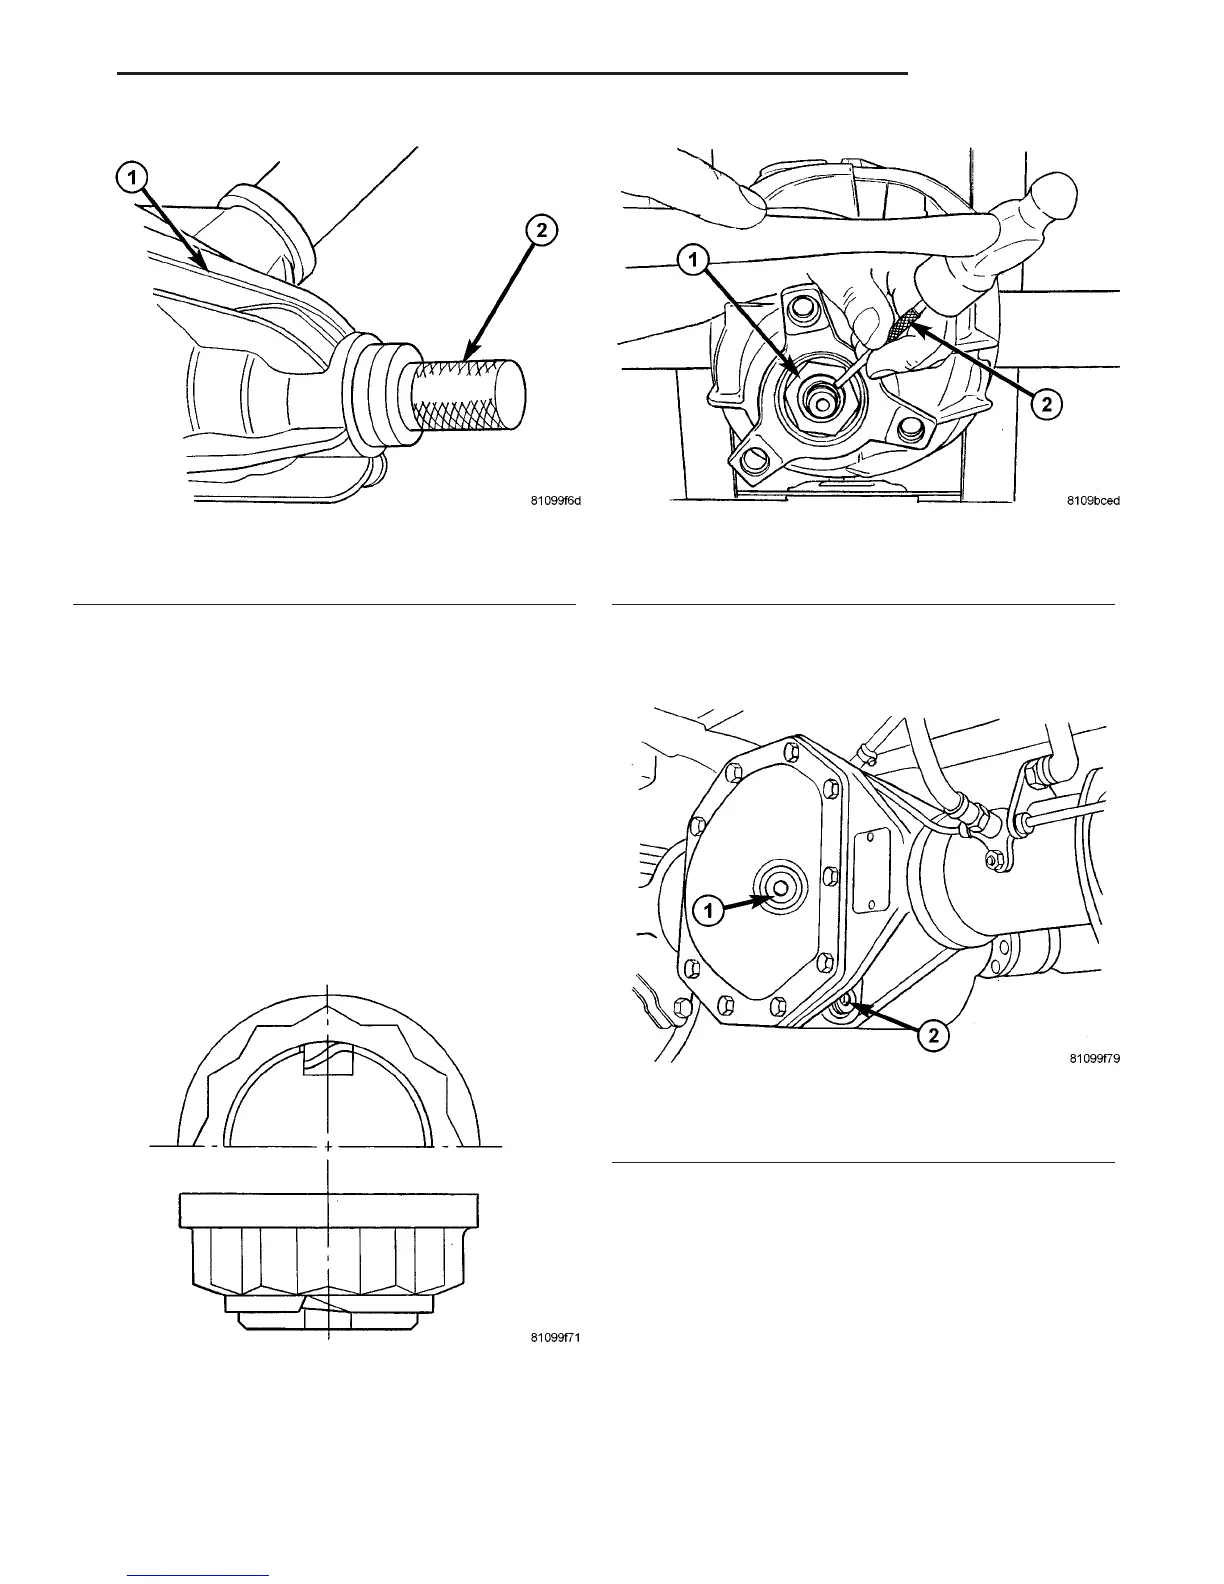
(12) Cut the collar of the tightened collared nut
(Fig. 30).
(13) Bend collar so it touches the wall of the slot
in the pinion shaft (Fig. 31).
(14) Connect propeller shaft to pinion flange.
(15) Pour in oil up to bottom edge of oil filler hole
(Fig. 32).
(16) Screw in oil filler plug and tighten to 100 N·m
(74 ft. lbs.).
(17) Install wheels at rear axle.
(18) Operate brake pedal several times until brake
pads contact brake discs (brake pressure built up).
(19) Attach rear brake cables if removed and
adjust parking brake.
Fig. 29 PINION SEAL INSTALLER
1 - AXLE
2 - INSTALLER
Fig. 30 COLLARED NUT
Fig. 31 BEND COLLAR OF NUT
1 - COLLARED NUT
2 - DRIFT
Fig. 32 FILL PLUG
1 - FILL PLUG
2 - DRAIN PLUG
VA REAR AXLE 3 - 23
PINION SEAL (Continued)

 Loading...


