LATCH RELEASE HANDLE
REMOVAL
(1) Remove the screws and remove the release
handle.
(2) Disconnect the cable from handle.
INSTALLATION
(1) Connect latch cable to release handle.
(2) Install handle and install the screws.
PROP ROD
REMOVAL
(1) Open and support hood.
(2) Remove the prop rod retaining clip. (Fig. 1)
(3) Separate the prop and spring from the hood.
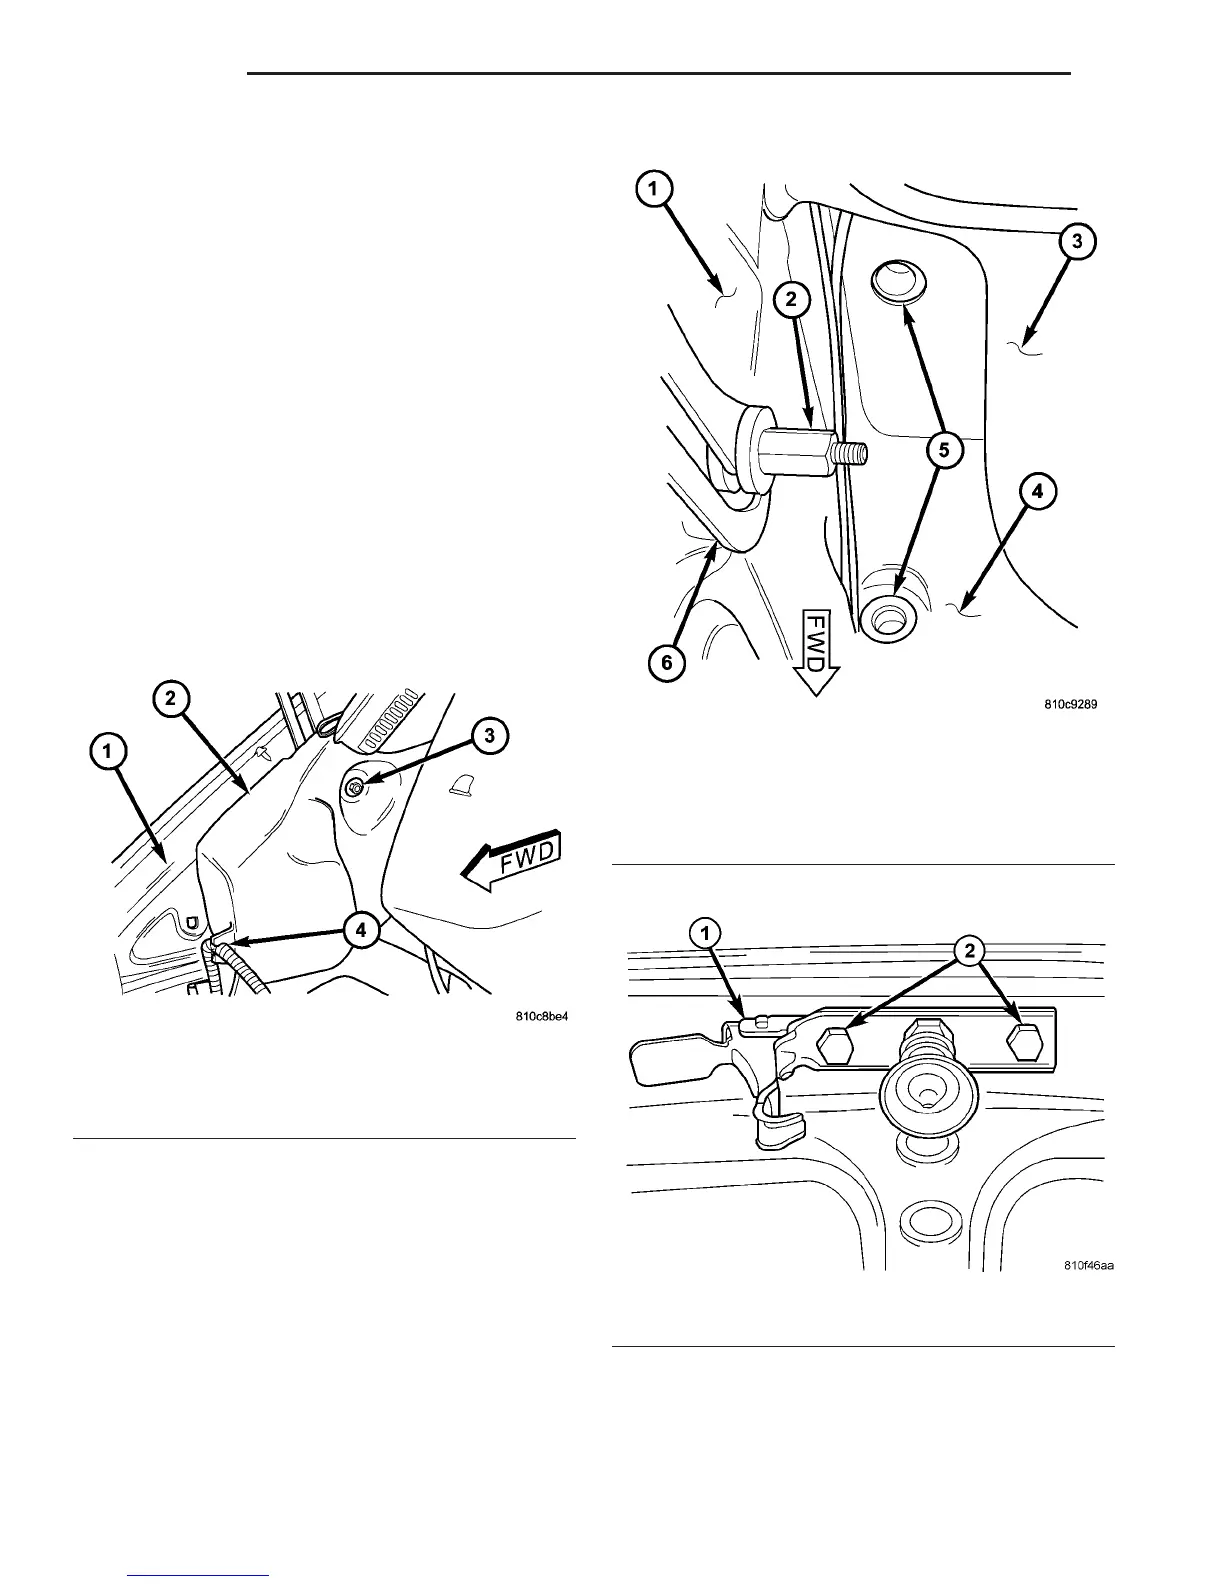
(4) Remove nut and position the washer bottle
aside. (Fig. 4)
(5)
Remove stud nut and remove hood prop. (Fig. 5)
INSTALLATION
(1) Install hood prop and install the stud nut.
(2) Position washer bottle back and install the nut
and washer.
(3) Connect spring and prop onto hood and install
the retaining spring.
SAFETY LATCH
REMOVAL
(1) Open hood.
(2) Using a grease pencil or equivalent, mark the
position of the safety latch to aid installation.
(3) Remove the bolts and remove the latch. (Fig. 6)
INSTALLATION
(1) Install the latch and install the bolts.
(2) Adjust the latch if necessary. (Refer to 23 -
BODY/HOOD/HOOD - ADJUSTMENTS)
Fig. 4 Washer Reservoir Remove/Install
1 - RIGHT INNER FENDER
2 - WASHER RESERVOIR
3 - NUT & WASHER
4 - ROUTING CLIP
Fig. 5 Washer Reservoir Mounting
1 - RIGHT INNER FENDER
2 - STUD NUT
3 - DASH PANEL
4 - RIGHT FRONT WHEEL HOUSE
5 - GROMMET (2)
6 - HOOD PROP
Fig. 6 SAFETY LATCH
1 - SAFETY LATCH
2 - BOLTS
23 - 52 HOOD VA

 Loading...


