DISASSEMBLY
RIGHT DOOR
(1) Remove door. (Refer to 23 - BODY/DOORS -
REAR/DOOR - REMOVAL)
(2) Remove trim panel (20) (Fig. 4). (Refer to 23 -
BODY/DOORS - REAR/TRIM PANEL - REMOVAL)
(3) Remove latch assembly (14). (Refer to 23 -
BODY/DOORS - REAR/LATCH - REMOVAL)
(4) Remove screws (21) from door handle (20).
(5) Slide door handle (20) to right and remove.
(6) Remove rivets (15) and remove closing wedge
(16).
(7) Remove bolts (2) and remove top closing wedge
(1).
(8) Remove bolts (9) and remove door check (10).
(Refer to 23 - BODY/DOORS - REAR/CHECK -
REMOVAL)
(9) Remove the bolts (3) and remove the door
hinges (4). (Refer to 23 - BODY/DOORS - REAR/
HINGE - INSTALLATION)
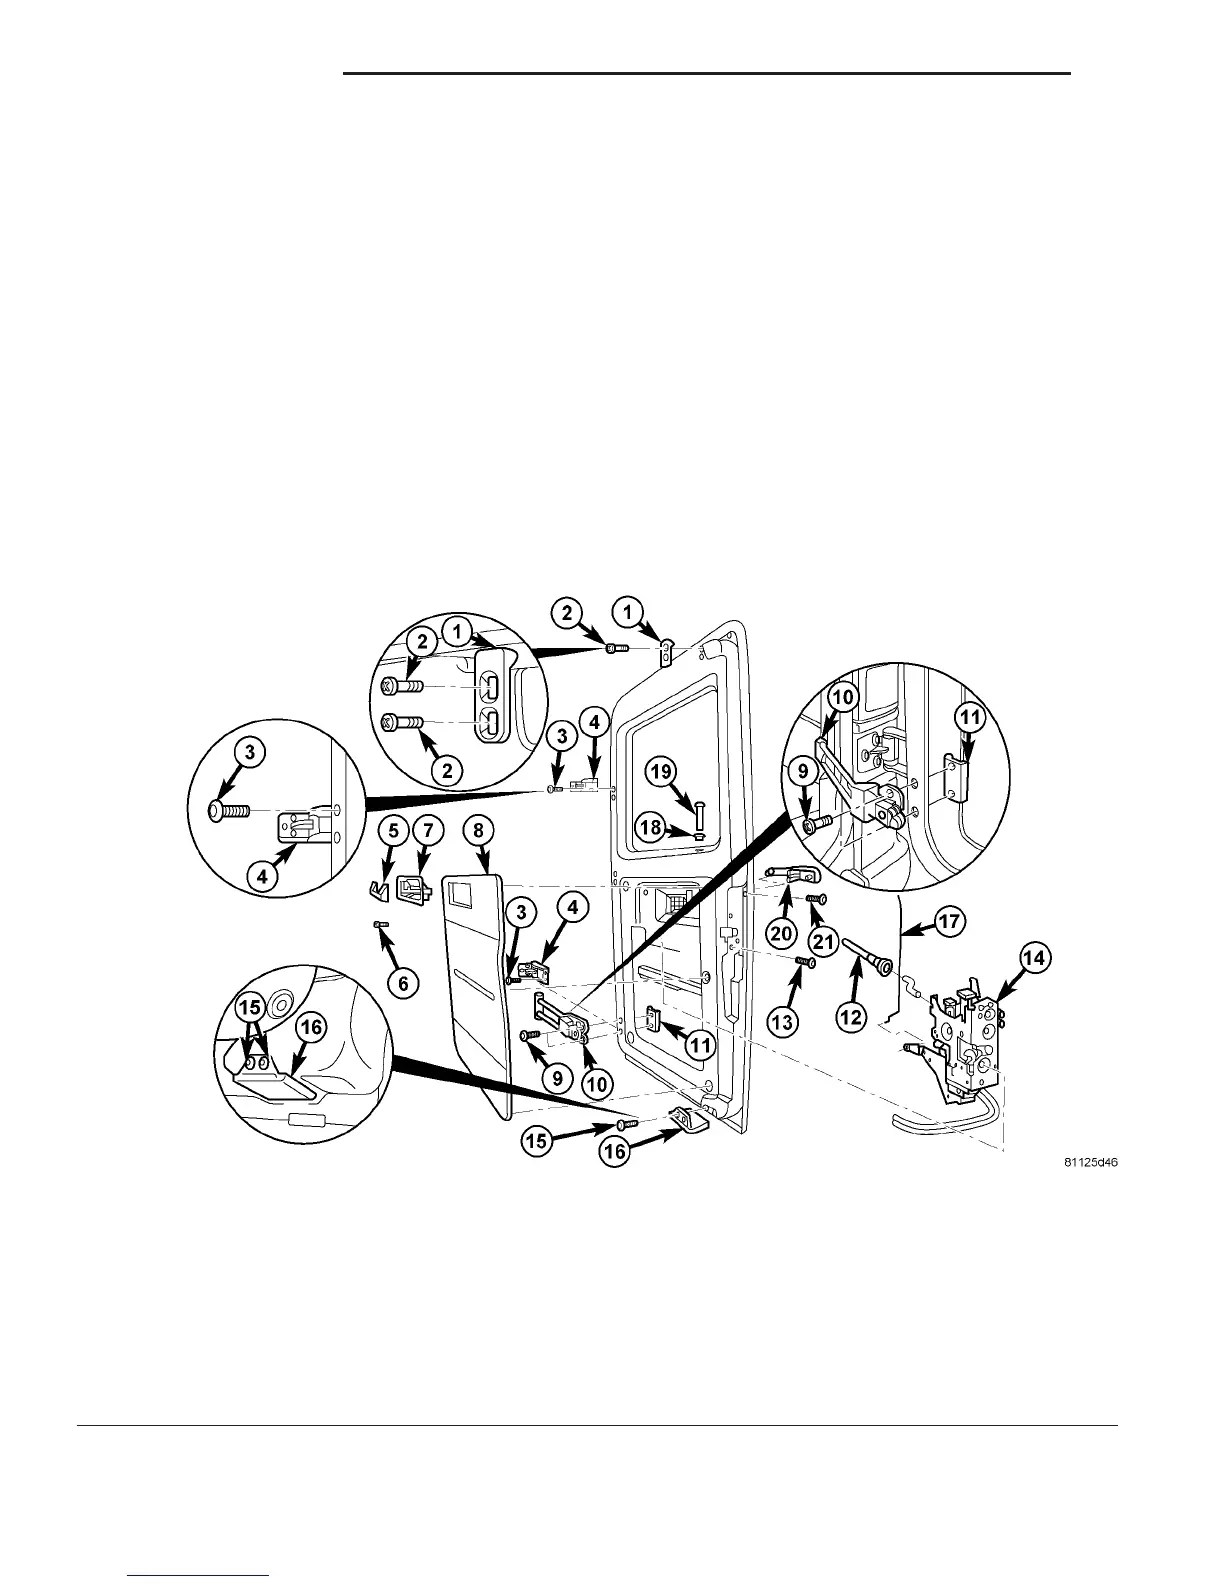
Fig. 4 RIGHT DOOR
1 - TOP CLOSING WEDGE 12 - DOOR LOCK LINKAGE
2 - BOLTS 13 - BOLTS (3)
3 - BOLTS (2) 14 - LATCH ASSEMBLY
4 - DOOR HINGE 15 - RIVETS (2)
5 - PANEL 16 - BOTTOM CLOSING WEDGE
6 - SCREW 17 - LOCKING ROD
7 - INNER ACTION 18 - GROMMET
8 - PANELING 19 - LOCKING KNOB
9 - BOLTS (2) 20 - EXTERIOR DOOR HANDLE
10 - DOOR CHECK 21 - SCREW
11 - THREADED PLATE
23 - 26 DOORS - REAR VA
DOOR (Continued)

 Loading...


