(3) Disconnect the vehicle wire harness connector
for the washer pump/motor unit from the motor con-
nector receptacle.
(4) Disengage the vehicle wire harness from the
routing clip integral to the front of the washer reser-
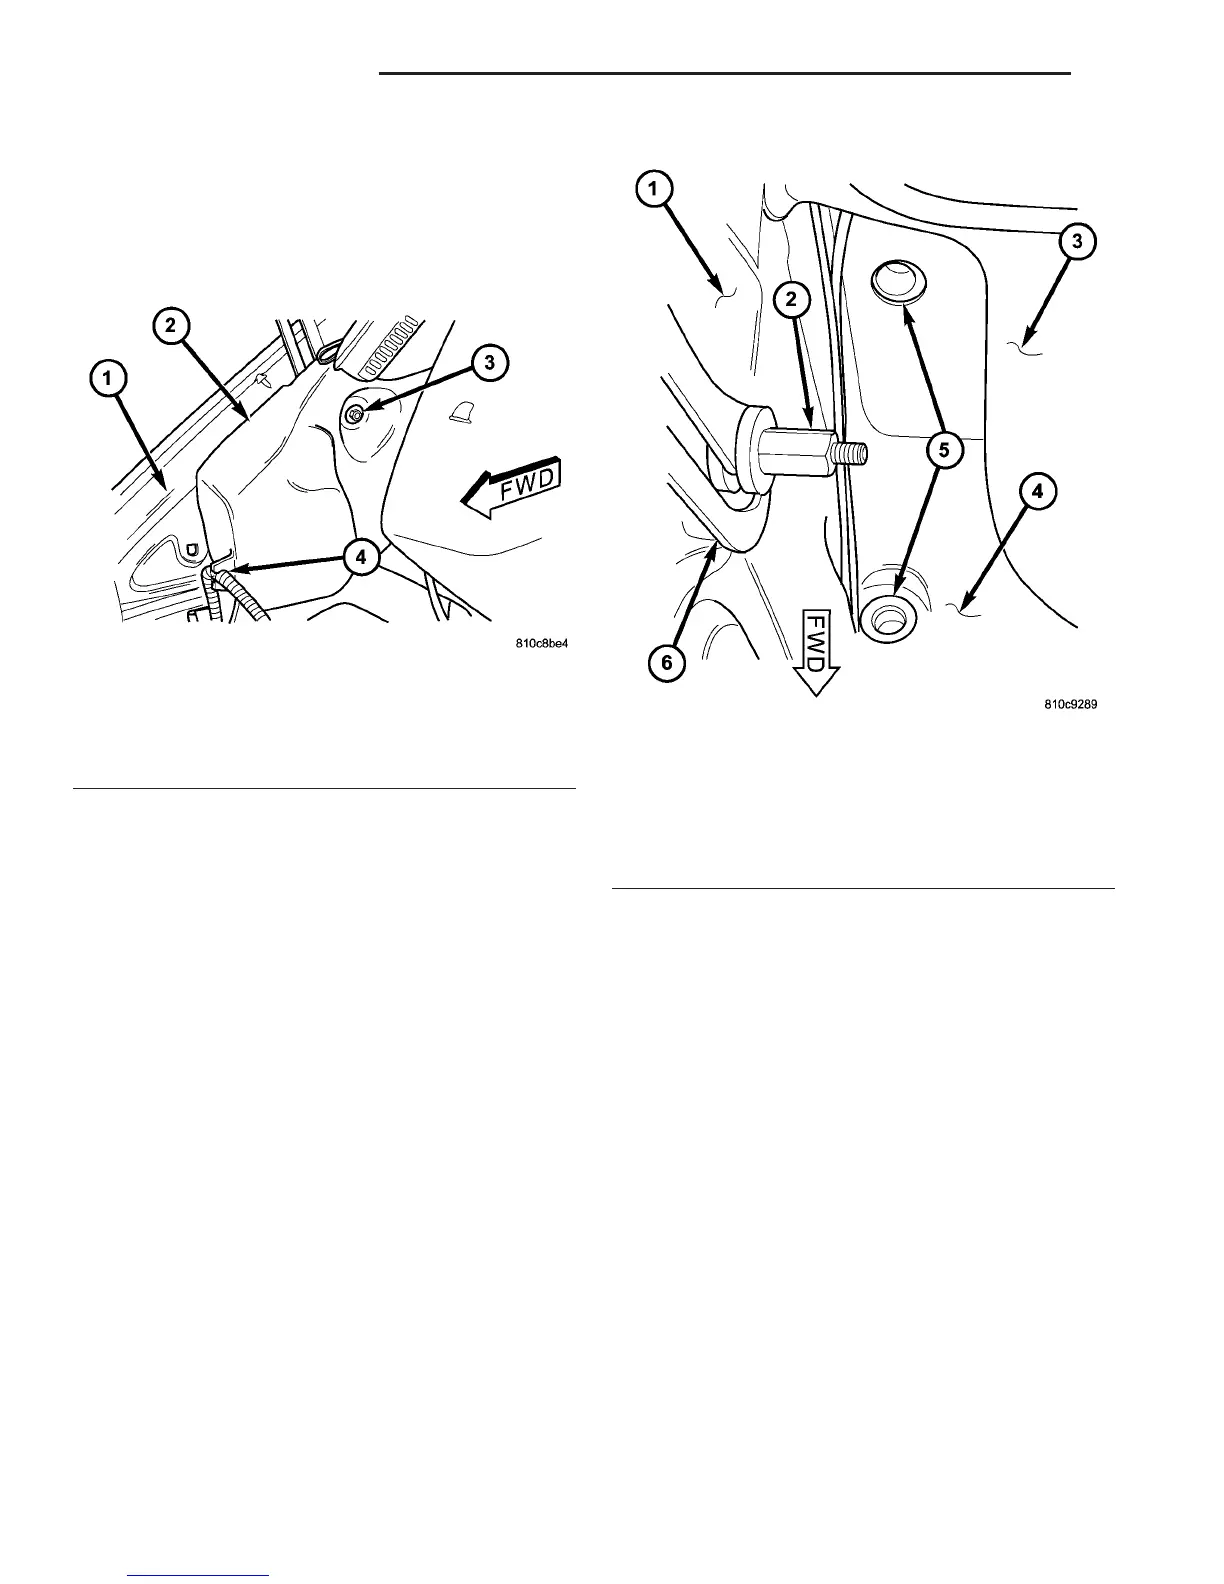
voir (Fig. 13).
(5) Remove the washer supply hose from the
barbed outlet nipple of the washer pump/motor and
allow the washer fluid to drain into a clean container
for reuse.
(6) Disengage the washer supply hose from the
routing trough integral to the top of the washer res-
ervoir.
(7) Remove the nut and washer that secures the
top of the washer reservoir to the stud nut on the
right inner fender.
(8) Pull the washer reservoir inboard far enough to
disengage the reservoir from the stud nut.
(9) Tilt the washer reservoir forward far enough to
disengage the rear mounting post from the grommet
in the dash panel.
(10) Lift the washer reservoir upward far enough
to disengage the lower mounting post from the grom-
met in the top of the right front wheel house.
(11) Remove the washer reservoir from the engine
compartment.
INSTALLATION
(1) Position the washer reservoir into the engine
compartment.
(2) Engage the lower mounting post of the washer
reservoir into the grommet in the top of the right
front wheel house (Fig. 14).
(3) Engage the rear mounting post of the washer
reservoir into the grommet in the dash panel.
(4) Position the washer reservoir mounting hole
over the stud nut on the right inner fender (Fig. 13).
(5) Install and tighten the nut and washer that
secures the top of the washer reservoir to the stud
nut on the right inner fender. Tighten the nut to 6
N·m (50 in. lbs.).
(6) Reconnect the washer supply hose to the
barbed outlet nipple of the washer pump/motor.
(7) Engage the washer supply hose into the rout-
ing trough integral to the top of the washer reservoir.
(8) Reconnect the vehicle wire harness connector
for the washer pump/motor unit to the motor connec-
tor receptacle.
(9) Engage the vehicle wire harness into the rout-
ing clip integral to the front of the washer reservoir.
(10) Reinstall the upper turbocharger heat shield
and the upper air cleaner housing into the engine
compartment (Fig. 12).
(11) Refill the washer reservoir with the washer
fluid drained from the reservoir during the removal
procedure.
(12) Reconnect the battery negative cable.
Fig. 13 Washer Reservoir Remove/Install
1 - RIGHT INNER FENDER
2 - WASHER RESERVOIR
3 - NUT & WASHER
4 - ROUTING CLIP
Fig. 14 Washer Reservoir Mounting
1 - RIGHT INNER FENDER
2 - STUD NUT
3 - DASH PANEL
4 - RIGHT FRONT WHEEL HOUSE
5 - GROMMET (2)
6 - HOOD PROP
8R - 12 WIPERS/WASHERS VA
WASHER RESERVOIR (Continued)

 Loading...


