(26) Install the output shaft washer onto the out-
put shaft.
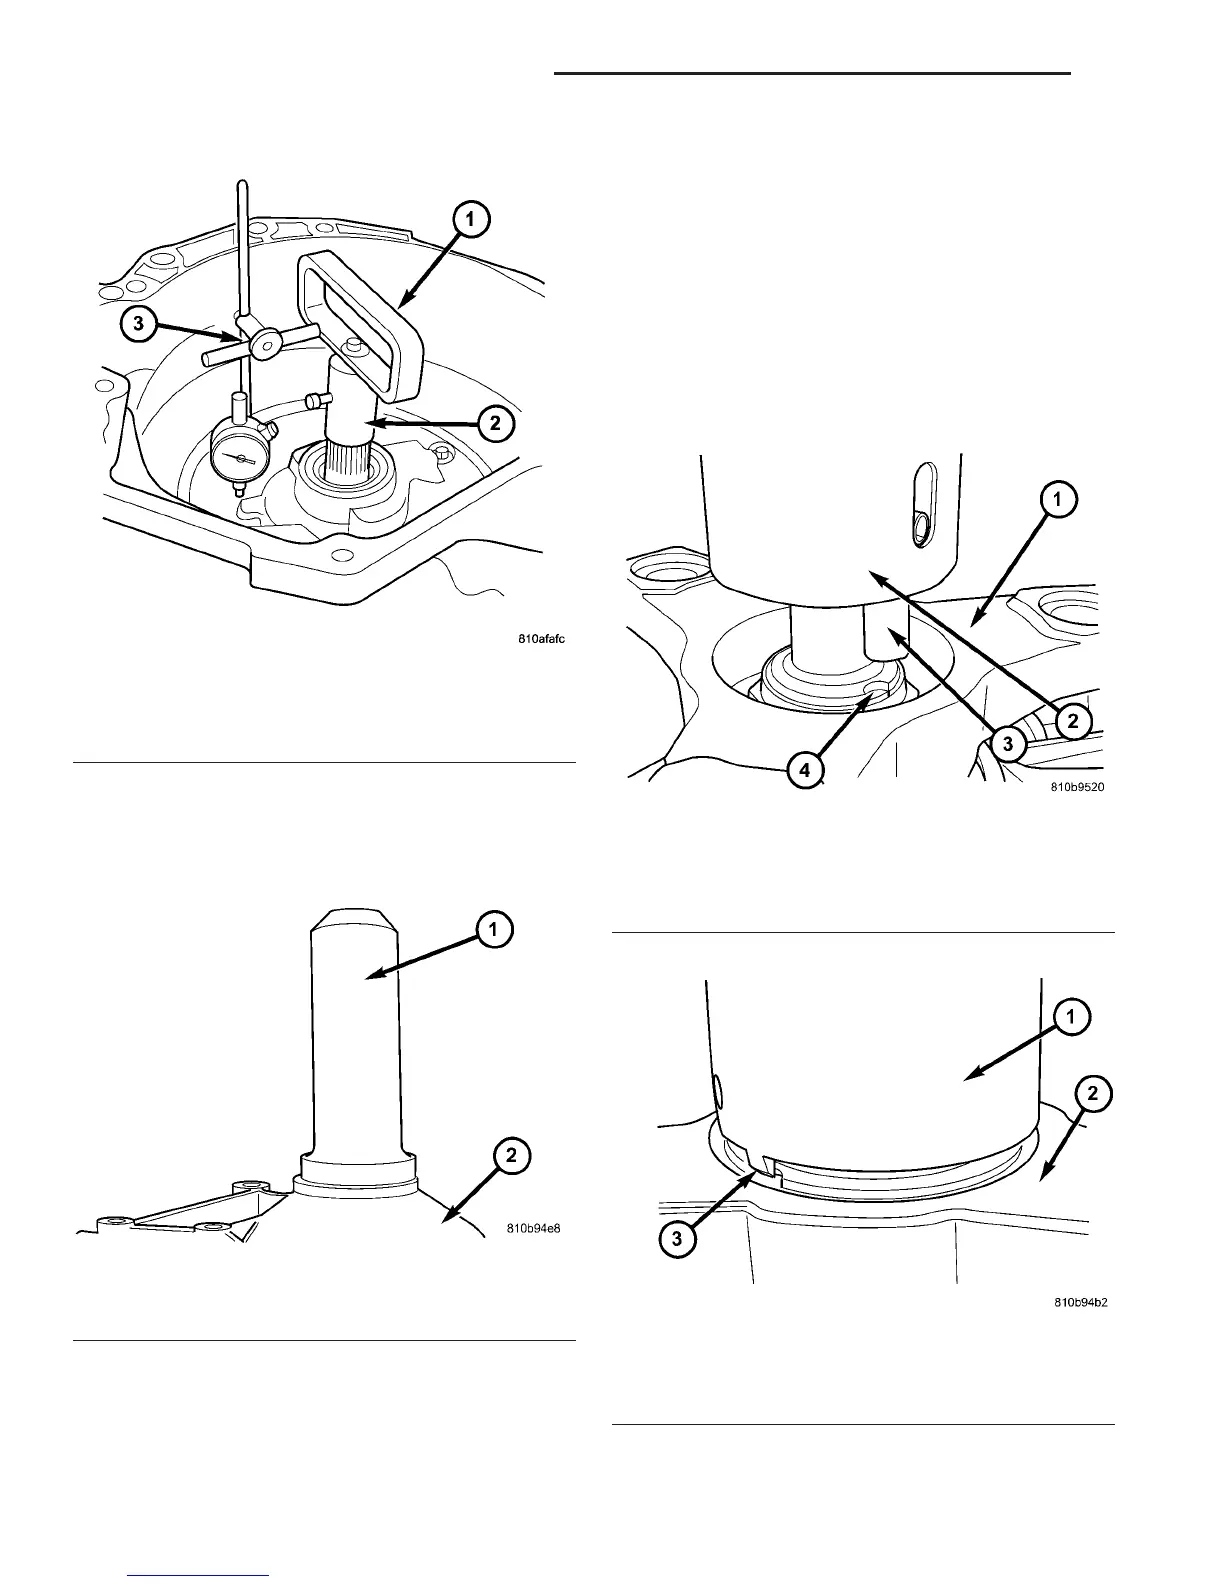
(27) Install a new transmission rear seal into the
transmission case with Seal Installer 8902A (Fig. 53).
(28) Place the transmission in PARK to prepare for
the installation of the output shaft nut.
(29) Install the propeller shaft flange onto the out-
put shaft and install an new flange nut. Tighten the
flange nut to 120 N·m (88.5 ft.lbs.).
(30) Stake the output shaft nut to the output shaft
as follows.
(a) Place the Staking Tool 9078 and Driver Han-
dle C-4171 onto the output shaft.
(b) Rotate the Staking Tool 9078 until the align-
ment pin engages the output shaft notch (Fig. 54).
(c) Press downward on the staking tool until the
staking pin contacts the output shaft nut flange
(Fig. 55).
(d) Strike the Driver handle C-4171 with a suit-
able hammer until the output shaft nut is securely
staked to the output shaft.
(31) Install electrohydraulic unit (2). Tighten the
bolts to 8 N·m (71 in.lbs.).
Fig. 52 Checking Input Shaft End Play
1 - TOOL 8266-8
2 - TOOL 8266-18
3 - TOOL C-3339
Fig. 53 Install Output Shaft Seal
1 - SEAL INSTALLER 8902A
2 - TRANSMISSION CASE
Fig. 54 Align Staking Tool 9078
1 - PROPELLER SHAFT FLANGE
2 - STAKING TOOL 9078
3 - ALIGNMENT PIN
4 - OUTPUT SHAFT NOTCH
Fig. 55 Stake Output Shaft Nut
1 - STAKING TOOL 9078
2 - PROPELLER FLANGE
3 - STAKING PIN
21 - 40 AUTOMATIC TRANSMISSION - NAG1 VA
AUTOMATIC TRANSMISSION - NAG1 (Continued)

 Loading...


