(3) From the back of the cluster bezel, squeeze the
two latches on the fog lamp switch body and push
the switch out through the face of the bezel (Fig. 17).
(4) Remove the fog lamp switch from the face of
the cluster bezel.
INSTALLATION
(1) Position the fog lamp switch to the proper
mounting hole on the face of the cluster bezel (Fig.
16).
(2) Using hand pressure, push the fog lamp switch
firmly and evenly into the switch mounting hole of
the cluster bezel until both of the latches on the
switch body are fully engaged.
(3) Reinstall the cluster bezel onto the instrument
panel. (Refer to 23 - BODY/INSTRUMENT PANEL/
CLUSTER BEZEL - INSTALLATION).
(4) Reconnect the battery negative cable.
FRONT LAMP UNIT
REMOVAL
(1) Disconnect and isolate the battery negative
cable.
(2) Remove the front grille from the vehicle. (Refer
to 23 - BODY/EXTERIOR/GRILLE - REMOVAL).
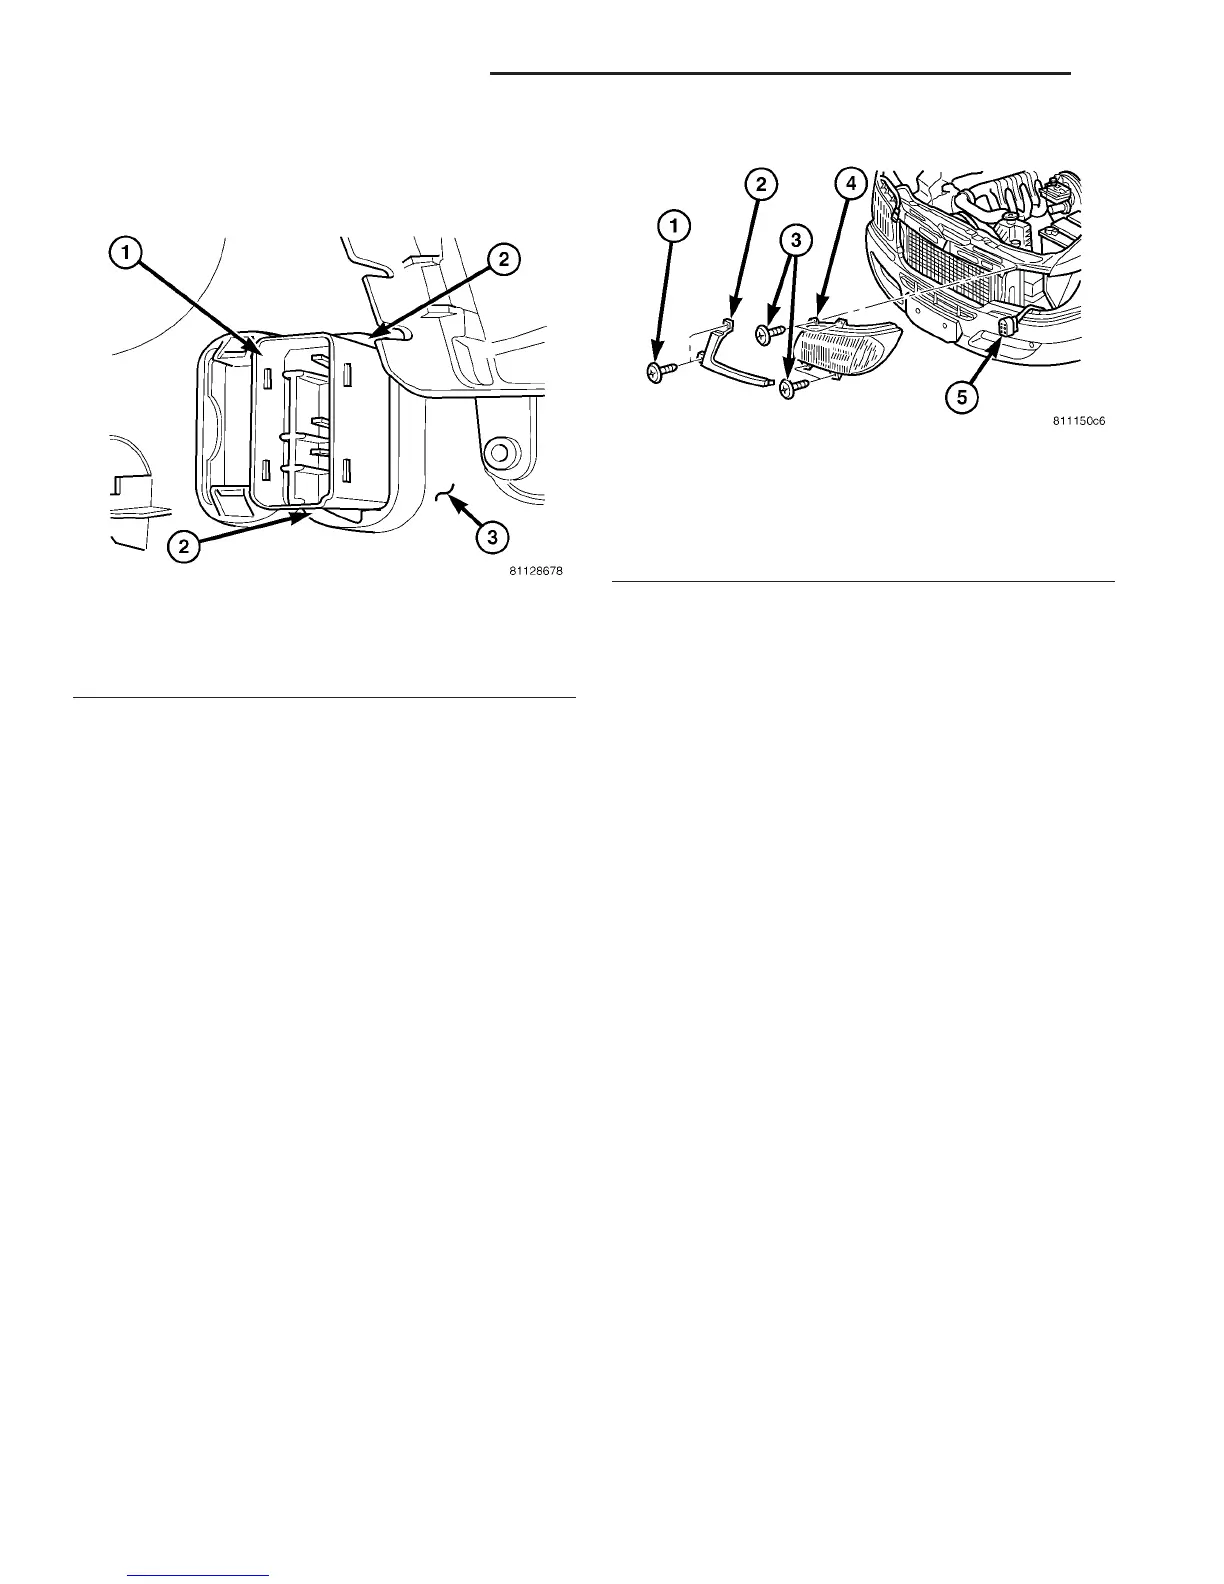
(3) Remove the two screws that secure the cover at
the inboard side of the front lamp unit (Fig. 18).
(4) Remove the cover from the front lamp unit.
(5) From the engine compartment, disconnect the
vehicle wire harness connector from the connector
receptacle for the front lamp unit.
(6) Remove the four screws that secure the front
lamp unit to the front of the vehicle.
(7) Remove the front lamp unit from the front of
the vehicle.
INSTALLATION
(1) Position the front lamp unit to the front of the
vehicle (Fig. 18).
(2) Install and tighten the four screws that secure
the front lamp unit to the front of the vehicle.
(3) From the engine compartment, reconnect the
vehicle wire harness connector to the connector
receptacle for the front lamp unit.
(4) Position the cover to the front lamp unit.
(5) Install and tighten the two screws that secure
the cover at the inboard side of the front lamp unit.
(6) Reinstall the front grille onto the vehicle.
(Refer to 23 - BODY/EXTERIOR/GRILLE - INSTAL-
LATION).
(7) Reconnect the battery negative cable.
(8) Check and adjust the front lamp alignment as
required. (Refer to 8 - ELECTRICAL/LAMPS/LIGHT-
ING - EXTERIOR/FRONT LAMP UNIT - ADJUST-
MENTS).
ADJUSTMENTS
ADJUSTMENT - FRONT LAMP UNIT
VEHICLE PREPARATION FOR FRONT LAMP UNIT
ALIGNMENT
(1) Verify headlamp dimmer (multi-function)
switch, fog lamp switch (if equipped), and high beam
indicator operation.
(2) Verify that the headlamp leveling switch is in
the “0” position.
Fig. 17 Fog Lamp Switch Remove/Install
1 - FOG LAMP SWITCH
2 - LATCH (2)
3 - CLUSTER BEZEL
Fig. 18 Front Lamp Unit Remove/Install
1 - SCREW (2)
2 - COVER
3 - SCREW (4)
4 - LAMP UNIT
5 - WIRE HARNESS CONNECTOR
8L - 12 LAMPS/LIGHTING - EXTERIOR VA
FOG LAMP SWITCH (Continued)

 Loading...


