INSTALLATION
(1) Position roller arm in guide track.
(2) Install arm into door opening and line up tab
with marks made previously.
(3) Install bolt and tighten to 45 N·m (33 ft. lbs.).
(4) Install rubber cover.
(5) Adjust door if necessary. (Refer to 23 - BODY/
DOORS - SLIDING/SLIDING DOOR - ADJUST-
MENTS)
(6) Install trim panel if necessary. (Refer to 23 -
BODY/DOORS - SLIDING/TRIM PANEL - INSTAL-
LATION)
(7) Install trim cover.
LOWER ROLLER ARM
REMOVAL
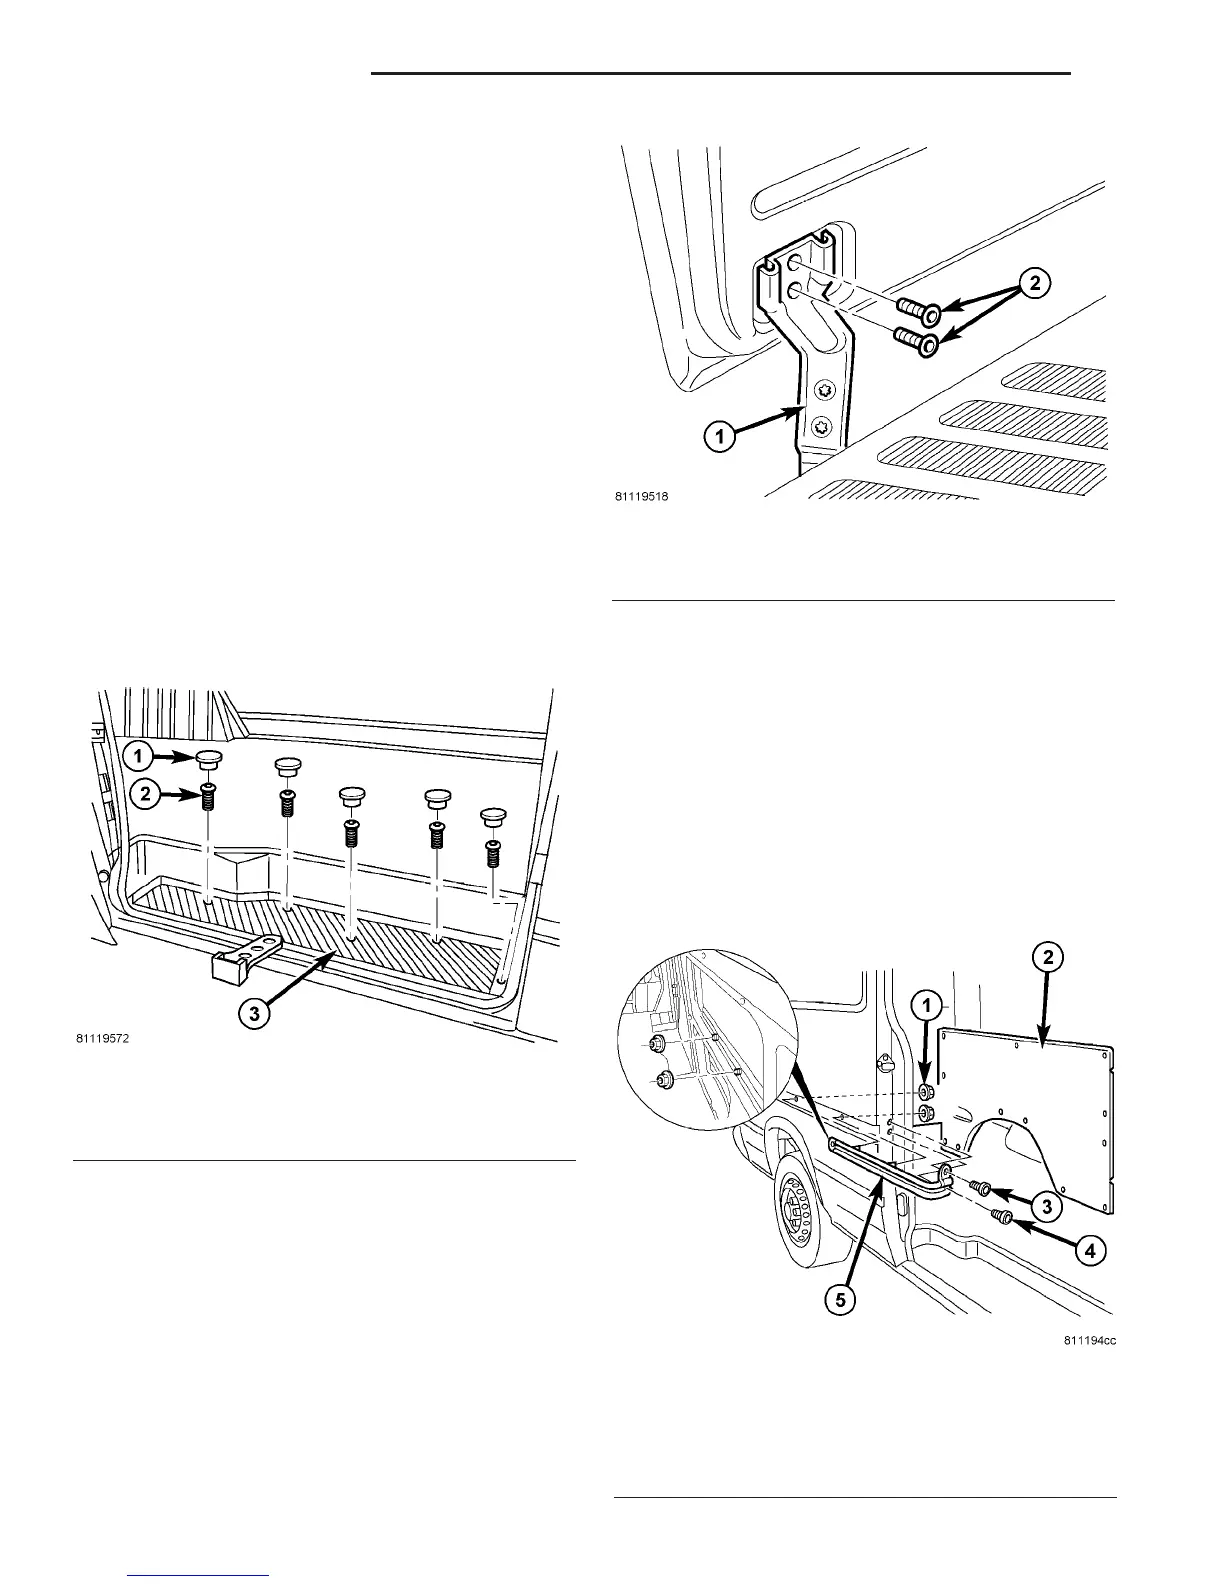
(1) Remove trim plugs and screws and remove
stepwell scuff pad. (Fig. 5)
(2) Remove the door screws and remove the roller
arm. (Fig. 6)
INSTALLATION
(1) Install roller arm and install door screws.
(2) Tighten screws to 25 N·m (18 ft. lbs.).
(3) Install stepwell scuff pad and install screws.
(4) Adjust door if necessary. (Refer to 23 - BODY/
DOORS - SLIDING/SLIDING DOOR - ADJUST-
MENTS)
CENTER TRACK
REMOVAL
(1) Remove center roller arm. (Refer to 23 - BODY/
DOORS - SLIDING/CENTER ROLLER ARM -
REMOVAL)
(2) Remove quarter trim panel. (Refer to 23 -
BODY/INTERIOR/QUARTER TRIM PANEL -
REMOVAL)
(3) Remove the nuts. (Fig. 7)
(4) Remove the front bolts.
Fig. 7 SLIDING DOOR CENTER TRACK
1 - NUTS
2 - QUARTER TRIM PANEL
3 - BOLT
4 - BOLT
5 - CENTER TRACK
Fig. 5 SLIDING DOOR SCUFF PAD
1 - TRIM PLUGS
2 - SCREWS (5)
3 - SCUFF PAD
Fig. 6 SLIDING DOOR LOWER ROLLER ARM
1 - SCREWS
2 - ROLLER ARM
23 - 38 DOORS - SLIDING VA
CENTER ROLLER ARM (Continued)

 Loading...


