NOTE: Do Not mix up the top and bottom connect-
ing rod bearing shells.
(8) Mark the connecting rod bearing shell and the
connecting rod bearing cap to each other.
NOTE: If the pistons are used, the direction of
travel arrows and the marking of the pistons may
no longer be visible because of carbon deposits.
The carbon deposits on the pistons must be
removed.
NOTE: If the arrows indicating the driving direction
on the piston are no longer visible, they must be
marked again.
(9) Remove the connecting rod together with the
piston through the top of the engine.
NOTE: DO NOT mix up the top and bottom connect-
ing rod bearing shells.
(10) Mark the connecting rod bearing shell and
connecting rod to each other.
CAUTION: Care must be taken not to damage the
piston.
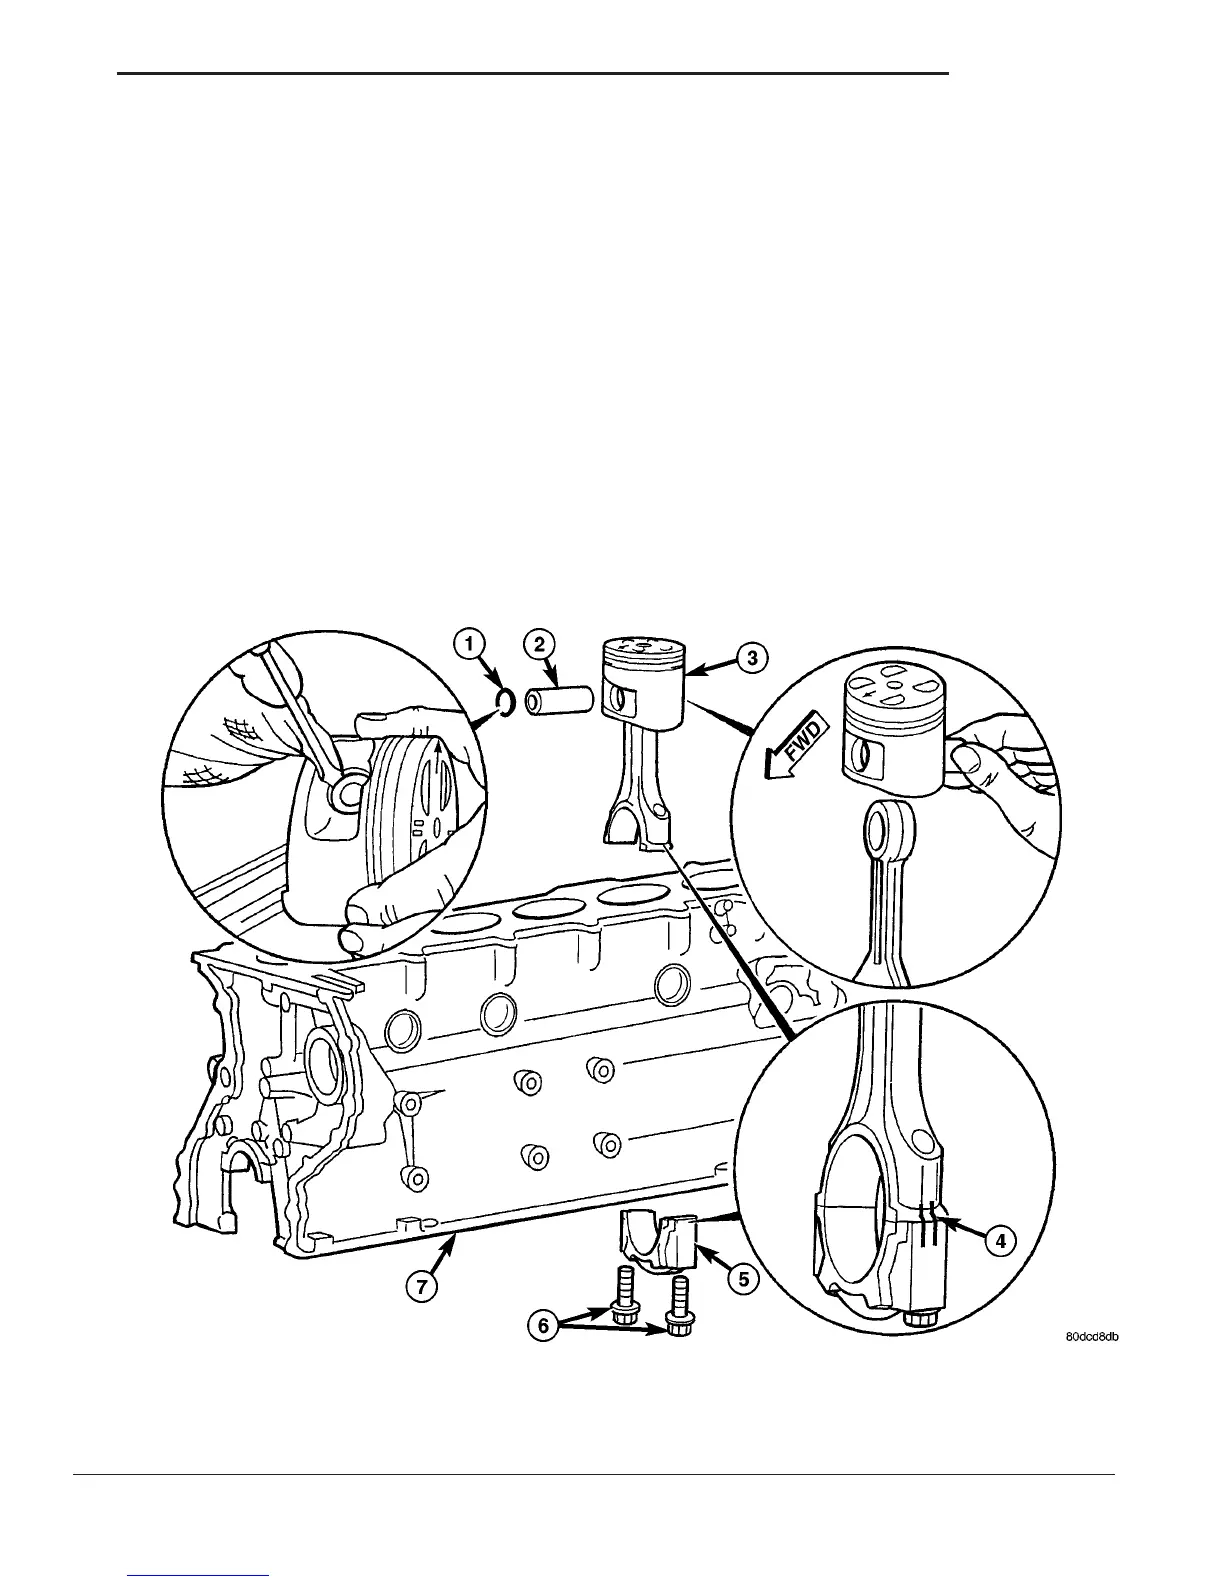
(11) Remove the piston pin circle clip. (Fig. 36).
(12) Press the piston pin out of the piston and con-
necting rod bushing. (Fig. 36).
(13) Inspect the connecting rod for wear and dam-
age.
INSTALLATION
(1) Assign piston to the cylinder bore.
(2) Using the appropriate clean engine oil, oil pis-
ton pin and connecting rod bushing.
Fig. 36 PISTON AND CONNECTING ROD ASSEMBLY
1 - PISTON PIN CIRCLIP
2 - PISTON PIN
3 - PISTON ASSEMBLY
4 - CONNECTING ROD AND CAP ALIGNMENT MARKS
5 - CONNECTING ROD CAP
6 - CONNECTING ROD BOLTS
7 - ENGINE BLOCK
VA ENGINE 9 - 43
PISTON & CONNECTING ROD (Continued)

 Loading...


