February, 2008
4-232
WorkCentre 5225, 5230
ADJ 11.6.1
Launch Version
Repairs and Adjustments
3. Remove the Platen Glass. (REP 11.3.1)
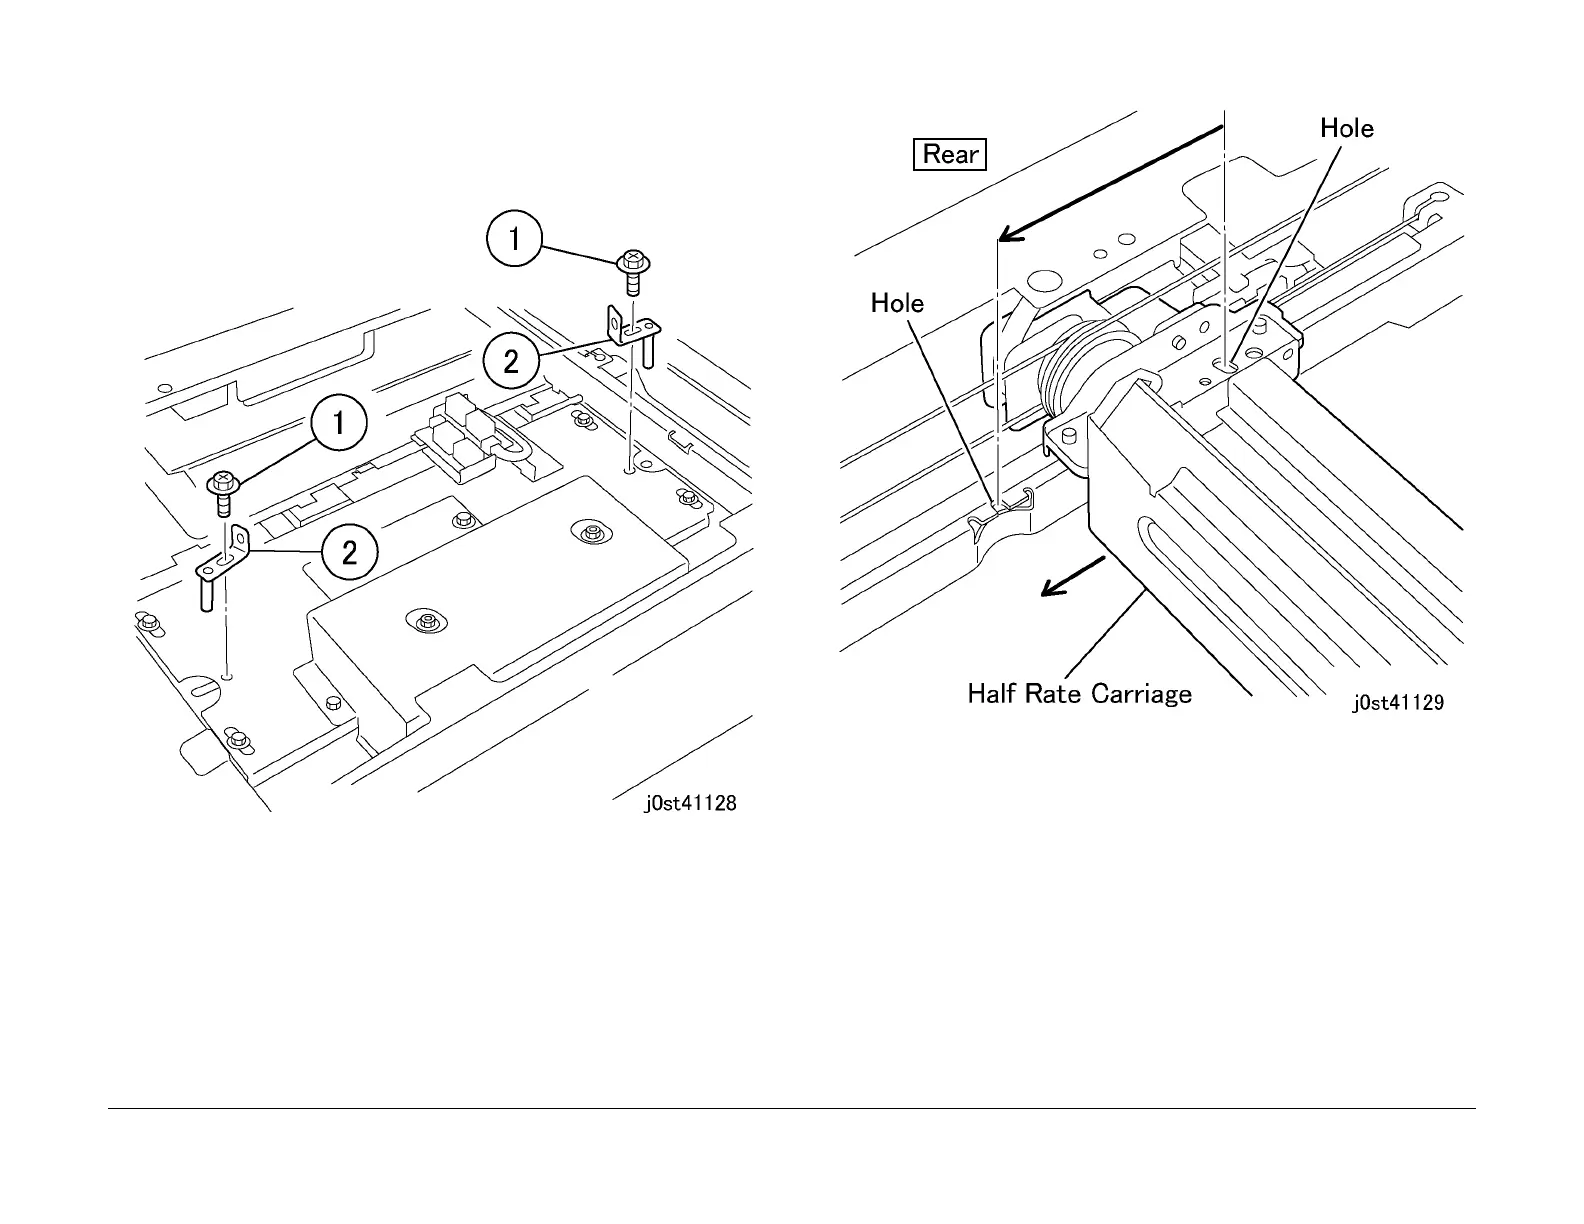
4. Prepare the tools (x2) for determining the position. (Figure 2)
1. Remove the screws (x2).
2. Take out the tools (x2).
Figure 2 Taking out the tools (j0st41128)
5. Align the tool hole in the Half Rate Carriage with the tool hole of the rail (Front/Rear). (Fig-
ure 3)
Figure 3 Position Adjustment of Half Rate Carriage 1/3 (j0st41129)
6. Fix the tool to the Half Rate Carriage. (Figure 4)
NOTE: Install the tools near the edges (the front tool to the front and the rear tool to the
rear).
1. Fix the tool. (Front/Rear)
2. Secure it with a screw.
 Loading...