February, 2008
4-54
WorkCentre 5225, 5230
REP 9.2.1
Launch Version
Repairs and Adjustments
REP 9.2.1 ESS PWB
Parts List on PL 9.2
Removal
WARNING
To avoid personal injury or shock, do not perform repair or adjustment with electrical
power applied to the machine.
CAUTION
Damage to electrical components is likely if static discharge reaches components. ESD proce-
dures must be used when removing or replacing PWBs.
Always wear a wrist strap to protect electrical parts from static damage. If a wrist strap is not
available, touch some metallic parts before servicing to discharge the static electricity.
CAUTION
A disabled machine with loss of serialization and billing data occurs if both the ESS PWB with
EPROM and the MCU PWB with EPROM are replaced at the same time.
1. Remove the ESS PWB (PL 9.2).
a. If present, remove Printer PWB (PL 9.2).
i. Disconnect network connection.
ii. Loosen thumbscrews and pullout Printer PWB to disconnect it from the ESS
PWB.
b. If present, remove FID PWB (PL 9.2), or FMO PWB (PL 9.2), or Hard Drive (PL 9.2).
c. Loosen screws (2) and remove ESS Cover Assembly (PL 9.2).
d. Disconnect P/Js form ESS PWB.
e. Remove the screws and remove ESS PWB.
2. If a new ESS PWB will be installed, go to step 3. If the ESS PWB will be reinstalled after
service actions in other areas, reinstall the ESS PWB when appropriate to do so.
CAUTION
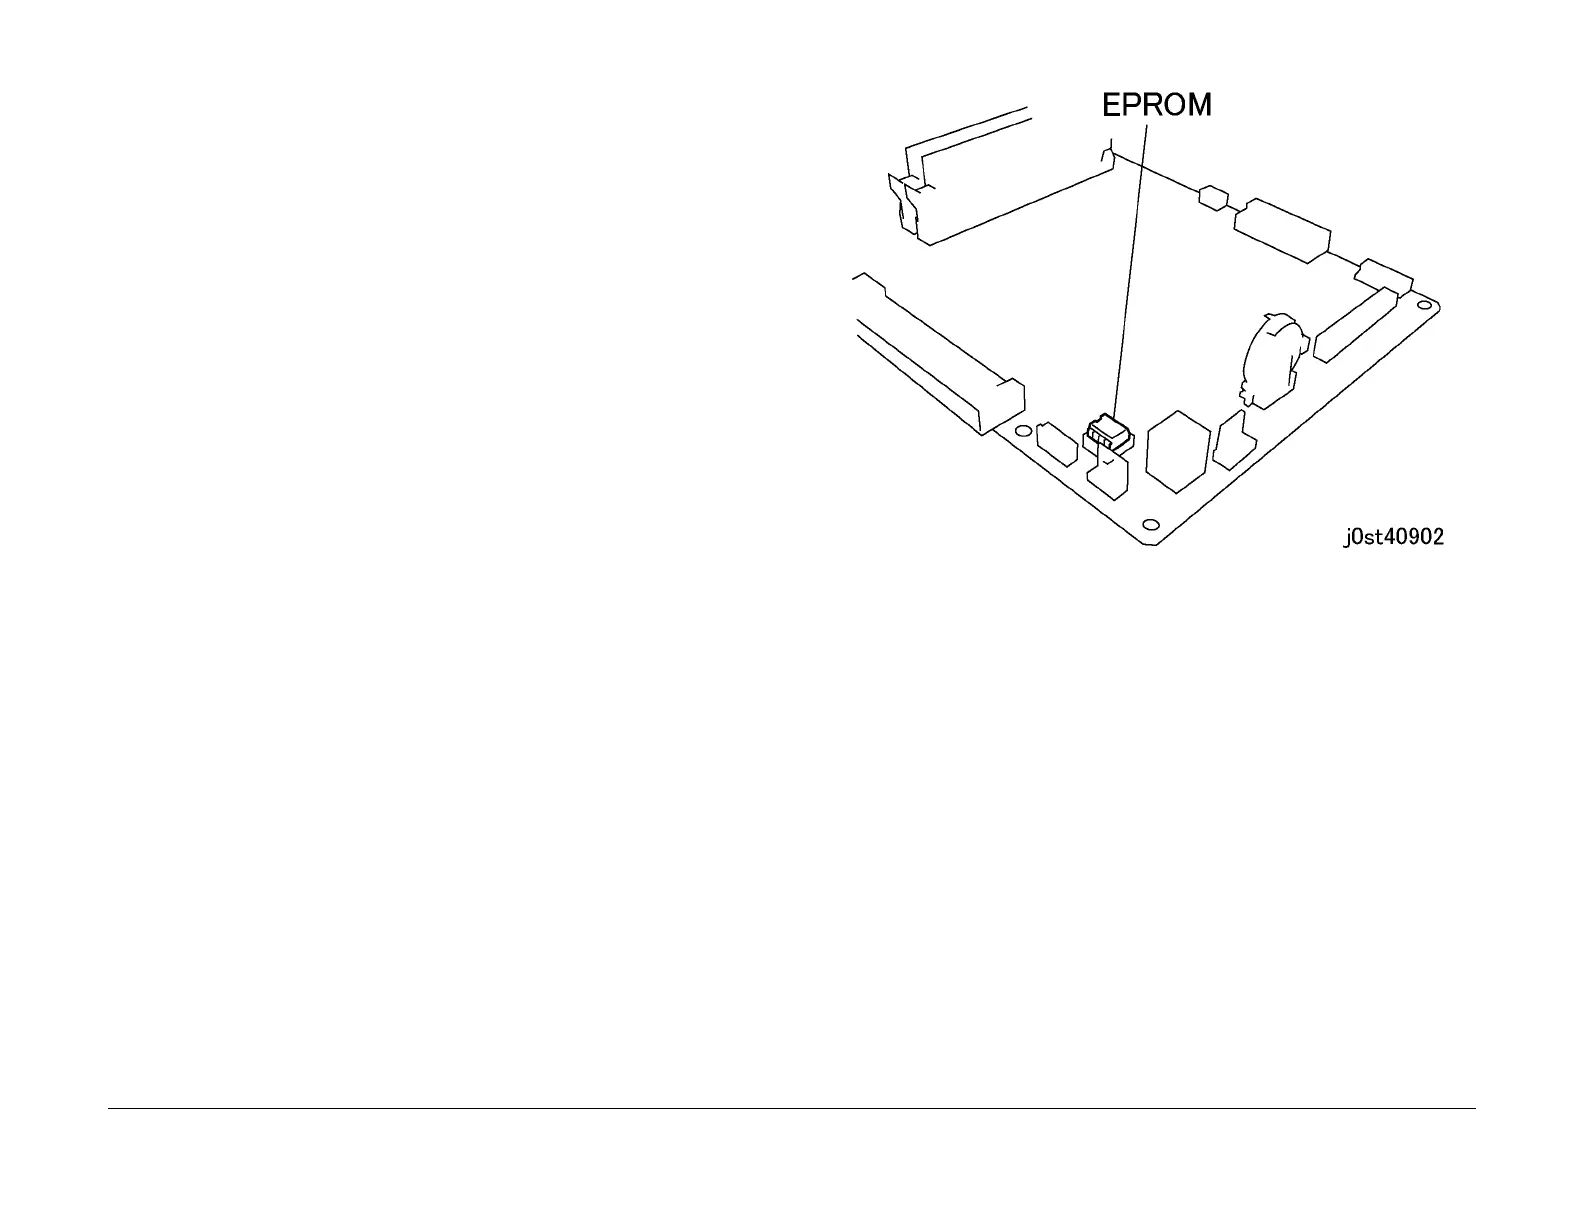
Pin breakage occurs if the EPROM is carelessly removed.
3. Remove EPROM from ESS PWB and save for installation on new or original ESS PWB
(Figure 1).
Figure 1 ESS PWB EPROM Location (j0st40902)
 Loading...