Router
D-Link Unified Wired and Wireless Access System
Oct. 2015 Page 317
D-Link UWS User Manual
Configured (Static) Routes
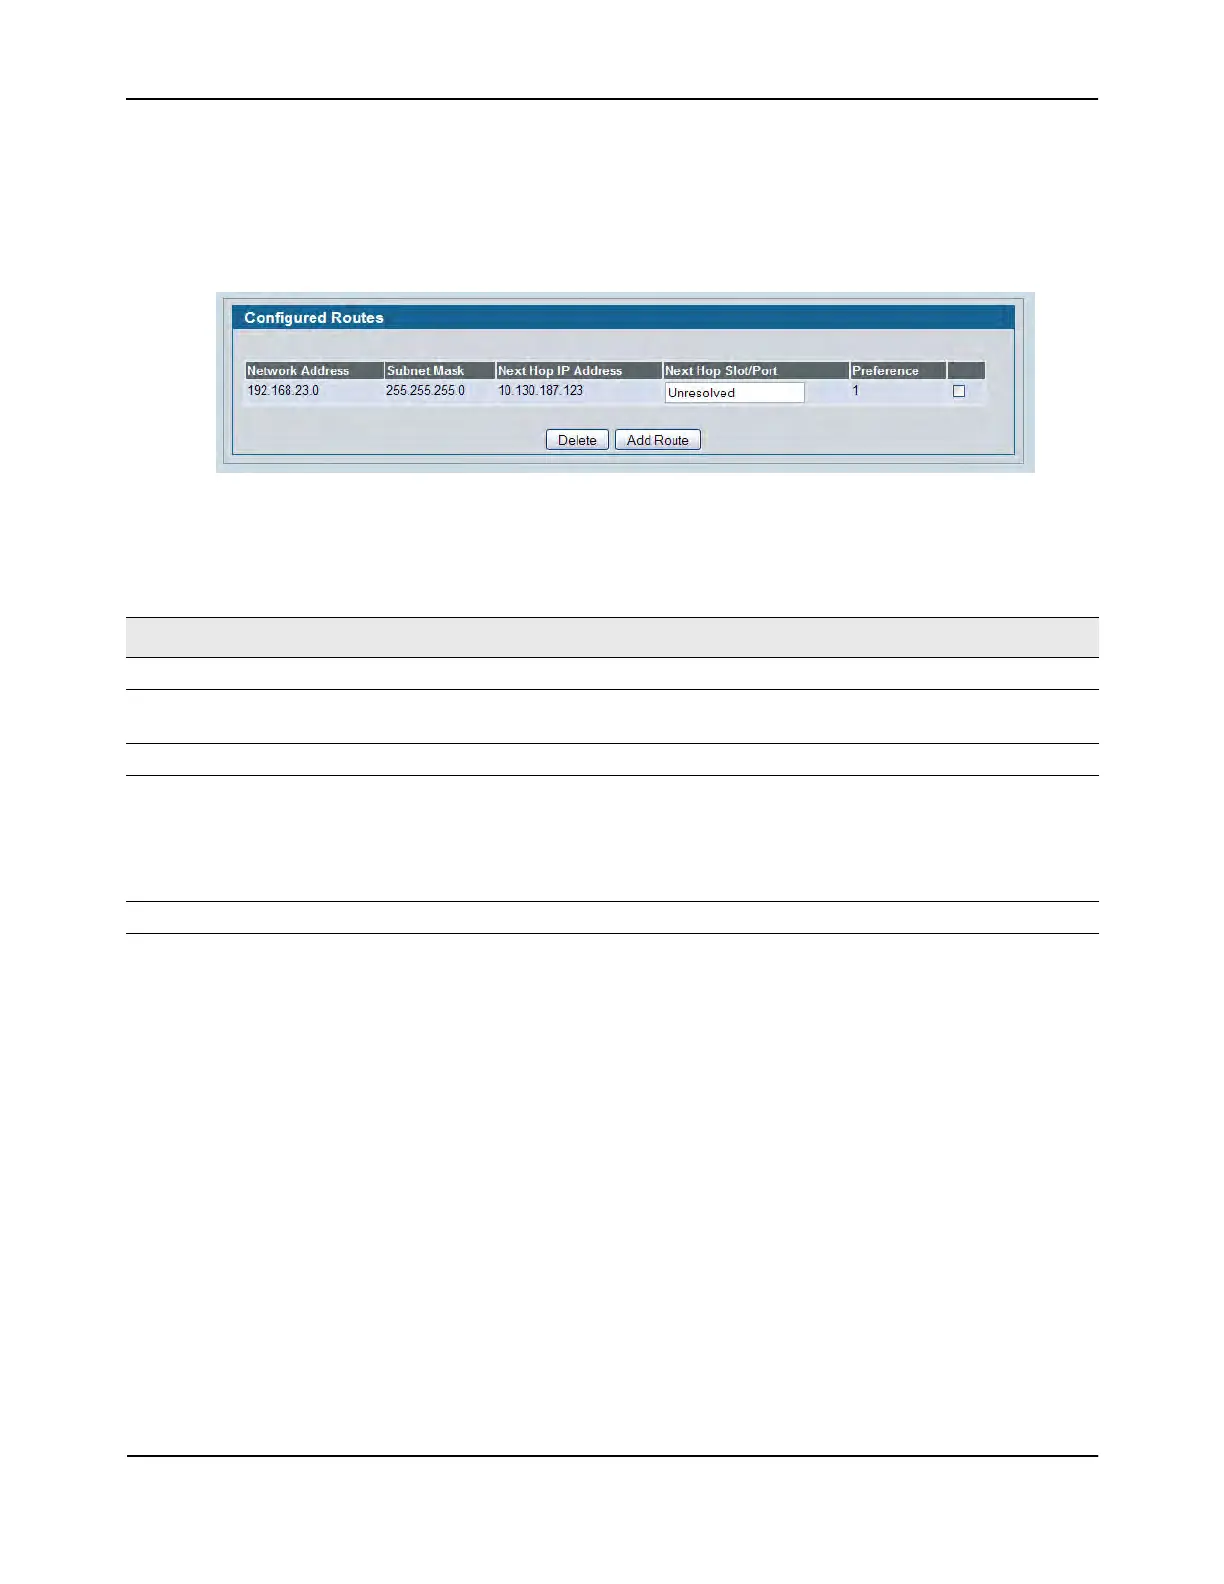
Use the Configured Routes page to create and display static routes.
To display the page, click LAN > L3 Features > Router > Configured Routes in the navigation tree.
Figure 204: Configured Routes
Adding a Static Route
1. Open the Configured Routes page.
2. Click Add Route.
The Router Route Entry Create page displays. The fields available on the page vary based on the route
type.
3. Next to Route Type, select Default route, Static or Static Reject from the menu.
• Default: Enter the default gateway address in the Next Hop IP Address field and the the route
preference value in the Preference field.
• Static: Enter values for Network Address, Subnet Mask, Next Hop IP Address, and Preference.
• Static Reject: Packets to these destinations will be dropped.
Table 186: Configured Routes Fields
Field Description
Network Address The IP route prefix for the destination.
Subnet Mask Also referred to as the subnet/network mask, this indicates the portion of the
IP interface address that identifies the attached network.
Next Hop IP The next hop router address to use when forwarding traffic to the destination.
Next Hop Slot/Port The outgoing interface to use when forwarding traffic to the destination. For
static reject routes it would be Null0.
Note: The route will not take effect until a routing interface belonging to the
same subnet as the next hop IP is created and activated, and this field will
display the next hop slot/port as Unresolved.
Preference The preferences configured for the added routes.
 Loading...
