2008T Troubleshooting Guide
P/N 490292 Rev. A
F- 12.0.0 CALIBRATE/TROUBLESHOOT DIALYSATE PRESSURE
This is NOT a routine calibration! Follow the instructions exactly to avoid error!
a)
IMPORTANT! Open the shunt door!
b) Enter Service Mode → Calibrate Sensors →
Dialysate Pressure. The screen says “1. Connect
a pressure gauge in line…”.
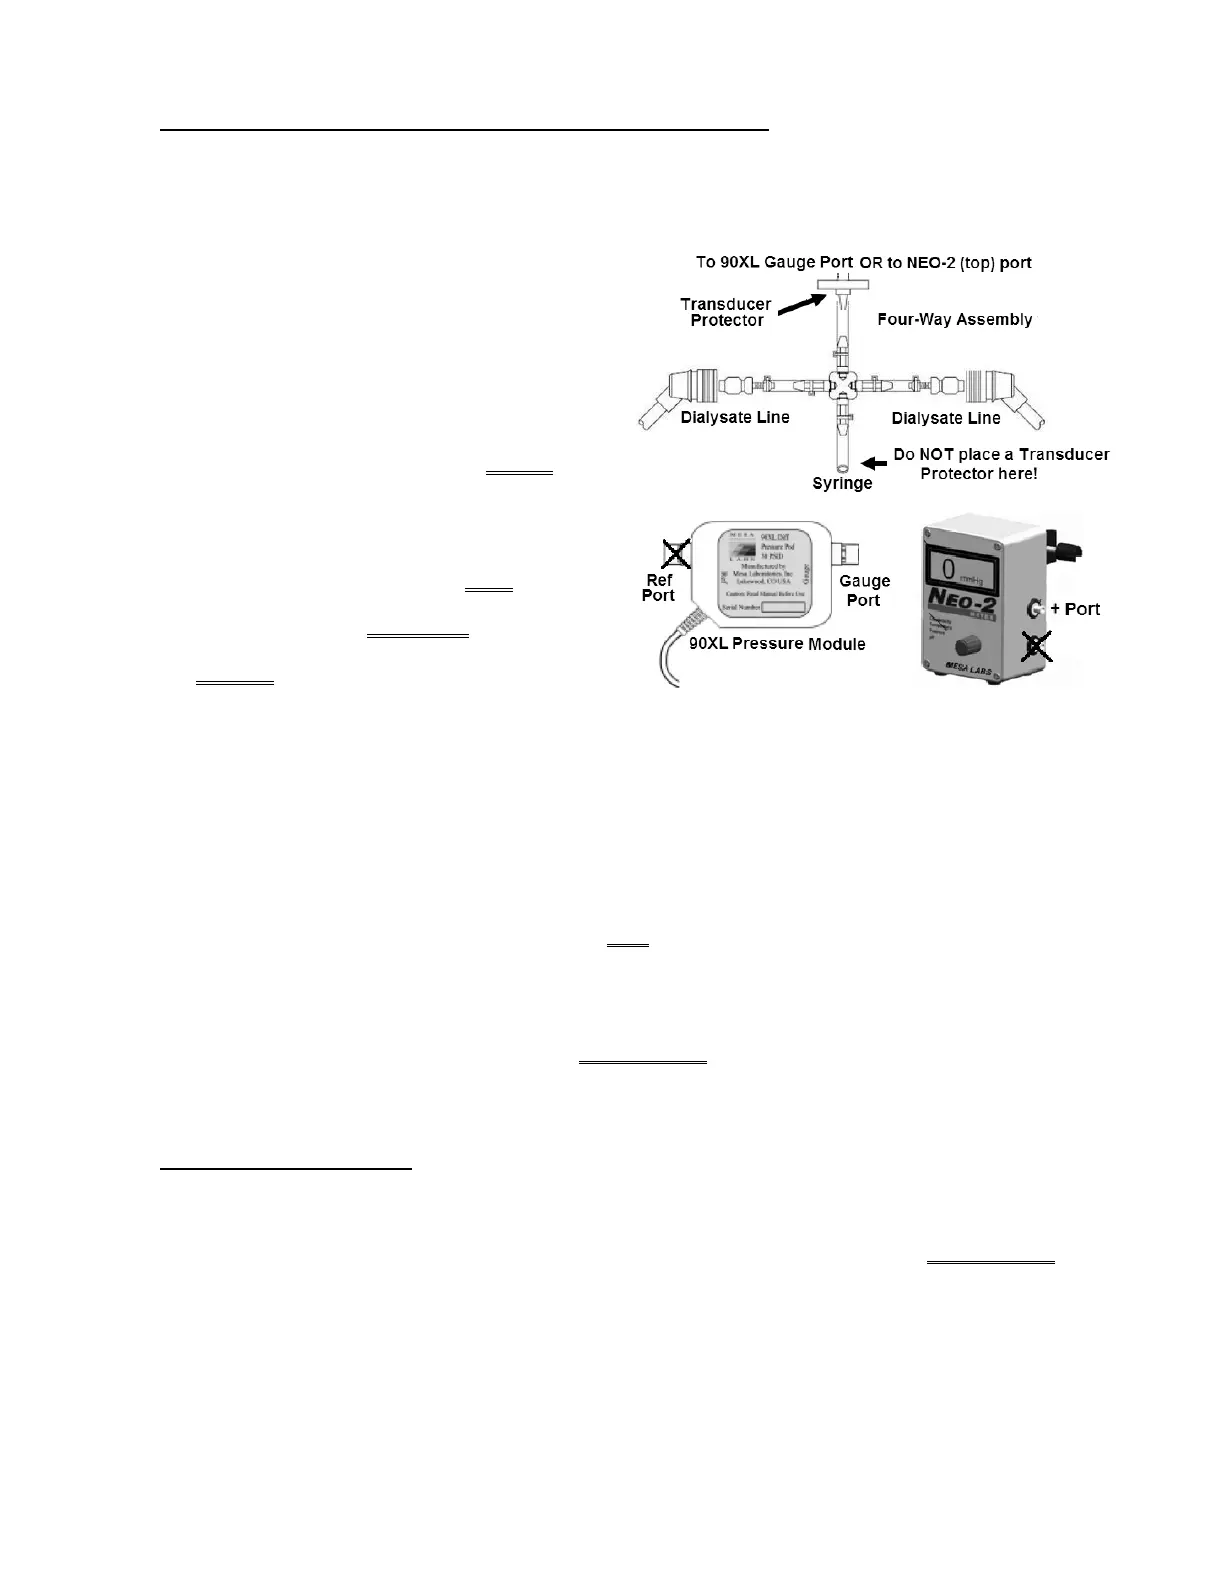
c) Figure right, connect the Four-Way
Assembly (P/N 150034) to the Dialyzer
connectors.
d) ENSURE a transducer protector IS NOT in the
‘to syringe’ tubing segment!
e) Place the Four-Way in the dialyzer holderl!
f) If using a NEO-2 attach to the +Port (top
(red) port). If using a 90XL attach to the
Pressure Module’s Gauge Port.
g) DO NOT allow tension or kinks in the Four-Way’s
tubing segments!
h) For now, clamp the ‘to meter’ tubing segment.
i)
Close the shunt door and ENSURE the flow indicator’s ‘bob’ is moving up and down.
j) Press ‘Enter’. The screen says “3. Press [Dialysate Flow on/off] key…”
k) Press the screen’s “Dialysate Flow On” button then press ‘Enter’.
l) ENSURE the button says “Dialysate Flow Off” AND the external flow indicator is NOT moving (Flow is
off).
m) Remove the clamp in the ‘to meter’ tubing segment.
n) Using the syringe, adjust pressure until the external meter = between -2 and 2 mmHg.
o) Press ‘Enter’ then see procedure number F- 12.1.0 (page 115).
F- 12.1.0 PRESSURE TEST
a) The screen says “6. Pressurize until dialysate pressure reads -250 mmHg…” .
b) PULL on the syringe plunger. Can you achieve negative (-)250 +/- 5 mmHg on the external meter?
Yes -250 achieved! Clamp the ‘to syringe’ tubing to hotd this pressure then see procedure
number F- 12.2.0 (page 116).
No -250 CANNOT be achieved! ENSURE the transducer protector, at the meter, is NOT wet OR
consider replacing it! If OKAY, proceed to
page 117, procedure number F- 12.3.0.

 Loading...


