2008T Troubleshooting Guide
P/N 490292 Rev. A
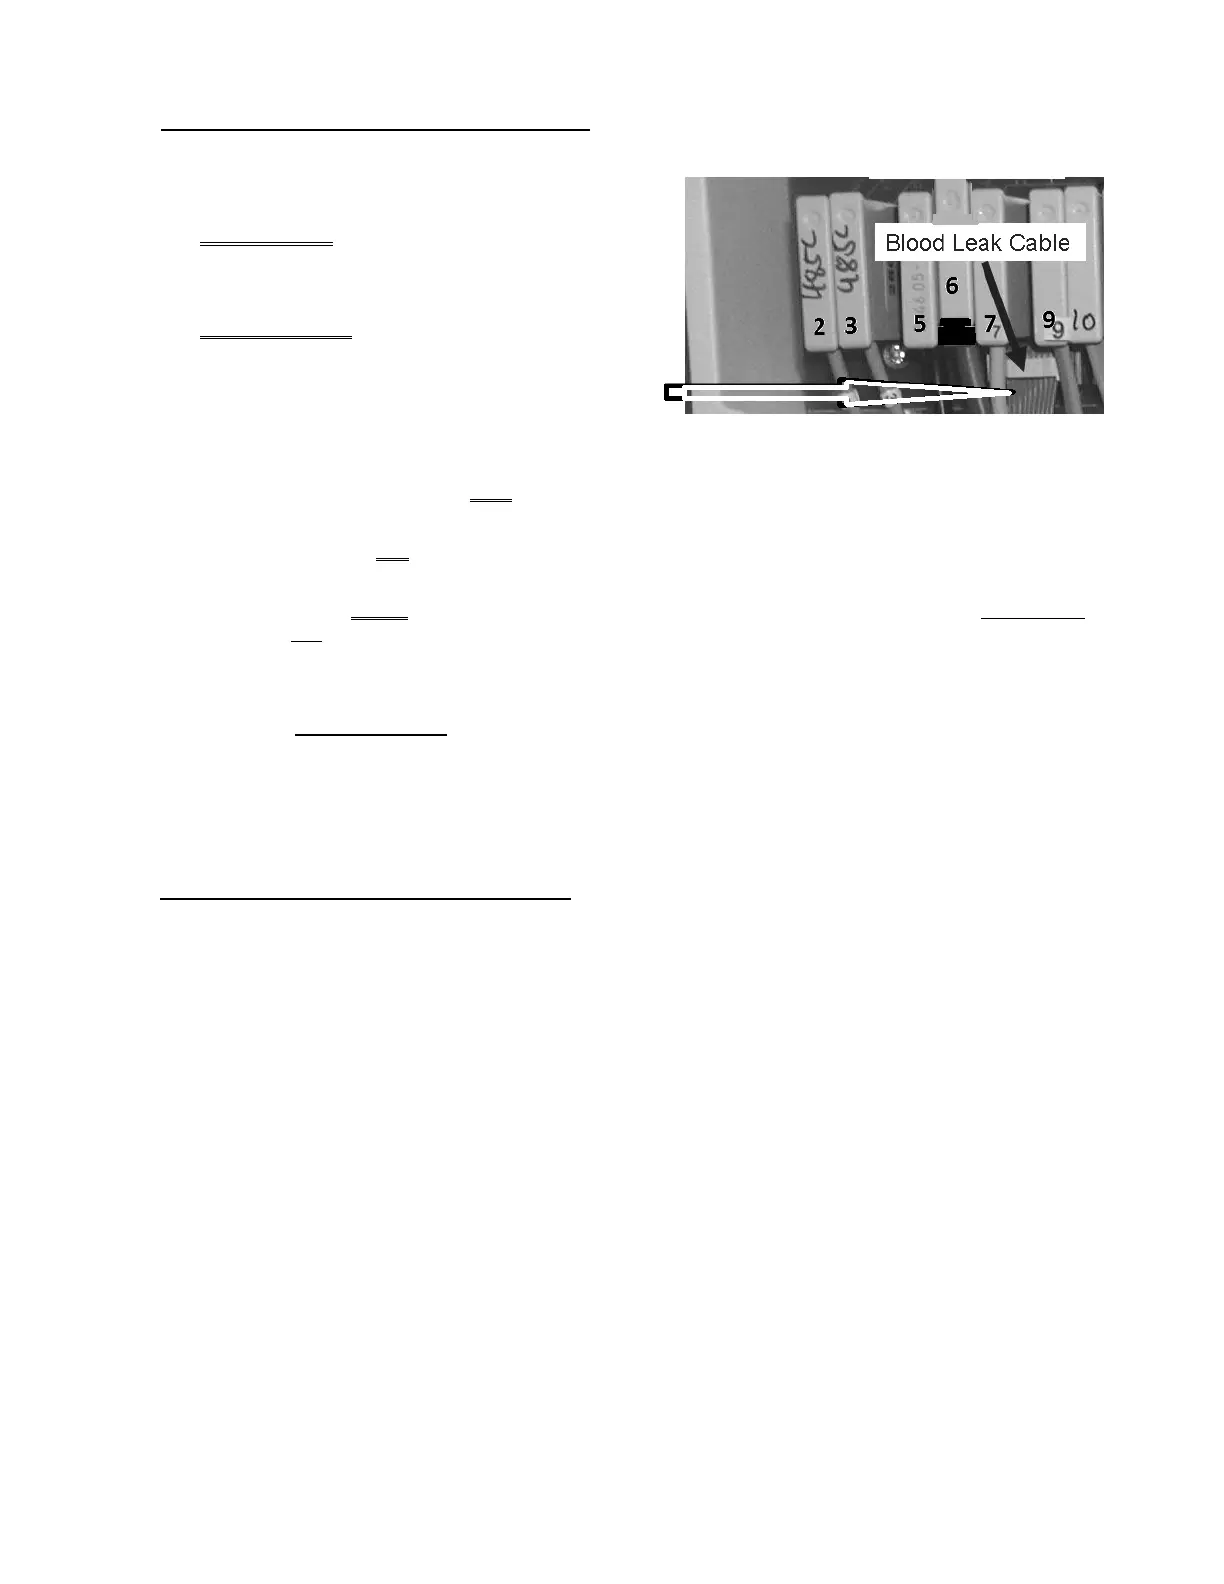
BL- 4.4.4 ISOLATE BLOOD LEAK DETECTOR
a) Turn the machine OFF!
b) Figure right, at the distribution board,
between and below positions #7 and #9, unplug
the Blood Leak ribbon Cable!
c) Using a flashlight, check the vacant connector. If
‘white’ corrosion or damaged male pins are
located the distribution board may need to be
replaced!
d) Leaving the cable unplugged, return to Dialysis Program (“Select Program” → ‘Dialysis’ → ‘Enter)!’
e) Call debug screen 4. Is LEAK AND DIMN BOTH = 0.0?
Yes LEAK and DIMN BOTH = 0.0! See procedure number BL- 4.5.0 (page 562).
No LEAK and/or DIMN are more than 0.0! THREE (3) possible bad components (Component
List below). Swap the components in, one at a time, and in between repeat procedure
number BL- 4.4.4 (page 562), parts d and e, to test each new component until LEAK and
DIMN are BOTH 0.0 indicating the last component swapped in is the problem!
Component List: 1) Sensor Board cable; 2) Sensor Board
1
(see Figure 4A, page 10);
3) Distribution board.
1
To prevent a “Cond Offset Failure”, place the machine into T and C Mode (refer to
OPERATING MODES, page 19)).
BL- 4.5.0 RETURN BLOOD LEAK SYSTEMS
a) To prevent damage turn the machine OFF!
b) Return the Blood Leak Sensor’s ribbon cable to the distribution board.
c) Return to Dialysis Program (“Select Program” → ‘Dialysis’ → ‘Enter’).
d) Allow six (6) minutes for stabilization!
e) ENSURING the external flow indicator’s ‘bob’ is rising and falling see procedure number BL- 5.0.0
(page 563).

 Loading...


