2008T Troubleshooting Guide
P/N 490292 Rev. A
PRESSURE TEST HYDROCHAMBER
This procedure pressurizes the Hydrochamber to locate a potential leak. Two (2) clamps are required:
a) Return the red (acid) connector to its Rinse
Port.
b)
DO NOT place the machine into a program!
The “Select Program” banner MUST remain up!
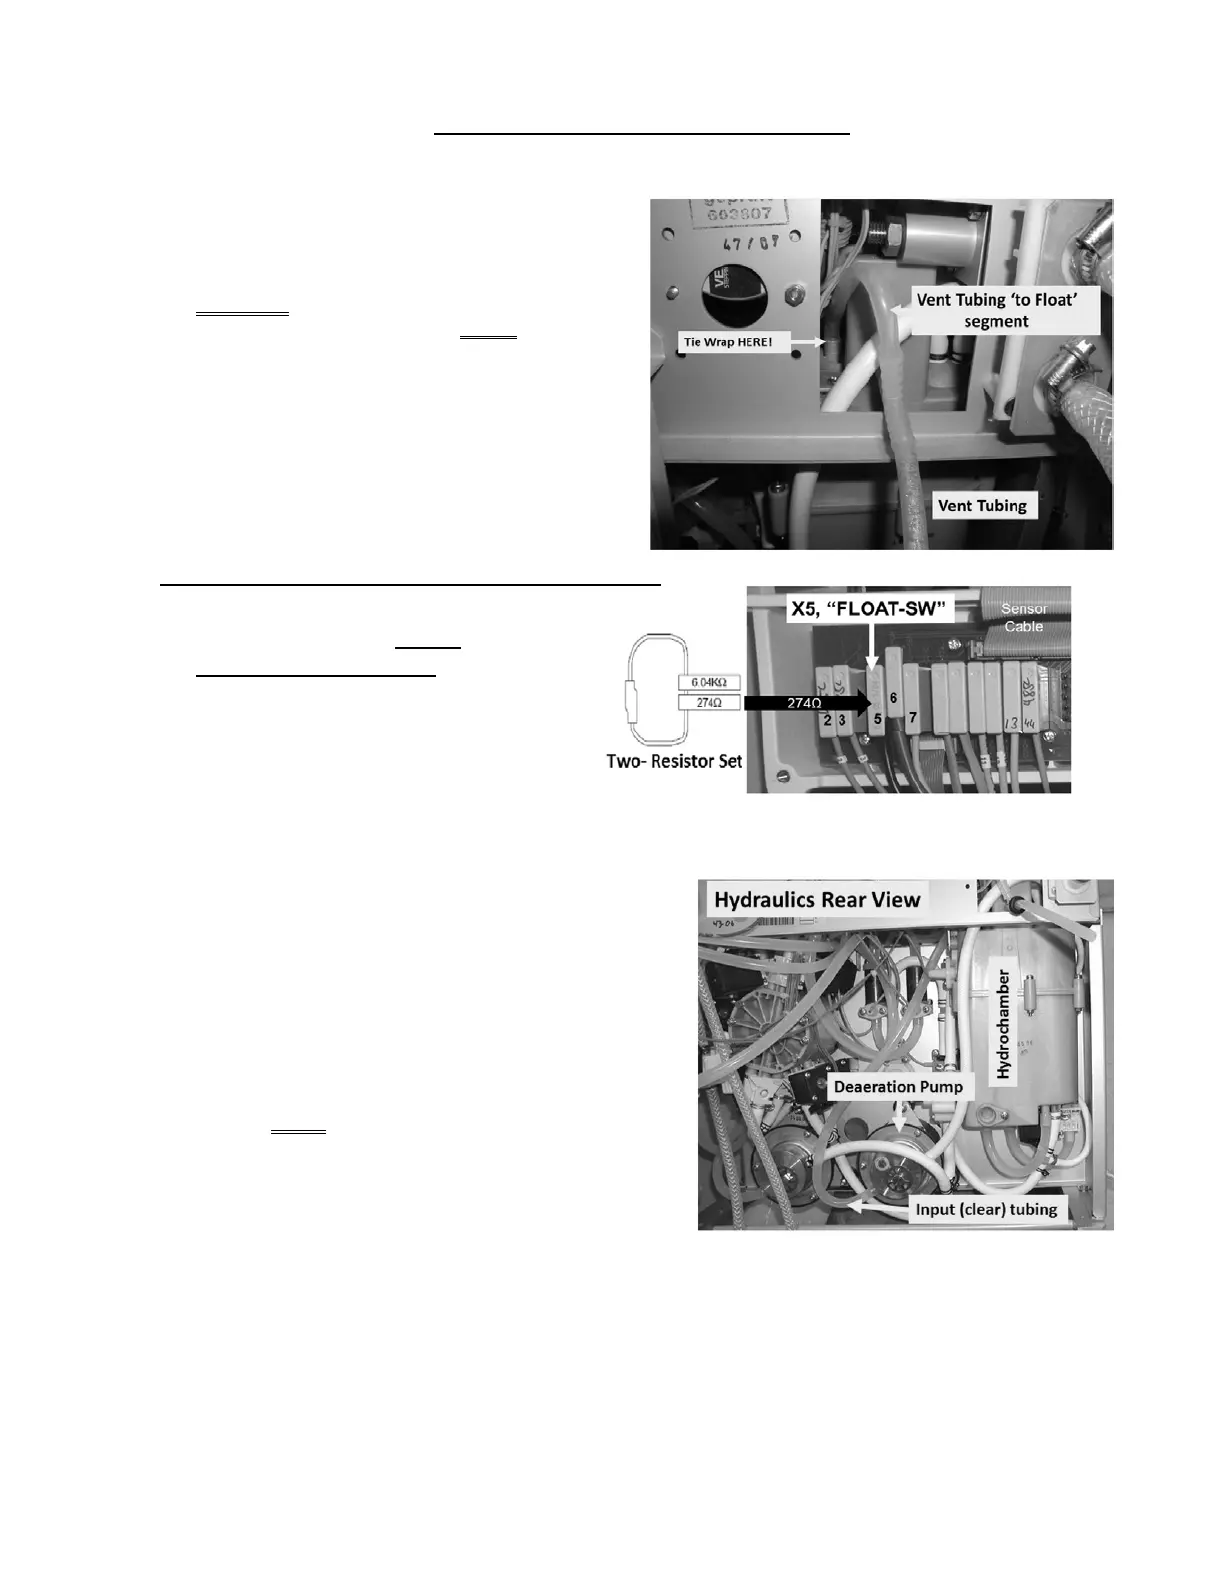
c) Figure right, locate the tubing segment that
attaches to the port at the top of the Float.
d) Tie wrap the tubing to the Float port!
e) See BLOCK LEAK- 1.0.0 (page 150).
BLOCK LEAK- 1.0.0 PRESSURIZE HYDROCHAMBER
a) Figure right, place the 274 Ω plug, from the
TWO-RESISTOR SET, into the float’s
distribution position, X5, “FLOAT-SW”.
b) Vent tubing overflow should occur within thirty
(30) seconds!
c) Clamp the Vent Tubing! If tubing ‘blows’ off remove the resistor plug, tie wrap the tubing, then
reinstall the plug!
d) Figure right, remove the INPUT (clear) tubing from the
Deaeration Pump. Strong flow from the tubing
indicates Restrictor #48 is open!
e) Clamp the CLEAR Deaeration Pump tubing to
pressurize the Hydrochamber.
f) Unless a leak is seen immediately, allow two (2)
minutes THEN check the surface of and below the
Hydrochamber for leaks.
g) Is a leak located?
Yes Leak located! See BLOCK LEAK- 2.0.0
(page 151).
No leaks! a) Return the float’s connector to distribution board position X5, “FLOAT-SW”
b) Reconnect the Deaeration Pump’s tubing.
c) Ensure you remove BOTH clamps!
d) Return to the procedure that brought you here as NOTED.

 Loading...


