2008T Troubleshooting Guide
P/N 490292 Rev. A
BL- 4.0.0 NO AIR SEEN / ISOLATE BLOOD LEAK DETECTOR #8
a) If automated tests are running (screen reads “Test: …) allow them to finish before
continuing!
b) Call debug screen 4 to see LEAK and DIMN. FIVE (5) possible scenarios, 1) or 2)
or 3) or 4) or 5) below:
1) IF LEAK is between 4.5 and 5.2 AND DIMN between 4.0 and 6.0: This is normal! Acid clean
then Bleach Disinfect. If (and ONLY if) a false Blood Leak reoccurs in the near future see
procedure number BL- 6.0.0 (
page 565).
2) IF LEAK AND / OR DIMN are less than 0.2: See procedure number BL- 4.1.0 (page 561).
3) IF LEAK is more than 5.2; DIMN does not matter: Proceed to page 562, procedure number
BL- 4.4.4.
4) IF DIMN is more than 6.0; LEAK does not matter: Proceed to
page 562, procedure number
BL- 4.4.4.
5) All OTHER scenarios: Proceed to
page 565, procedure number BL- 6.0.0.
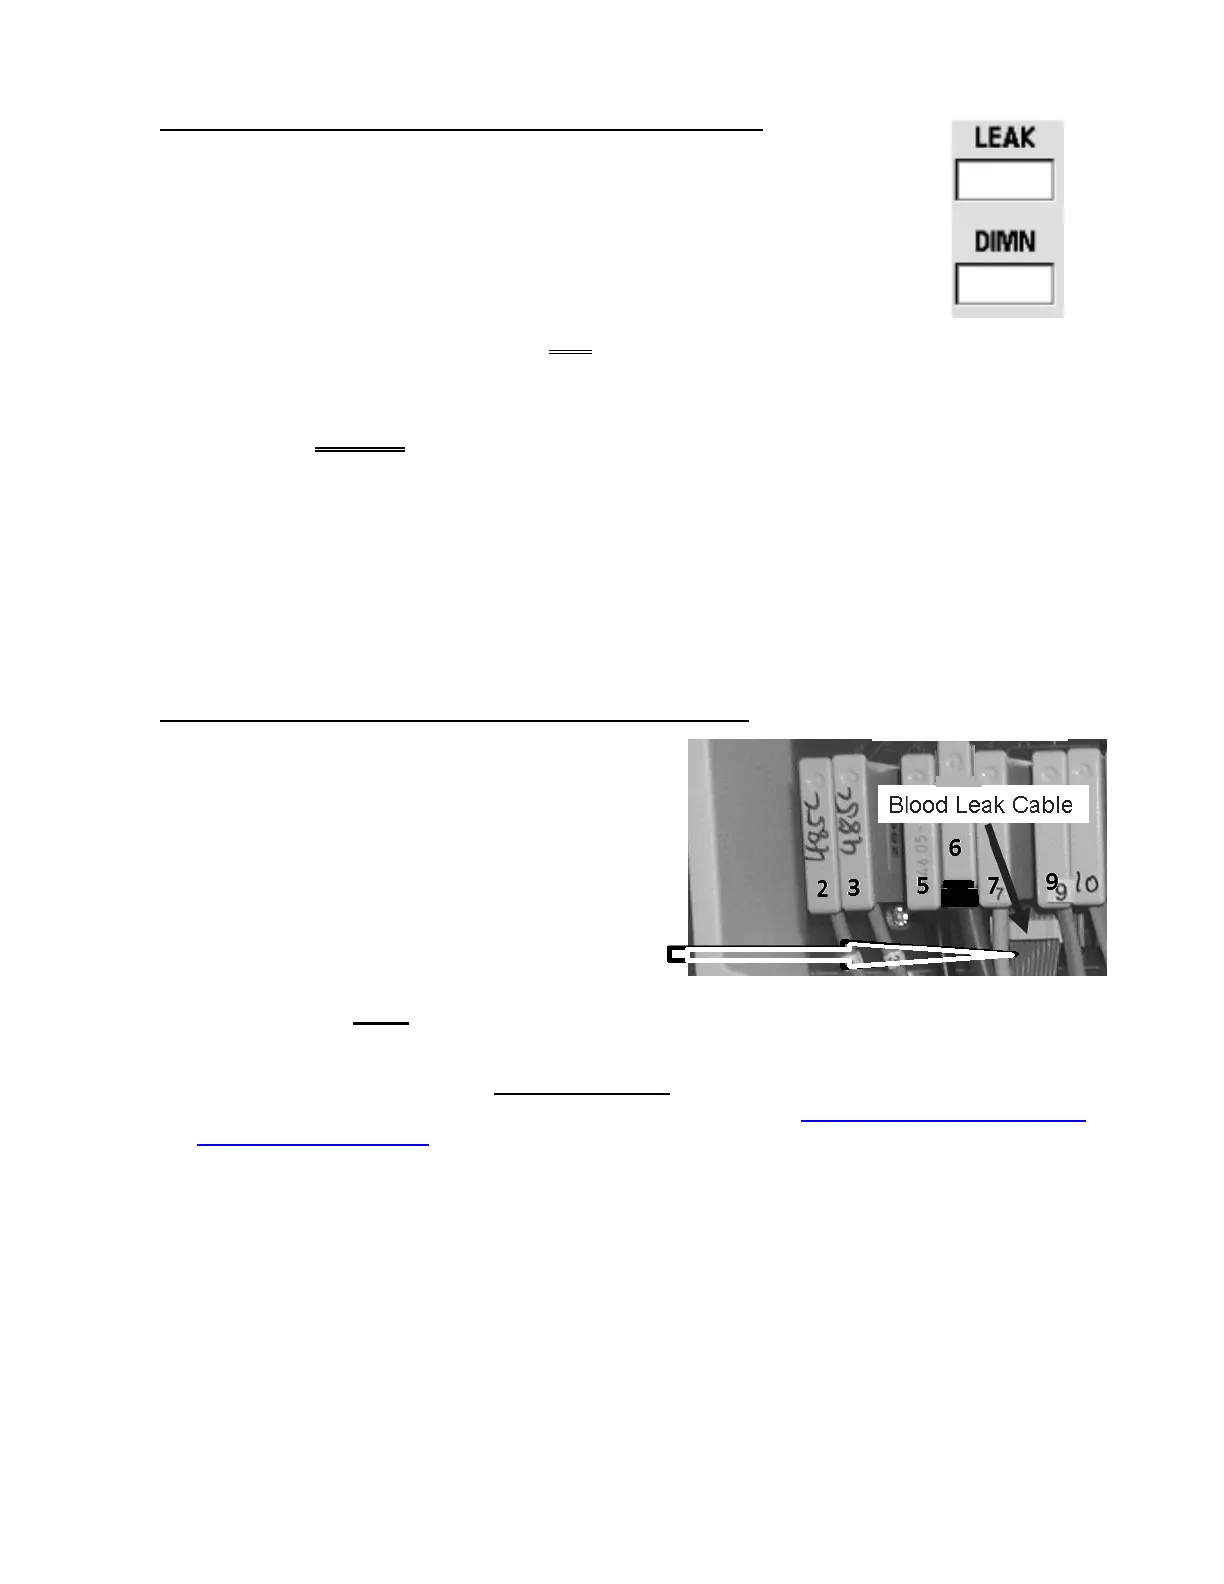
BL- 4.1.0 ISOLATE ‘OPEN CIRCUIT’ BLOOD LEAK DETECTOR
a) Turn the machine OFF!
b) Figure right, at the distribution board, ENSURE the
Blood Leak Sensor’s ribbon cable is plugged in
properly. If not, this may be the problem!
c) A procedure, in different Section, is performed next.
IMPORTANT! NOTE this page and procedure number (BL- 4.1.0 ) because you may prompted to
return to here.
d) BEFORE continuing to part e the Sensor Board cable MAY be bad. NOTE that five (5) BLOOD LEAK
connections will be checked and proceed to page 569, to perform SECTION 17 - CHECKING THE
SENSOR BOARD CABLE.
e) If the Sensor Board cable checks return to Dialysis Program (“Select Program” → ‘Dialysis’ → ‘Enter’)!
f) Allow six (6) minutes for stabilization!
g) ENSURING the external flow indicator’s ‘bob’ is rising and falling, proceed to
page 563, procedure
number BL- 5.0.0.

 Loading...


