2008T Troubleshooting Guide
P/N 490292 Rev. A
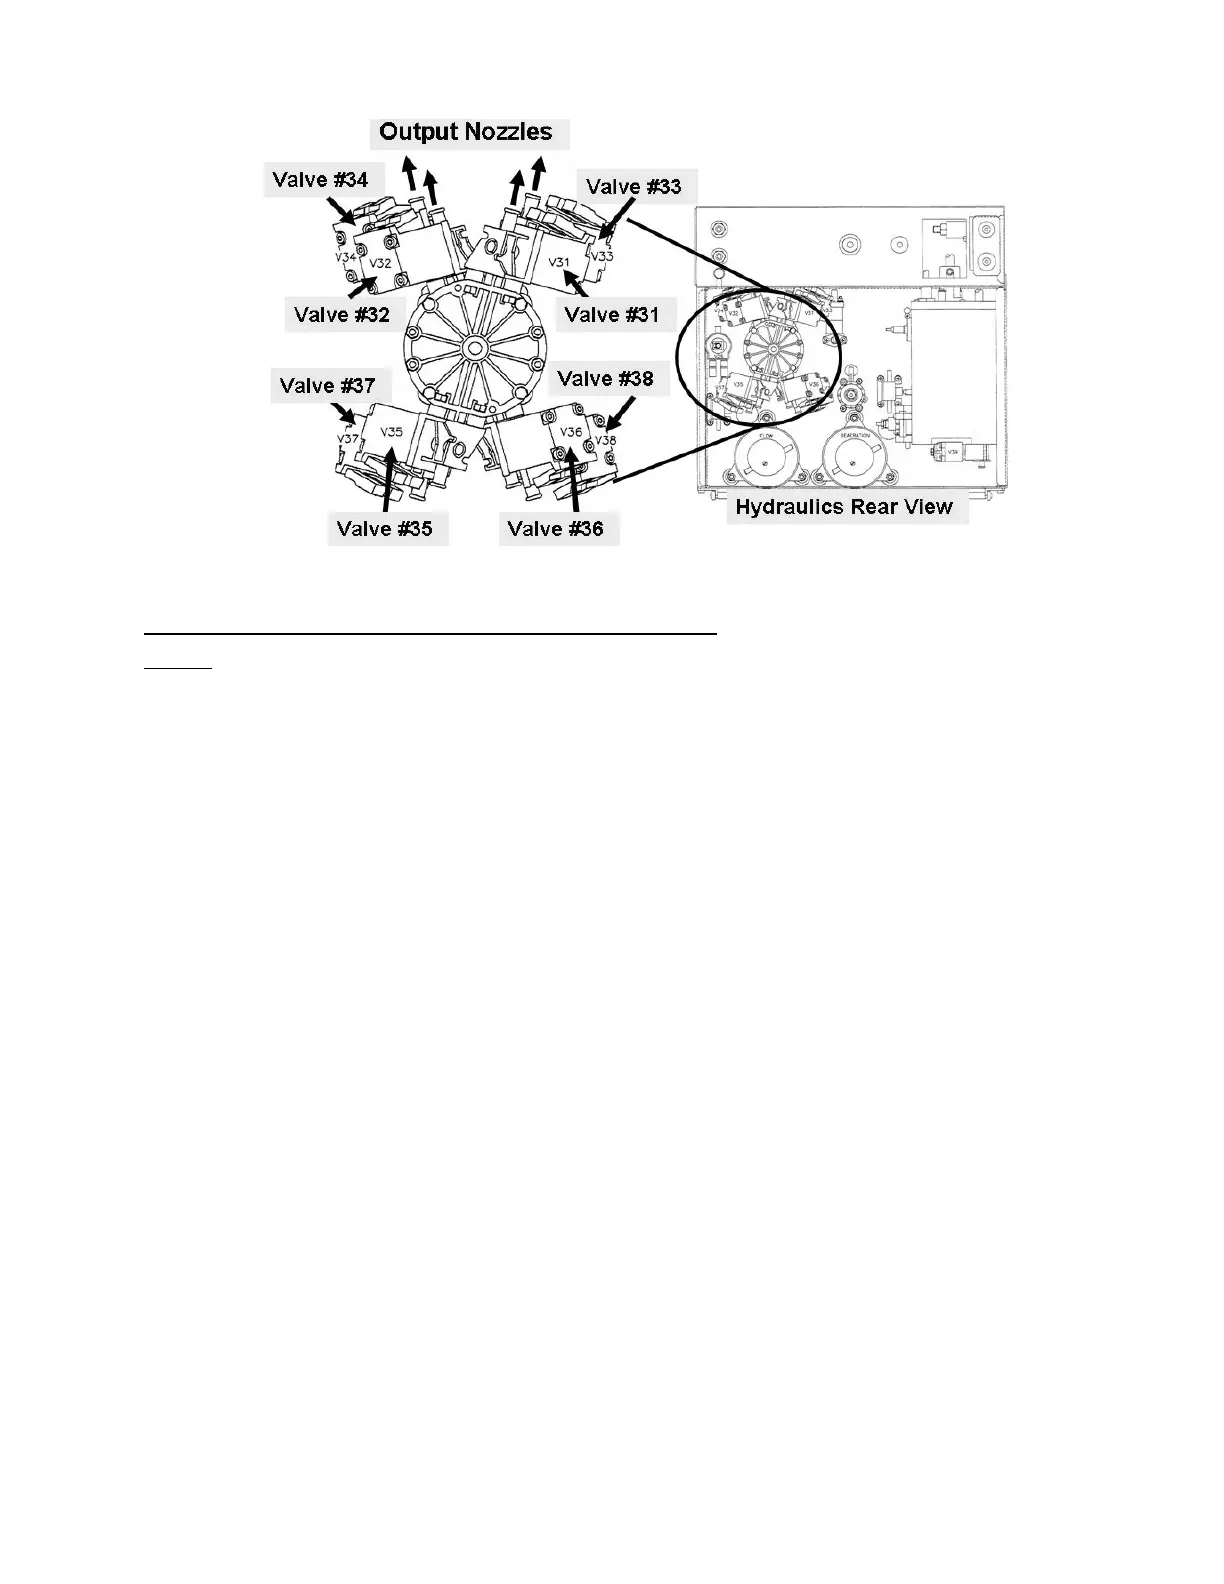
Figure 96 – Balancing Chamber Valves
BOTTOM SIDE LEAK PROCEDURE (Valves #35 through #38)
Theory: The following procedures open the top side valves, one at a time, using 24 volts from valve 30’s
distribution board connector. Because the deaeration pump and Flow Pump are running the bottom balancing
chamber valves are pressurized.
NOTE: Needle nose pliers are required (DO NOT use a plastic clamp) to QUICKLY clamp valve #35’s or
valve #37’s white (bottom) tubing IF a leak is seen. Referring to Figure 96 (page 579), locate these valves at
this time (left side, bottom).
a) Plug valve #31 into valve #30’s distribution board position (V30, “DRAIN-V”) and watch valve #31’s
nozzle. Is a leak seen?
Yes QUICKLY clamp valve #35’s white tubing. If the leak stops replace valve #35. If not, replace
valve #36.
No Unplug valve #31 and leave it unplugged. See part b.
b) Plug valve #32 into valve #30’s position (V30, “DRAIN-V”) and watch valve #32’s nozzle. Is a leak seen?
Yes QUICKLY clamp valve #35’s white tubing. If the leak stops replace valve #35. If not, replace
valve #36.
No Unplug valve #32 and leave it unplugged. See part c.
c) Plug valve #33 into valve #30’s position (V30, “DRAIN-V”) and watch valve #33’s nozzle. Is a leak seen?
Yes QUICKLY clamp valve #37’s white tubing. If the leak stops replace valve #37. If not, replace
valve #38.
No Unplug valve #33 and leave it unplugged. See part d.
d) Plug valve #34 into valve #30’s position (V30, “DRAIN-V”) and watch valve #34’s nozzle. Is a leak seen?
Yes QUICKLY clamp valve #37 white tubing. If the leak stops replace valve #37. If not, replace
valve #38.
No A balancing chamber valve leak is not obvious using this test. Turn the machine off and
CAREFULLY plug all valves back into the distribution board. Return to Dialysis Program and
perform automated Alarms / Pressure tests.
 Loading...
