2008T Troubleshooting Guide
P/N 490292 Rev. A
VE- 7.0.0 ISOLATE VERR
a) From debug screen 0, RECORD the valve numbers of the valves whose ‘dots’ are BLUE! One of
these valve circuits may be the problem! These procedures isolates them.
b) Call debug screen 1. NOTE VERR’s value for reference later. If VERR EVER reaches 255 return to
procedure number VE- 1.0.0 (page 214) to reset it.
c) Watch VERR until if it increases above what was noted in part b OR for five (5) minutes whichever
comes first! TWO (2) possible scenarios:
1) IF VERR does
NOT increase above what was noted in part b: A valve error is not occurring
at this time! Turn Dialysate Flow on. If a Flow Error reoccurs proceed to page 38, procedure
number F- 2.0.0.
2) IF VERR increases above what was noted in part b: See procedure number VE- 7.0.1
(page 223).
VE- 7.0.1 ISOLATE VERR
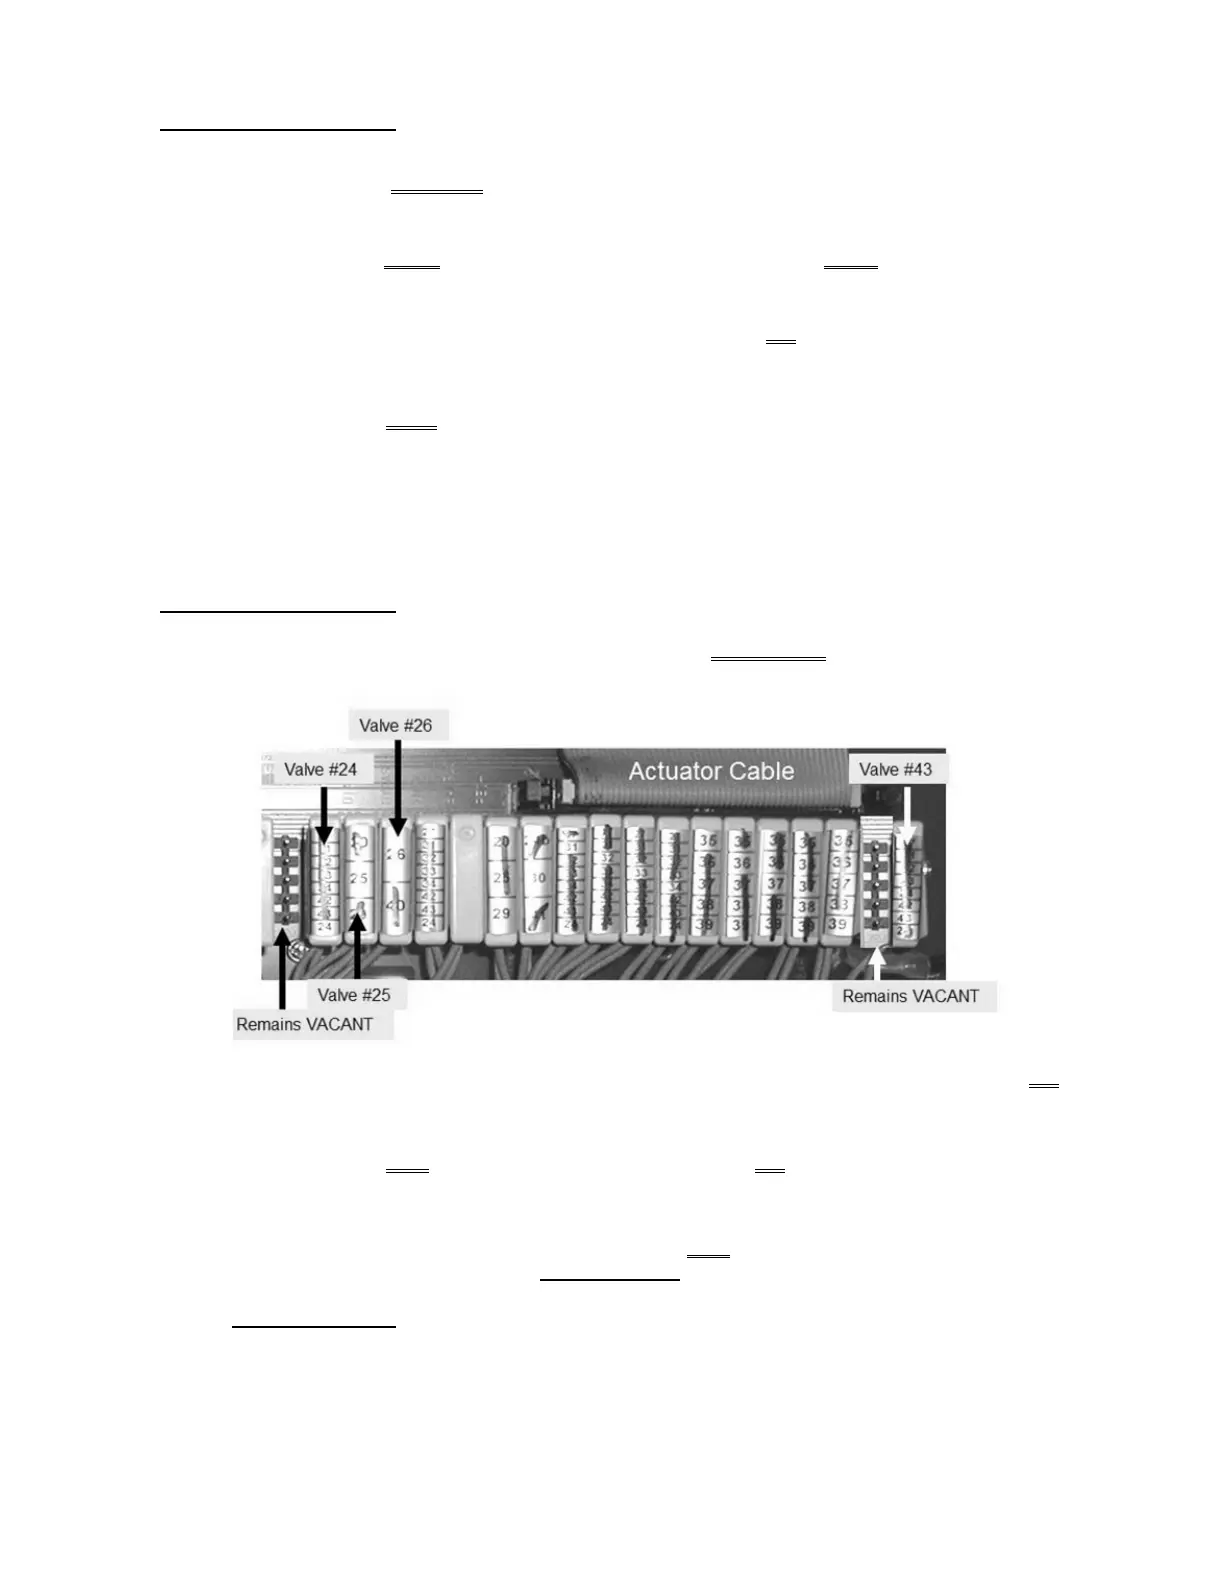
a) At the distribution board (Figure below), unplug one of the RECORDED valves. This isolates the valves
solenoid and its wire harness.
Figure 40 – Distribution Board
b) Watch VERR until if it increases above what was noted in procedure number VE- 7.0.0, part b OR for
five (5) minutes whichever comes first! TWO (2) possible scenarios:
1) IF VERR does NOT increase: The last valve unplugged OR its blue wire harness is the problem!
2) IF VERR increases: Repeat procedure number VE- 7.0.1 until all RECORDED valves have been
unplugged. If after all these valve(s) are unplugged AND VERR is still increasing, THREE (3)
possible bad components, see the Component List below:
Component List: Swap in each, one at a time, returning to Dialysis Program in between, until
VERR remains = 0 for 10 minutes indicating the last component swapped in is the problem!
1) Actuator-Test Board; 2) Actuator Cable; 3) Distribution board

 Loading...


