2008T Troubleshooting Guide
P/N 490292 Rev. A
DAIR- 5.0.0 ISOLATE THE DEAERATION PUMP HEAD
a) IMPORTANT! Remove the clamp from Valve #39.
b) Press ‘Enter’ twice to return to the “Calibrate Hydraulics” menu.
c) Select Deaeration Pressure but
DO NOT press any keys.
The [PUMP RATE] box MUST = 0 before continuing to part d.
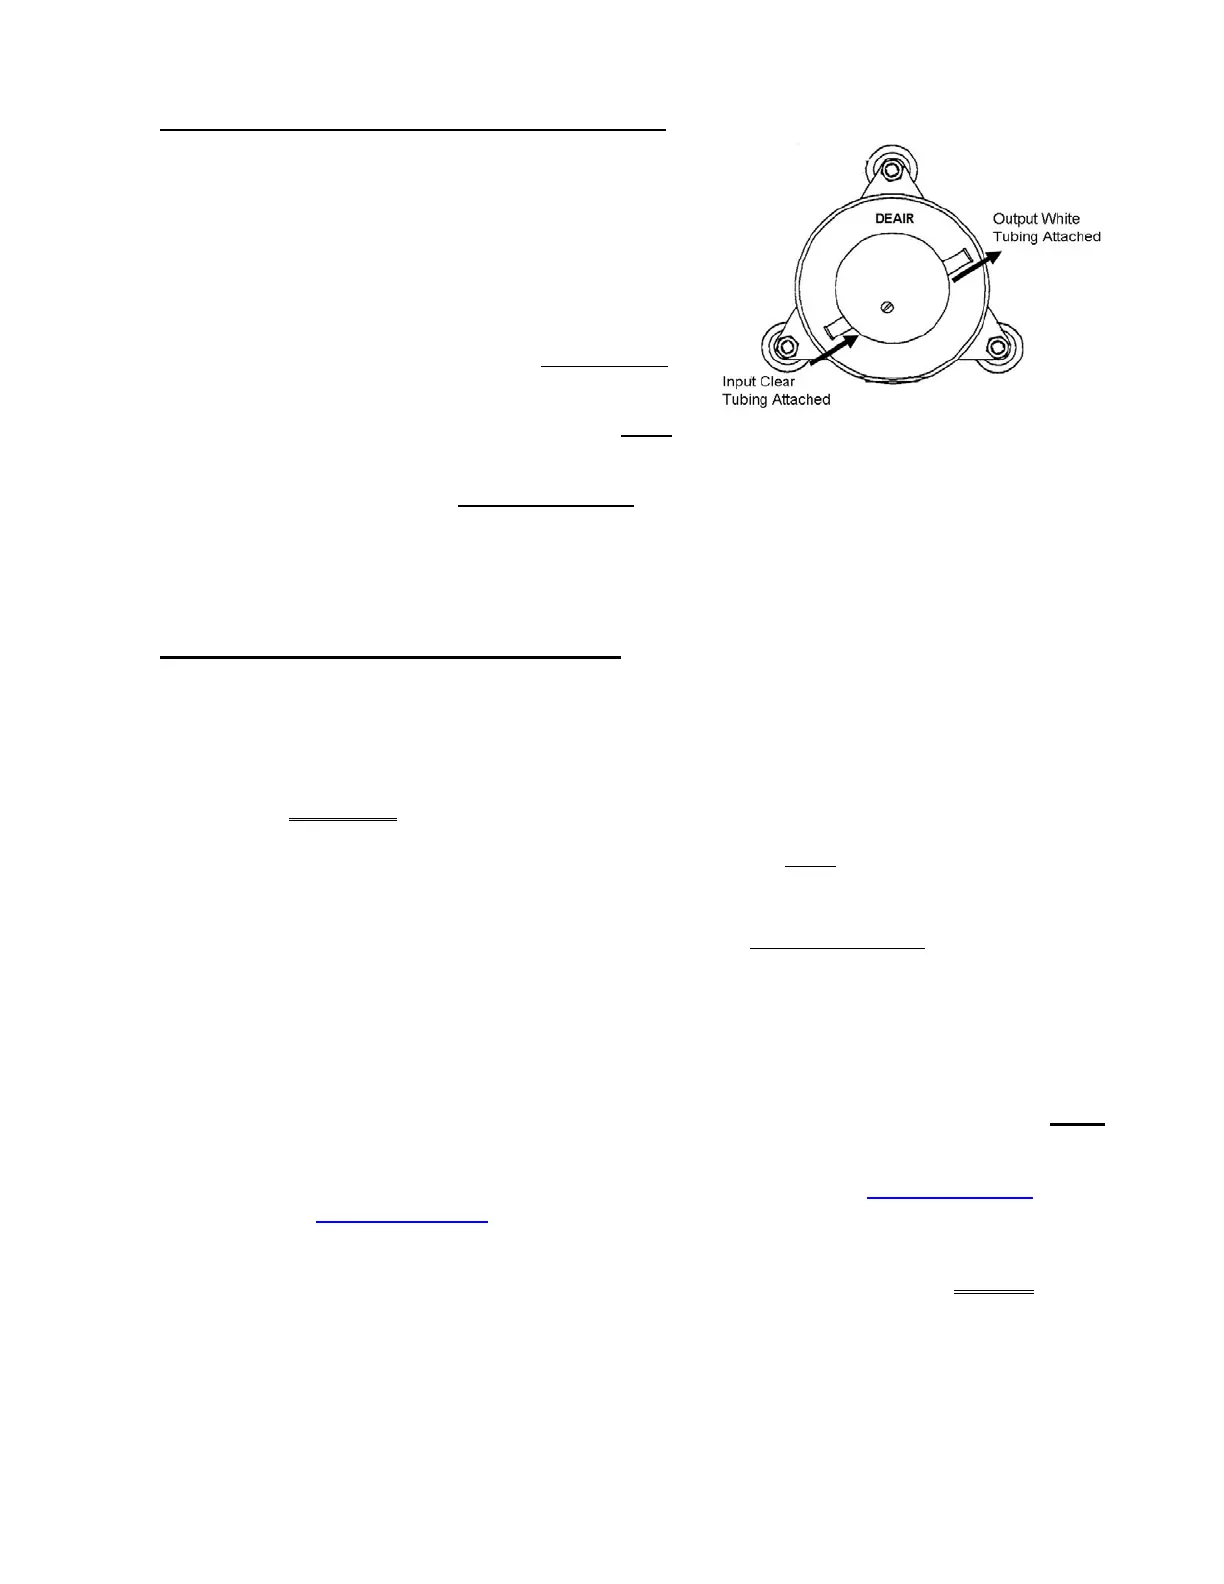
d) Referring to the Figure right, swap in a KNOWN good
deaeration pump head.
e) Can [PUMP RATE] now be adjusted to achieve target pressures?
Yes Target pressures achieved! A) Press ‘Enter’ to save the calibration! B) Return to Dialysis
Program. C) The Deaeration problem is solved but return to the procedure that prompted
you here.
No Target pressures CANNOT be achieved! See procedure number DAIR- 6.0.0 (page 547).
NOTE! The previous pump head may be good!
DAIR- 6.0.0 ISOLATE THE DEAERATION MOTOR
a) Press ‘Enter’ twice to return to the “Calibrate Hydraulics” menu.
b) Select “Deaeration Pressure” but
DO NOT press any keys!
c) Swap in a known good deaeration motor.
d) ‘Sharply’ press ‘Enter’. Can [PUMP RATE] be adjusted to achieve target pressures?
Yes Target pressures achieved! Target pressures achieved! A) Press ‘Enter’ to save the
calibration; B) Return to Dialysis Program; C) The Deaeration problem is solved but return
to the procedure that prompted you here!
No Target pressures CANNOT be achieved! See parts THROUGH d below:
a) Return to Dialysis Program (“Select Program” → ‘Dialysis’ → ‘Enter’)!
b) BEFORE continuing to part c, a procedure in a different Section is performed next. NOTE
this page and procedure number (DAIR- 6.0.0) as you may prompted to return to here.
c) Before continuing to part d, proceed to
page 150 to perform PRESSURE TEST
HYDROCHAMBER.
d) If a Hydrochamber leak was WAS NOT located in part c, THREE (3) possible bad
components: 1) Deaeration motor OR; 2) Deaeration restrictor #48* (*to LOCATE #48
refer to Figure 84 (page 545)) OR; 3) Bad Hydrochamber.

 Loading...


