2008T Troubleshooting Guide
P/N 490292 Rev. A
F- 1.0.3 CHAMBER #69 SAYS “NO AIR” / TROUBLESHOOT FILLING PROGRAM FAILURE
a) To avoid damage turn the machine
OFF!
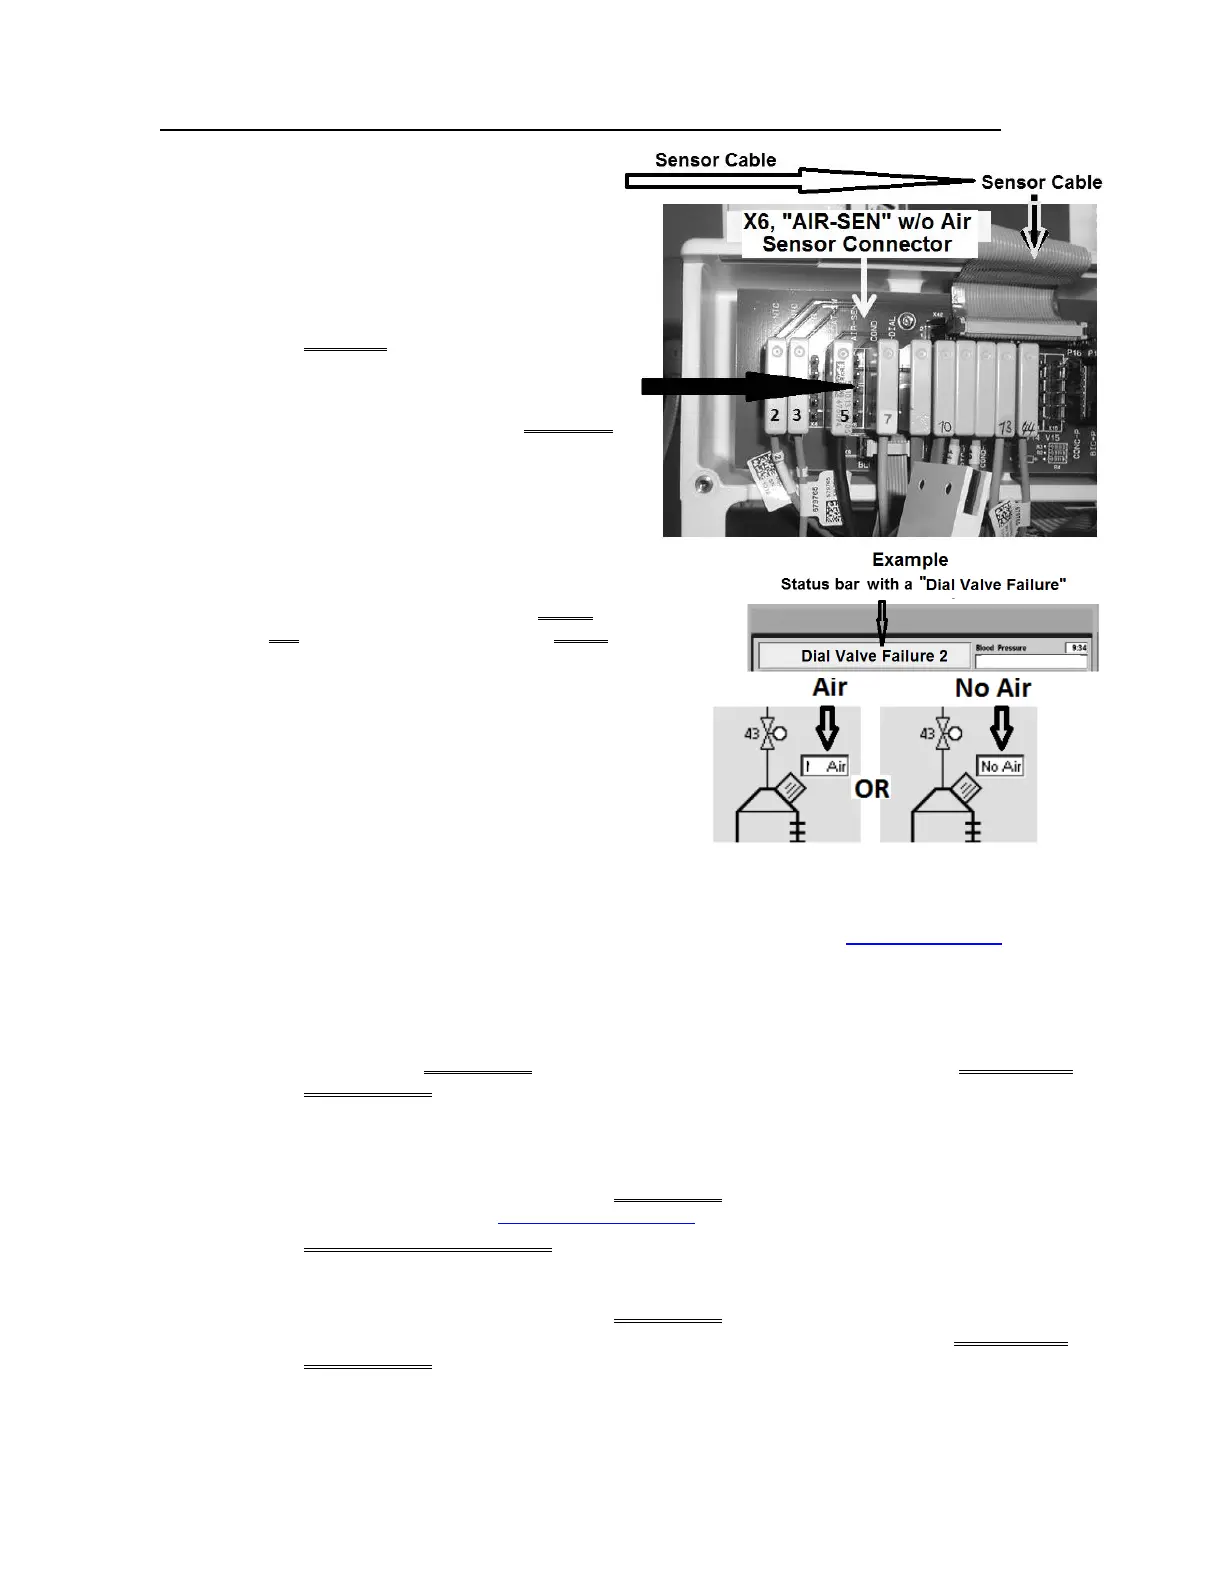
b) Figure right, TWO (2) checks:
Check #1: At the top of the distribution board,
ENSURE the Sensor Cable is
plugged in SECURELY!
Check #2: ENSURE a resistor plug HAS NOT
been prematurely plugged into the
5
th
position from the left!
c) Turn the machine on and return to Dialysis
Program (“Select Program” → ‘Dialysis’ → ‘Enter’)!
d) Figure right, from here forward, if (and ONLY if) a “Dial Valve
Failure” OR “Act Byp Valve Fail” banner EVER appears
proceed to page 711, Section 26
e) Call debug screen 0. Based on Chamber #69’s
text box now, TWO (2) possible scenarios:
1) IF it says “Air” always: Return to ABOVE
procedure number
F- 1.0.2.11 (page 26).
2) IF it continues to EVER say “No Air”: Filling Program is not working! See parts a AND b below:
a) Before performing part b NOTE this page number THEN perform INITIAL CHECKS (page 7).
b) FIVE (5) possible bad components: 1) CBE board
1
; 2) Sensor Board
2
; 3) Functional Board
3
;
4) Distribution board; 5) Motherboard.
1
A) Swap in a known good CBE board; B) With the Air Sensor’s connector REMAINING
UNPLUGGED return to Dialysis Program (“Select Program” → ‘Dialysis’ → ’Enter’);
C) From debug screen 0, if Chamber #69’s text box now says “Air” the previous CBE board
is bad.
2
A) With the machine off, swap in a known good Sensor Board; B) Place the machine into T
and C Mode (refer to OPERATING MODES (page 19); C) With the Air Sensor’s connector
REMAINING UNPLUGGED, return to Dialysis Program; D) From debug screen 0, if
Chamber #69’s text box now says “Air” the previous Sensor Board is bad.
3
A) With the machine off, swap in a known good Functional Board; B) Pace the new
Functional Board into T and C Mode; C) With the Air Sensor’s connector REMAINING
UNPLUGGED, return to Dialysis Program; D) From debug screen 0, if Chamber #69’s text
box now says “Air” the previous Functional Board is bad.

 Loading...


