2008T Troubleshooting Guide
P/N 490292 Rev. A
F- 15.3.0 BIBAG
CONNECTOR EQUIPPED
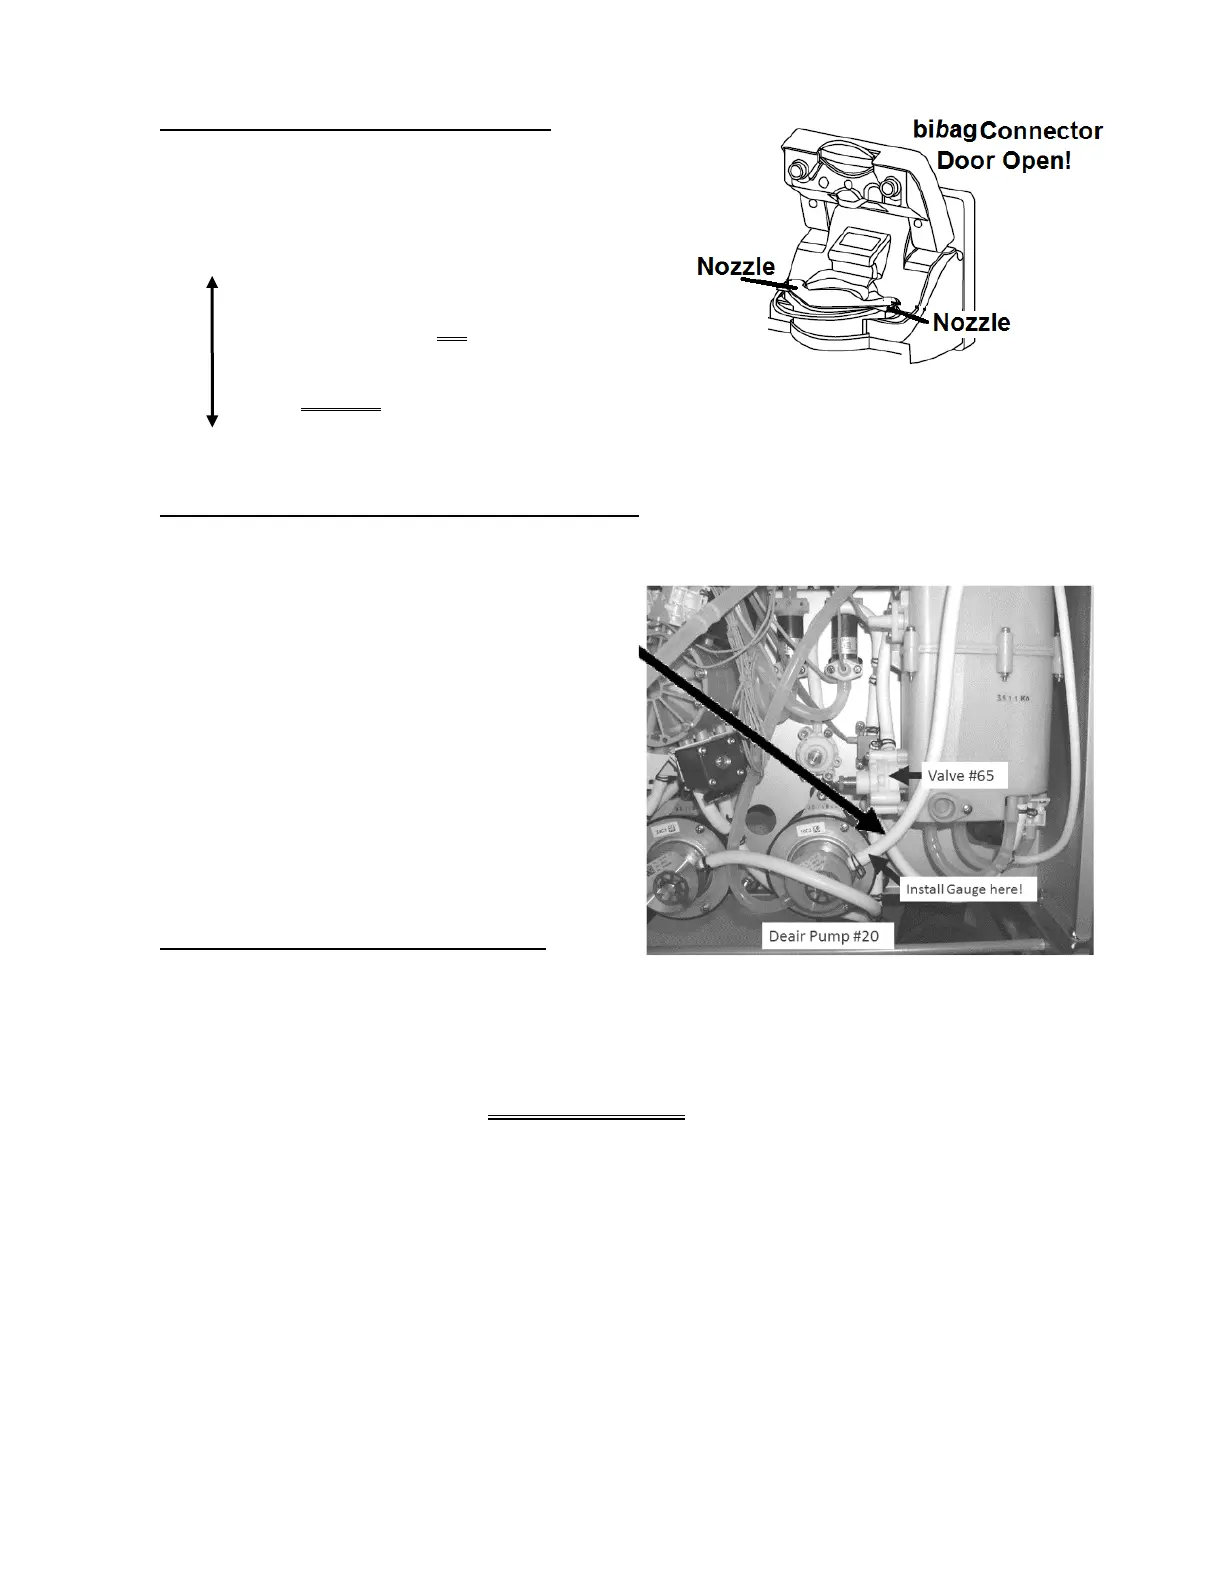
Figure right, open the bibag Connector door. Flow
(more than 10 ml per minute) from one of the nozzles?
Yes Flow from a nozzle! THREE (3) possible
problems: 1) Loose bibag Interface Board
ribbon cable (refer to Figure 4C, page 11) OR;
2) Bad Valve #100* OR; 3) Bad bibag Interface
board.
* To LOCATE Valve #100 refer to Figure 3 (page 5)
No flow Close the bibag door FULLY then see procedure number F- 15.3.2 (page 128).
F- 15.3.2 NO FLOW FROM EITHER BIBAG NOZZLE
a) Leaving the gauge in the Rinse port, a second psi gauge is required. ENSURE this gauge reads
zero (0) psi BEFORE installing it.
b) Turn the machine OFF!
c) Figure right, tee the gauge into the OUTPUT
(white tubing) side of the Deaeration Pump.
d)
To prevent leaks and false readings,
tie wrap both sides of the gauge
tubing.
e) See procedure number F- 15.3.4 (page 128).
F- 15.3.4 ISOLATE LOADING PRESSURE
a) Return to Dialysis Program (“Select Program” → ‘Dialysis’ → ‘Enter’).
b) From the Home screen, set [Dialysate Flow] to 800 ml/min and press ‘Enter’.
c)
Reading the gauge at the Deaeration Pump, TWO (2) possible scenarios below:
1) IF (and ONLY if) peaking to MORE than 26 psi: Turn Valve #65’s nut (Figure above)
counterclockwise (outward) to decrease pressure. If (and ONLY if) between 23 and 25 psi can be
achieved see procedure number F- 15.3.6 (page 129). If between 23 and 25 psi CANNOT be
achieved Valve #65 may be bad.
2) ALL OTHER scenarios: Turning Valve #65’s nut (Figure above) clockwise (inward), can you bring
peak pressure to between 23 and 25 psi?
Yes Between 23 and 25 psi! See procedure number
F- 15.3.6 (page 129).
No Pressure remains lower than 23 psi! ENSURING no leaks, see parts a AND b next page:

 Loading...


