2008T Troubleshooting Guide
P/N 490292 Rev. A
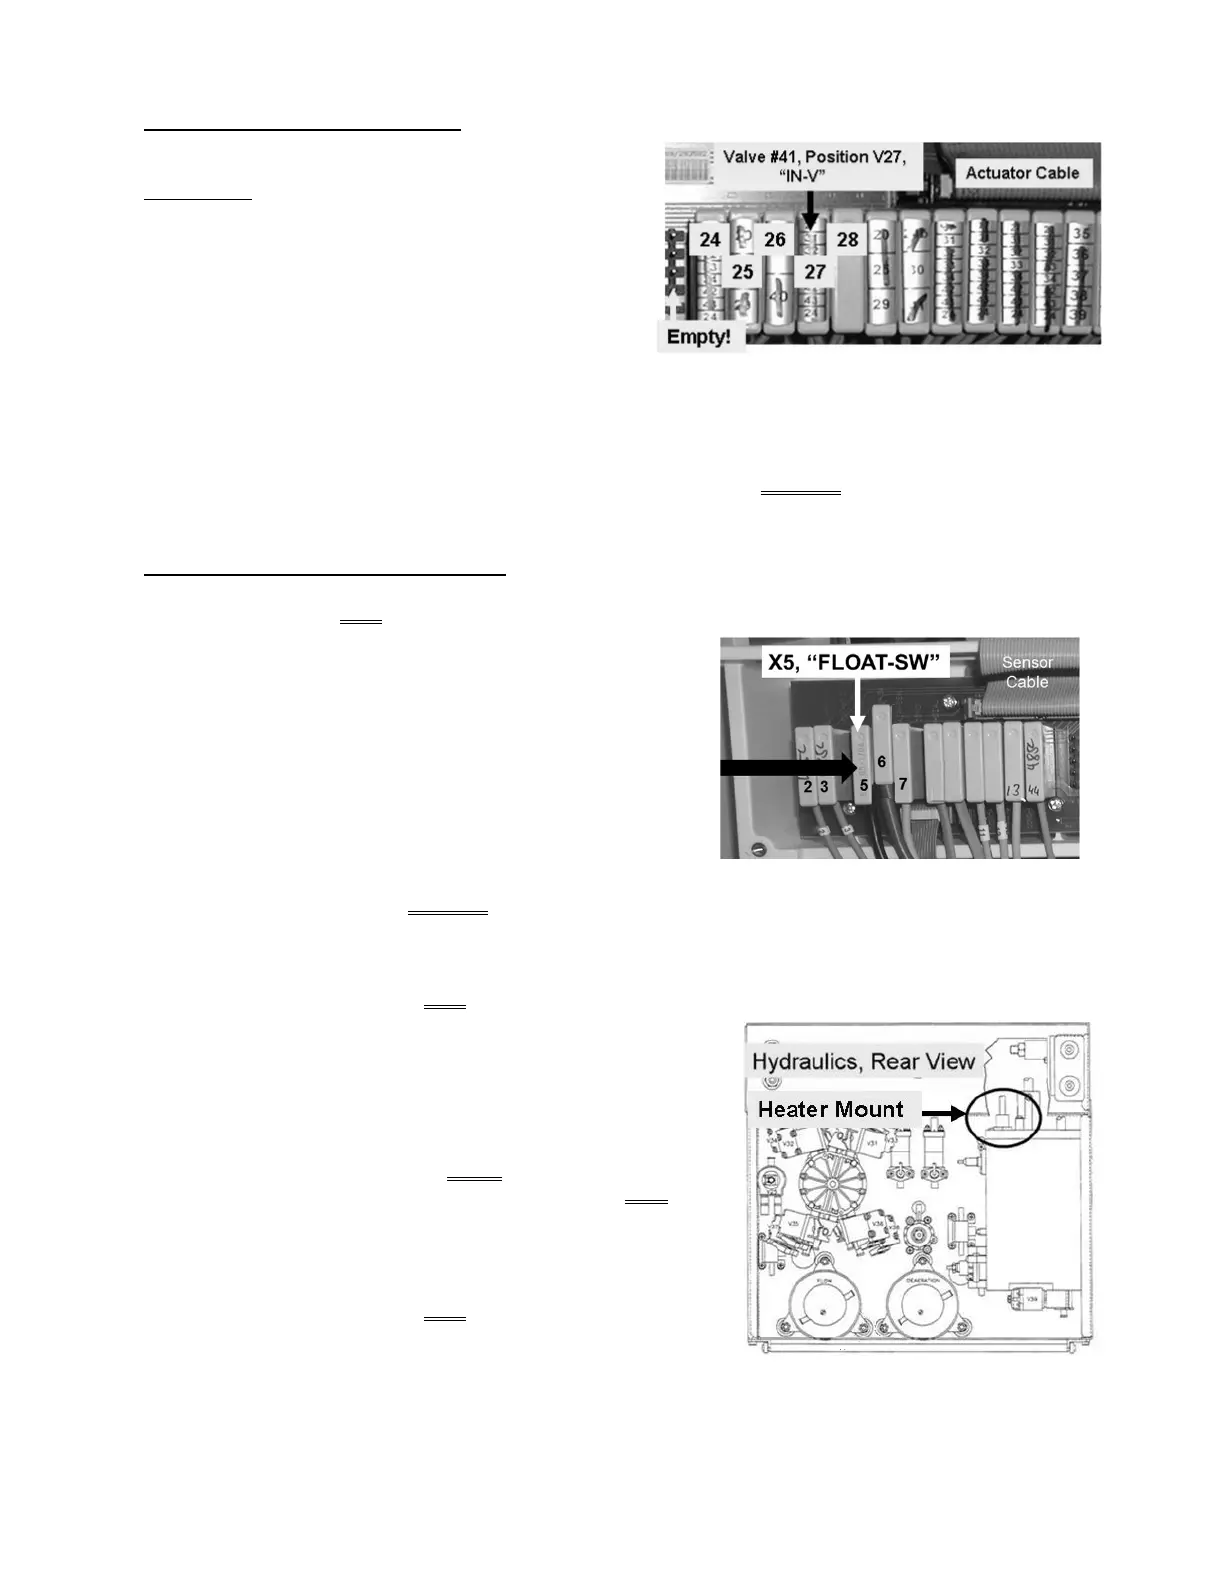
OVER- 7.0.0 ISOLATE VALVE #41
Figure right, unplug valve #41 from distribution board
position #27 (“V27, “IN-V”). TWO (2) possible scenarios:
1) IF massive overflow STOPS: See procedure
number OVER- 7.0.1 (page 595).
2) IF massive overflow continues: ENSURING Valve
#41 was unplugged, perform parts THROUGH c
below:
a) Turn the water OFF!
b) Referring Figure 35A (page 211), trace valve #41’s wiring harness from the distribution board to
ENSURE it terminates at valve #41’s solenoid terminals.
c) If the harness terminates at valve #41, valve #41* is bad * To LOCATE valve #41 refer to Figure 35
(page 211).
OVER- 7.0.1 ISOLATE FLOAT SWITCH
a) With the machine AND water ON, CAREFULLY return valve #41 to distribution board position “IN-V”. If
(and ONLY if) ‘massive’ overflow continues see part b.
b) Figure right, unplug the float’s connector from distribution
board position “X5, FLOAT-SW”. Does ‘massive’ overflow
continue?
Yes Overflow continues! ENSURING the float was
unplugged, the Actuator-Test Board is bad (see
Figure 4A, page 10).
No a) Trace the float’s wiring harness from the distribution board to ENSURE it terminates at the
float. NOTE! To LOCATE the Float refer to Figure 28 (page 140).
b) If the harness terminates correctly replace the float.
c) With the machine AND water ON, if (and ONLY if) massive overflow continues see part d.
d) Turn the machine OFF to prevent
electrocution.
e) Figure right, remove the heater and check its port
into the top of the Hydrochamber for heat damage
(i.e. melting). If (and ONLY if) damage is located it is
replace the Hydrochamber. If damage is NOT
located see part e.
e) Reinstall the heater.
f) With the machine AND water ON, if (and ONLY if)
massive overflow continues see part g.
g) FOUR (4) possible bad components: 1) Bad actuator cable OR; 2) Bad Sensor Board cable
OR; 3) Bad distribution board OR; 4) Bad motherboard.

 Loading...


