February 2013
4-247
ColorQube® 9303 Family
REP 62.3, REP 62.4
Repairs/Adjustments
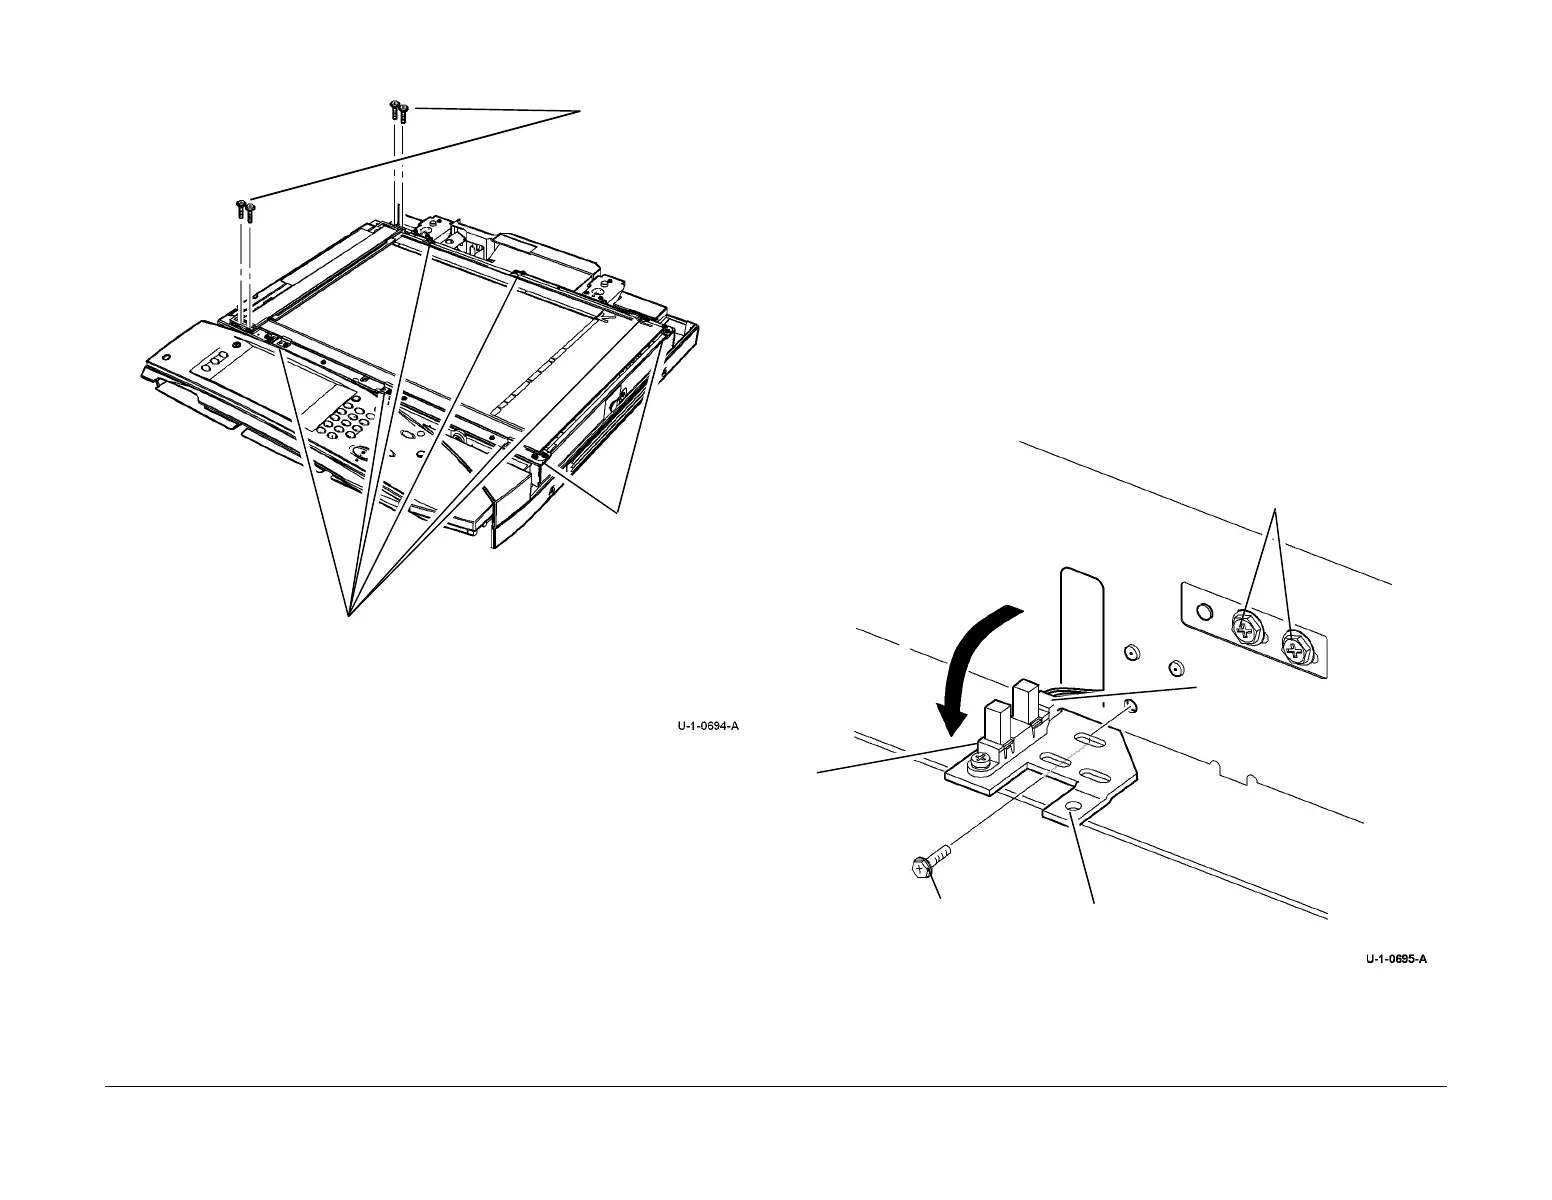
Figure 1 CVT glass and document glass assembly
Replacement
1. The replacement procedure is the reverse of the removal procedure.
2. Ensure that the white AGC strips on the document glass and the CVT glass are at the
front and underside of the glass.
3. Ensure that the document glass is located in the corner brackets, Figure 1. Check that the
CVT ramp is located correctly in the pips on the frame.
4. Perform ADJ 62.1 Optics Cleaning as necessary.
5. If a new document glass assembly has been installed, perform the following:
a. dC608 Document Feeder Registration.
b. dC609 Document Glass Registration.
REP 62.4 Scan Carriage Home Sensor
Parts List on PL 62.15
Removal
WARNING
Switch off the electricity to the machine. Refer to GP 14. Disconnect the power cord
from the customer supply while performing tasks that do not need electricity. Electricity
can cause death or injury. Moving parts can cause injury.
WARNING
Take care during this procedure. Sharp edges may be present that can cause injury.
1. Remove the User Interface assembly, REP 2.1.
CAUTION
Do not remove the document glass.
Do not loosen the two screws securing the setting plate, shown in Figure 1.
2. Figure 1, remove the scan carriage home sensor.
Figure 1 Scan carriage home sensor
Replacement
1. Install the sensor on to the sensor plate, ensuring the lugs locate correctly in the slot.
1
Remove 4 screws.
2
Loosen 6 screws and rotate 6 glass clamps away
from the document glass.
3
Remove the document glass
and CVT ramp assembly.
Corner brackets
4
Remove the
sensor (1
screw).
3
Disconnect the sensor.
1
Remove the
screw.
2
Pull forward the sensor
plate.
Do not loosen.
 Loading...


