February 2013
4-59
ColorQube® 9303 Family
REP 10.1
Repairs/Adjustments
REP 10.1 Transfix Roller
Parts List on PL 10.20
Removal
WARNING
Switch off the electricity to the machine. Refer to GP 14. Disconnect the power cord
from the customer supply while performing tasks that do not need electricity. Electricity
can cause death or injury. Moving parts can cause injury.
WARNING
Do not clean the stripper blade. The stripper blade is very sharp and can cause injury. If
the stripper blade is dirty a new blade must be installed.
WARNING
Take care during this procedure. Sharp edges may be present that can cause injury.
CAUTION
Use care when working near the drum. The drum can be damaged easily, which will cause
print quality defects.
1. Remove the exit paper path, REP 10.20.
2. Remove the cleaning unit, refer to REP 94.1.
3. Unlock the stripper gate, GP 31 and fully lower/open the gate. This will lower and cover
the stripper blade with its protective guard.
4. Remove the transfix blade, REP 10.6.
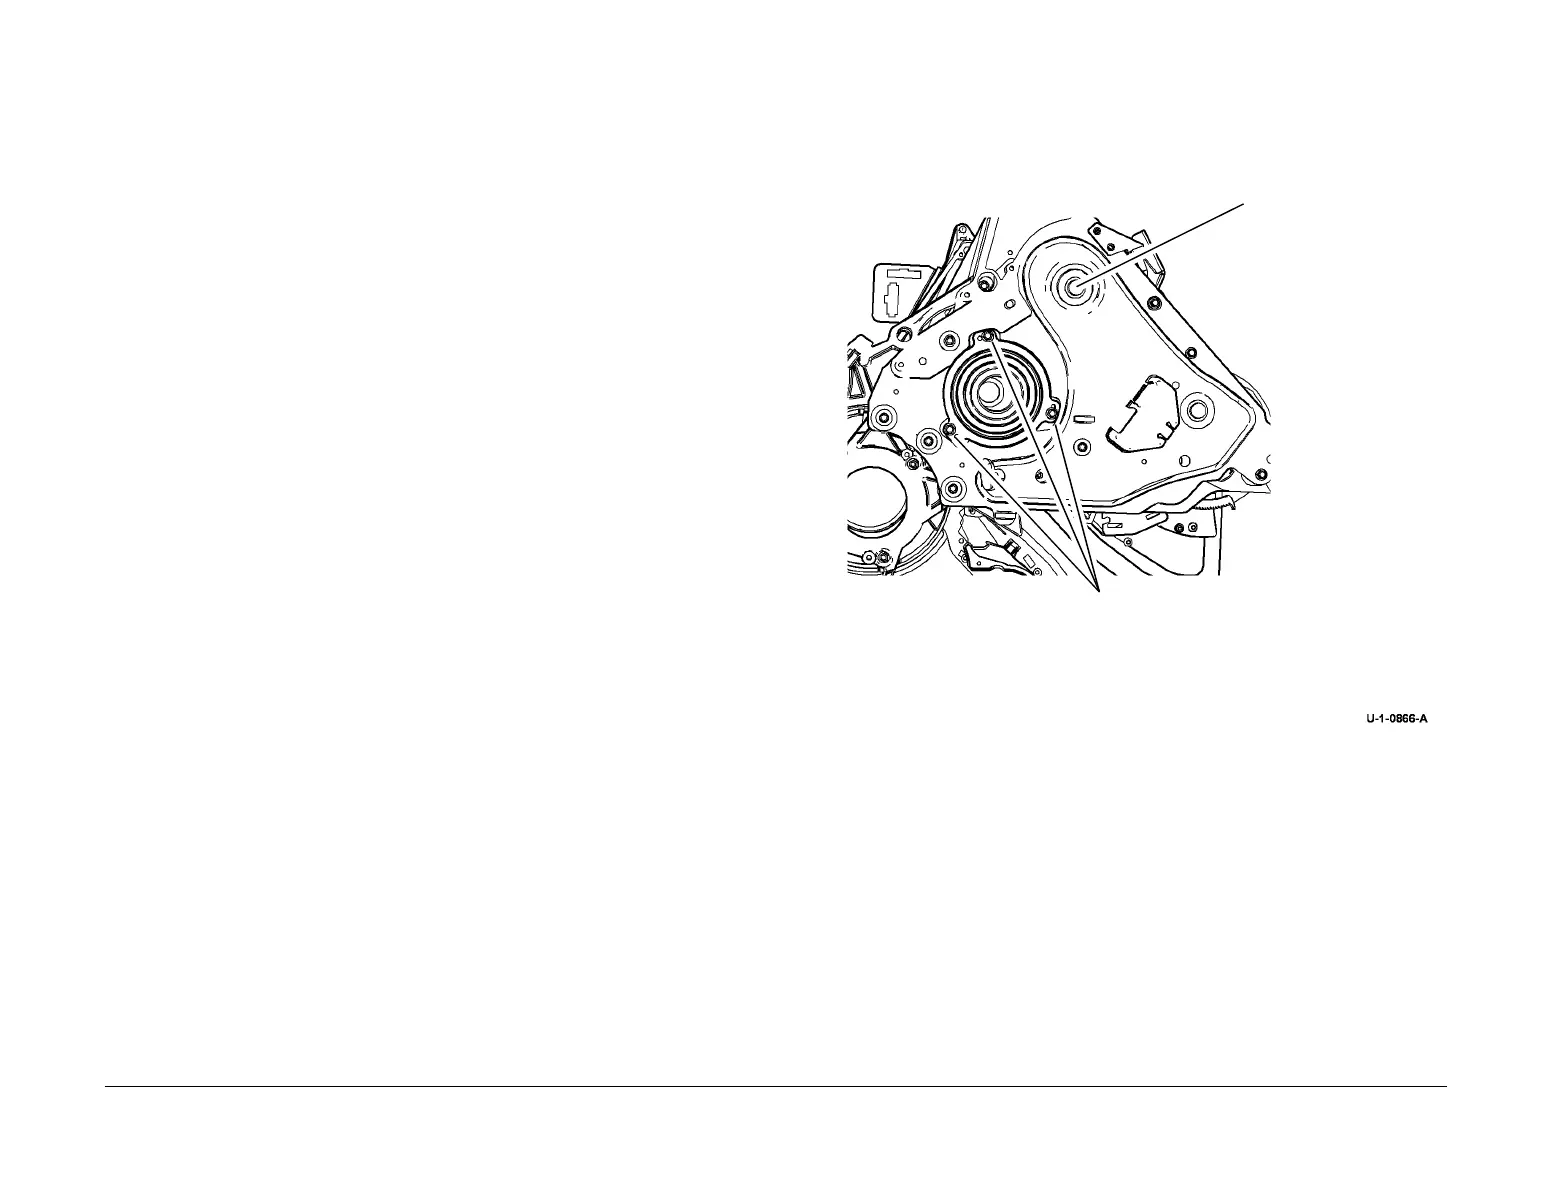
5. Prepare to remove transfix roll, Figure 1.
NOTE: It may be necessary to use a screwdriver to manually rotate the front and rear
transfix motor shafts to move the transfix roller away from the drum.
Figure 1 Preparation
CAUTION
Support the weight at the rear of the transfix roll to avoid damage to the drum.
CAUTION
Make sure all three screws are moved to the adjacent threaded holes during removal. Leaving
one screw in the original position, while attempting to remove the roller with the other two
screws, can break a tab on the transfix roller. Move the screws back over to the larger, non-
threaded holes for installation.
1
Remove 3 screws and
ground lead.
Location of the front
transfix motor shaft. Rear
shaft in similar position at
rear.
 Loading...


