February 2013
4-347
ColorQube® 9303 Family
REP 91.17, REP 91.18
Repairs/Adjustments
Replacement
1. Replacement is the reverse of the removal procedure.
2. Take care not to bump or damage the plastic flags on the assembly while inserting it
under the belts.
3. When reinstalling the key plate motor, ensure the locator pin is seated correctly before
installing the retaining clip.
4. Ensure that the motor harness is connected to the motor before reinstallation.
5. Refer to the replacement of the ink loader assembly REP 91.15, to reset the ink levels.
6. Verify that the key plate moves by entering one of the following diagnostics codes 93-051,
93-052 or 93-053.
REP 91.18 Ink Transport Motor and Drive Gear
Parts List on PL 93.10
Removal
WARNING
Switch off the electricity to the machine. Refer to GP 14. Disconnect the power cord
from the customer supply while performing tasks that do not need electricity. Electricity
can cause death or injury. Moving parts can cause injury.
WARNING
Take care during this procedure. Sharp edges may be present that can cause injury.
WARNING
Do not touch the ink loader melt plates while the machine is switched on. Dangerous
voltages may be present that could cause death or injury.
1. Remove the ink loader assembly, REP 91.15.
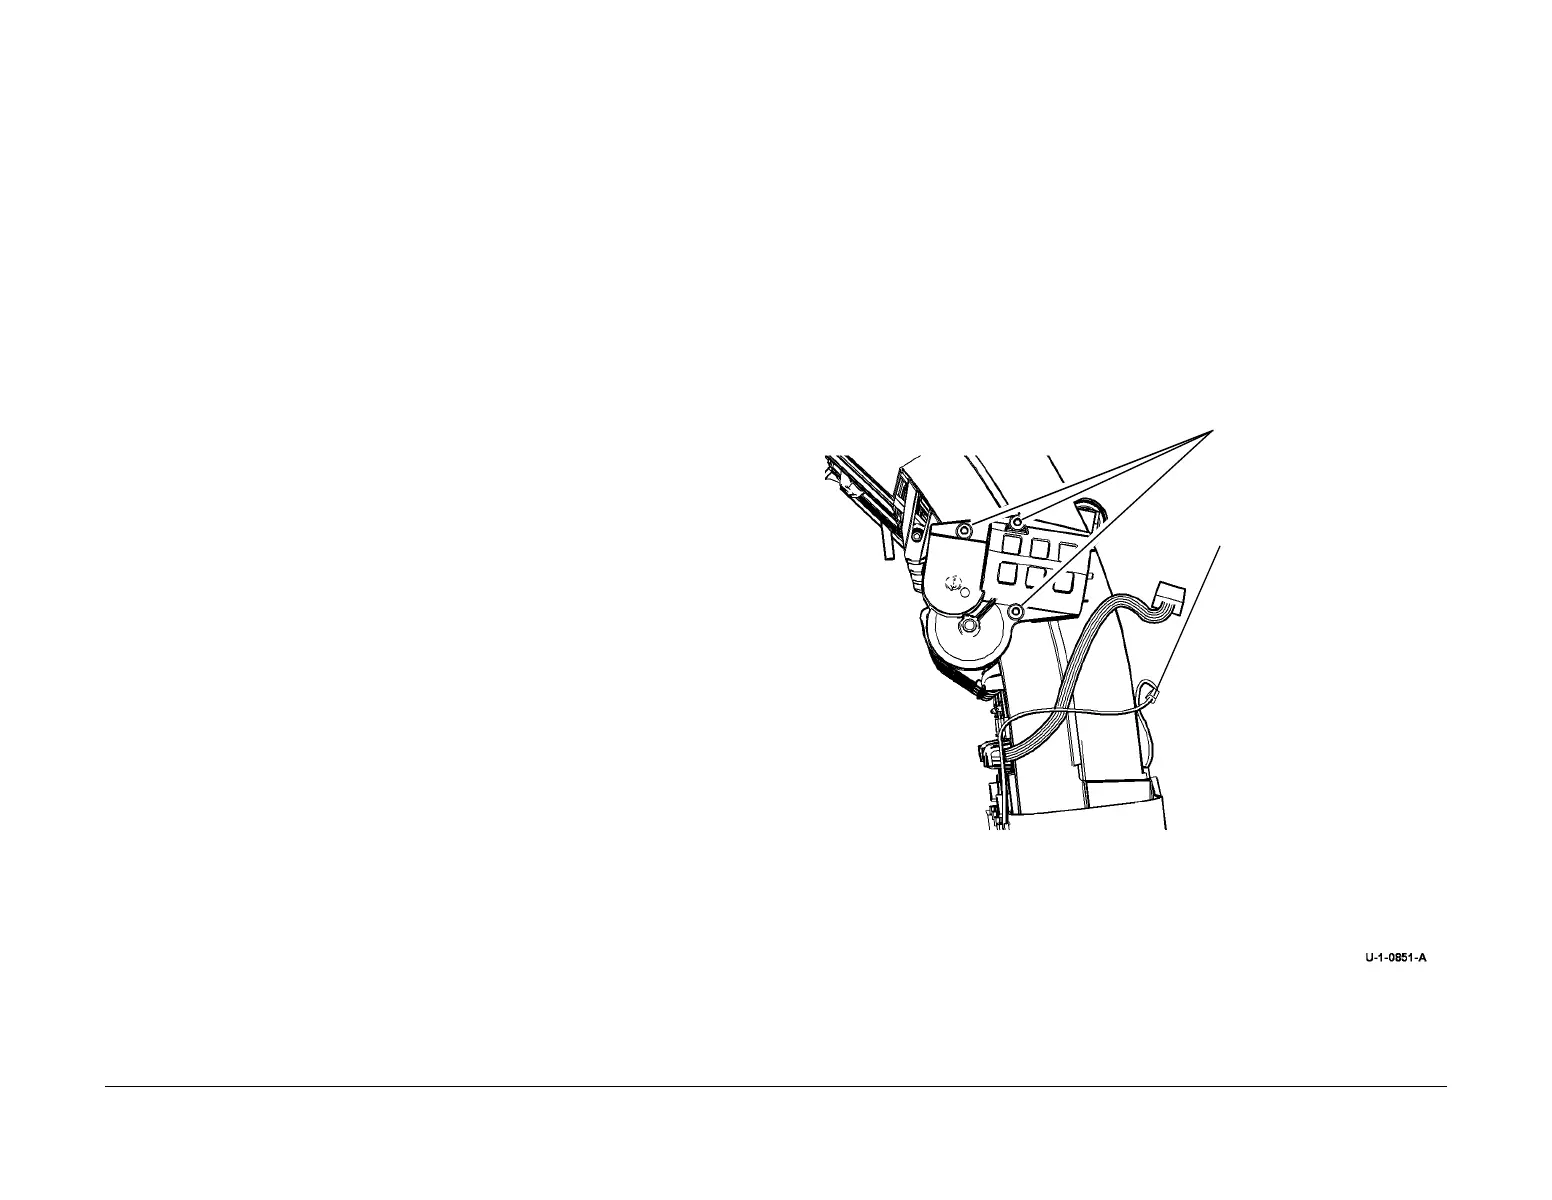
2. Remove the ink transport motor, cover and gear, Figure 1.
Figure 1 Transport motor removal
NOTE: After removal, inspect the compound gear pin and boss for cracks or damage,
Figure 2.
Remove 3 screws and
the cover.
3
Remove the drive
gear and motor.
2
Disconnect harness.

 Loading...


