February 2013
4-334
ColorQube® 9303 Family
REP 91.9, REP 91.10
Repairs/Adjustments
Replacement
1. Replacement is the reverse of the removal procedure.
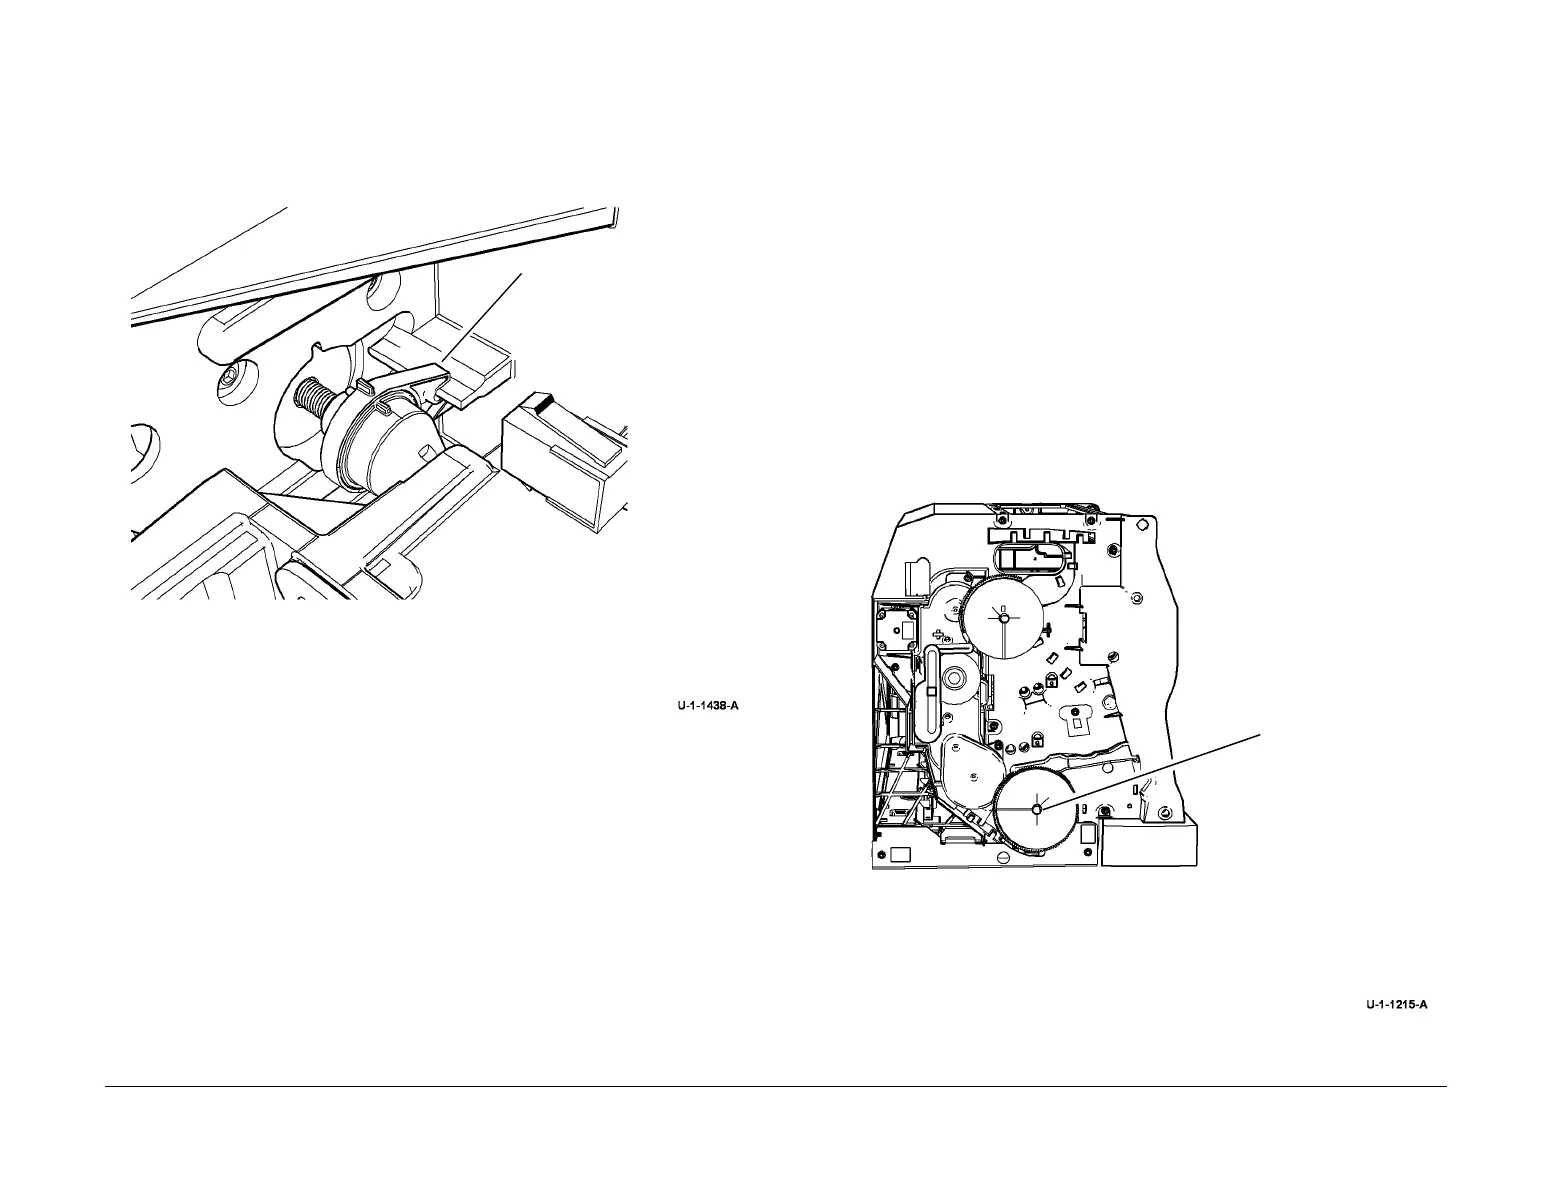
2. Ensure the rotation stop is correctly located when securing the motor to the frame, Figure
2.
Figure 2 Motor Location
3. Run the relevant diagnostic routines, refer to GP 37 Post Part Replacement Routines.
REP 91.10 Lower Carriage Drive Shaft, Cranks, Lower
Front and Rear Compliant Links
Parts List on PL 91.10
Removal
WARNING
Switch off the electricity to the machine. Refer to GP 14. Disconnect the power cord
from the customer supply while performing tasks that do not need electricity. Electricity
can cause death or injury. Moving parts can cause injury.
WARNING
Take care during this procedure. Sharp edges may be present that can cause injury.
CAUTION
Do not touch the exposed face of the printheads. Surface contamination or minor damage can
destroy the printhead.
1. Remove marking unit lower printheads, REP 91.29
2. Remove marking unit lower carriage, REP 91.14
3. Remove the lower drive gear, Figure 1.
Figure 1 Lower drive gear
Ensure the motor rotation stop
is located correctly onto the
frame.
1
Remove the screw
then the drive gear.
 Loading...


