February 2013
4-329
ColorQube® 9303 Family
REP 91.6, REP 91.7
Repairs/Adjustments
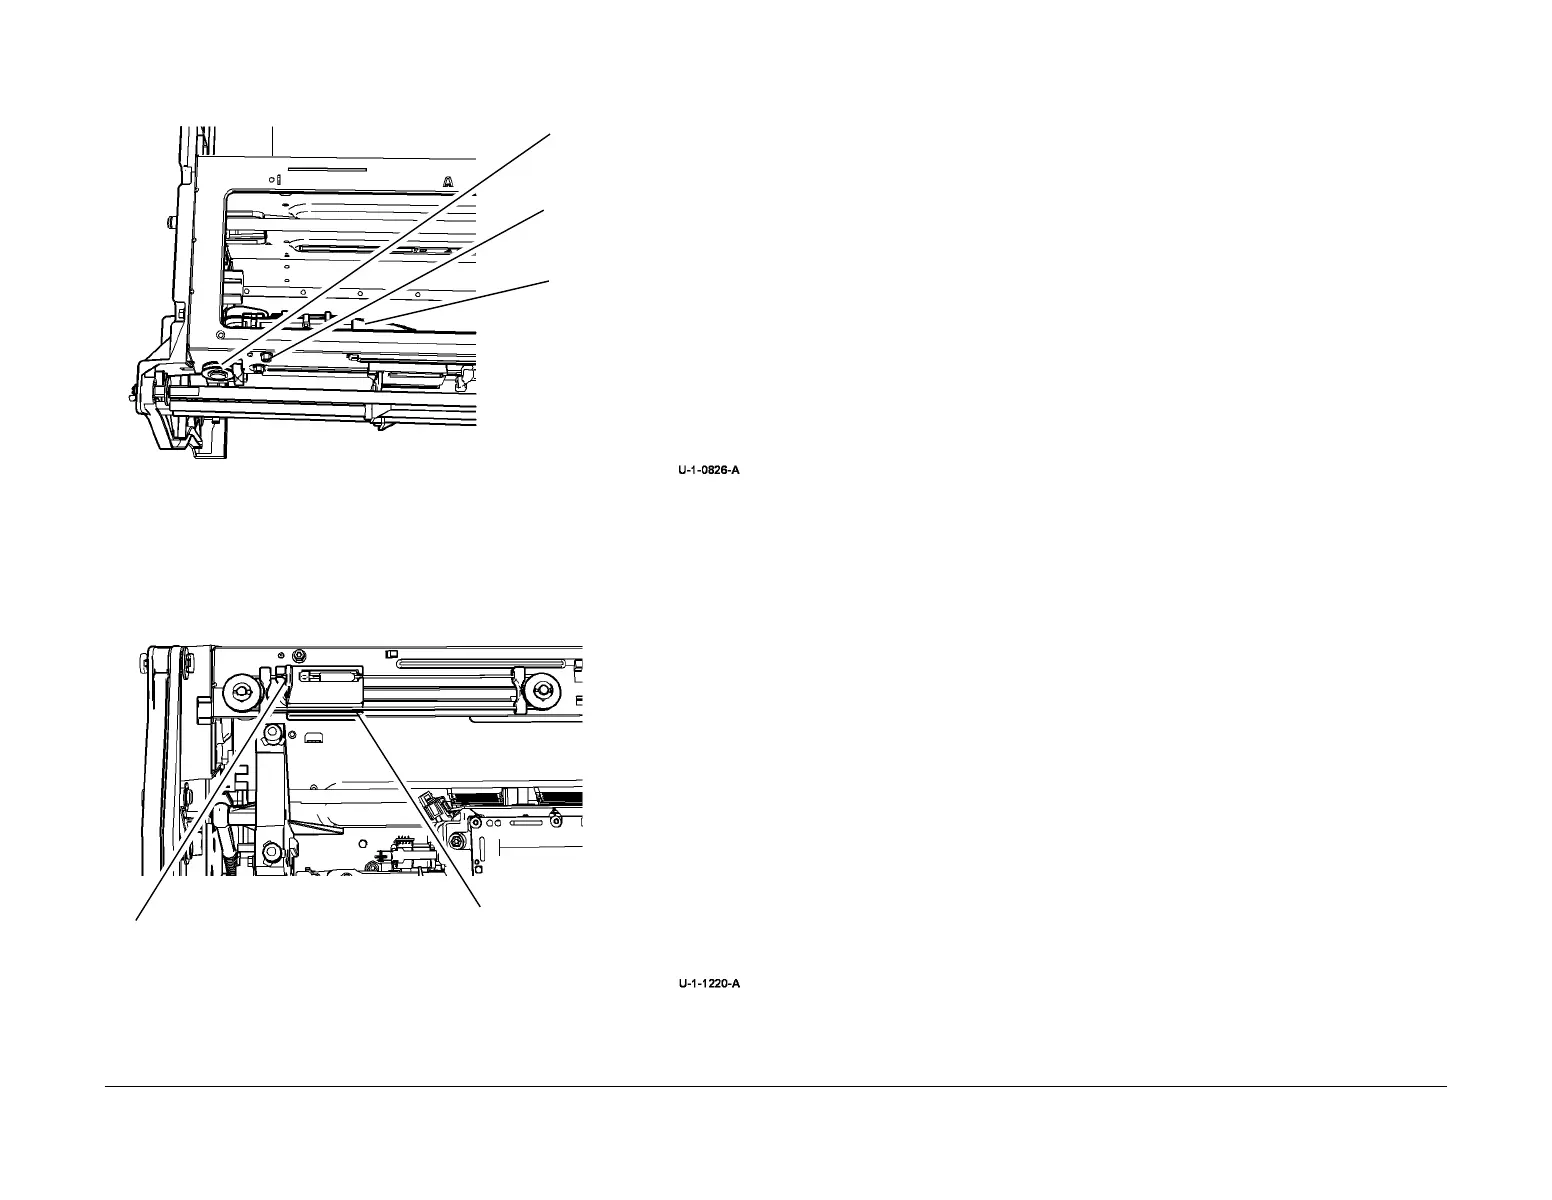
4. Remove the horizontal motion motor, Figure 3.
Figure 3 Motion motor removal
Replacement
1. Replacement is the reverse of the removal procedure.
2. Figure 4 shows the correct wiper shuttling yoke position.
Figure 4 Wiper shuttling yoke position
3. Ensure that both carriages are parked and the wiper is in the home position, all the way
up or down.
REP 91.7 Marking Unit Upper Carriage
Parts List on PL 91.20
Removal
WARNING
Switch off the electricity to the machine. Refer to GP 14. Disconnect the power cord
from the customer supply while performing tasks that do not need electricity. Electricity
can cause death or injury. Moving parts can cause injury.
WARNING
Take care during this procedure. Sharp edges may be present that can cause injury.
CAUTION
Do not touch the exposed face of the printheads. Surface contamination or minor damage can
destroy the printhead.
NOTE: Rotate the wiper drive shaft, move the head maintenance wiper to the front of the lower
printheads. This is to provide protection during the procedure. Move the head maintenance
wiper back when the procedure is complete.
1. If possible print the initial test print pages, TP 1. These test pages are used to check the
print quality after the machine has been repaired. Refer to GP 37.
2. Remove upper printheads, REP 91.29.
1
Remove the e-clip and
pulley.
2
Remove 2 screws.
3
Disconnect harness.
4
Remove the motion
motor.
2
Ensure the cable sits in this slot.
1
Ensure the tab is located at the top left.
 Loading...


