February 2013
3-32
ColorQube® 9303 Family
IQ 8
Image Quality
IQ 8 Cross Process Ink Artifacts (Smudge) RAP
Use this RAP when the output has extra ink in localized areas in the cross process direction,
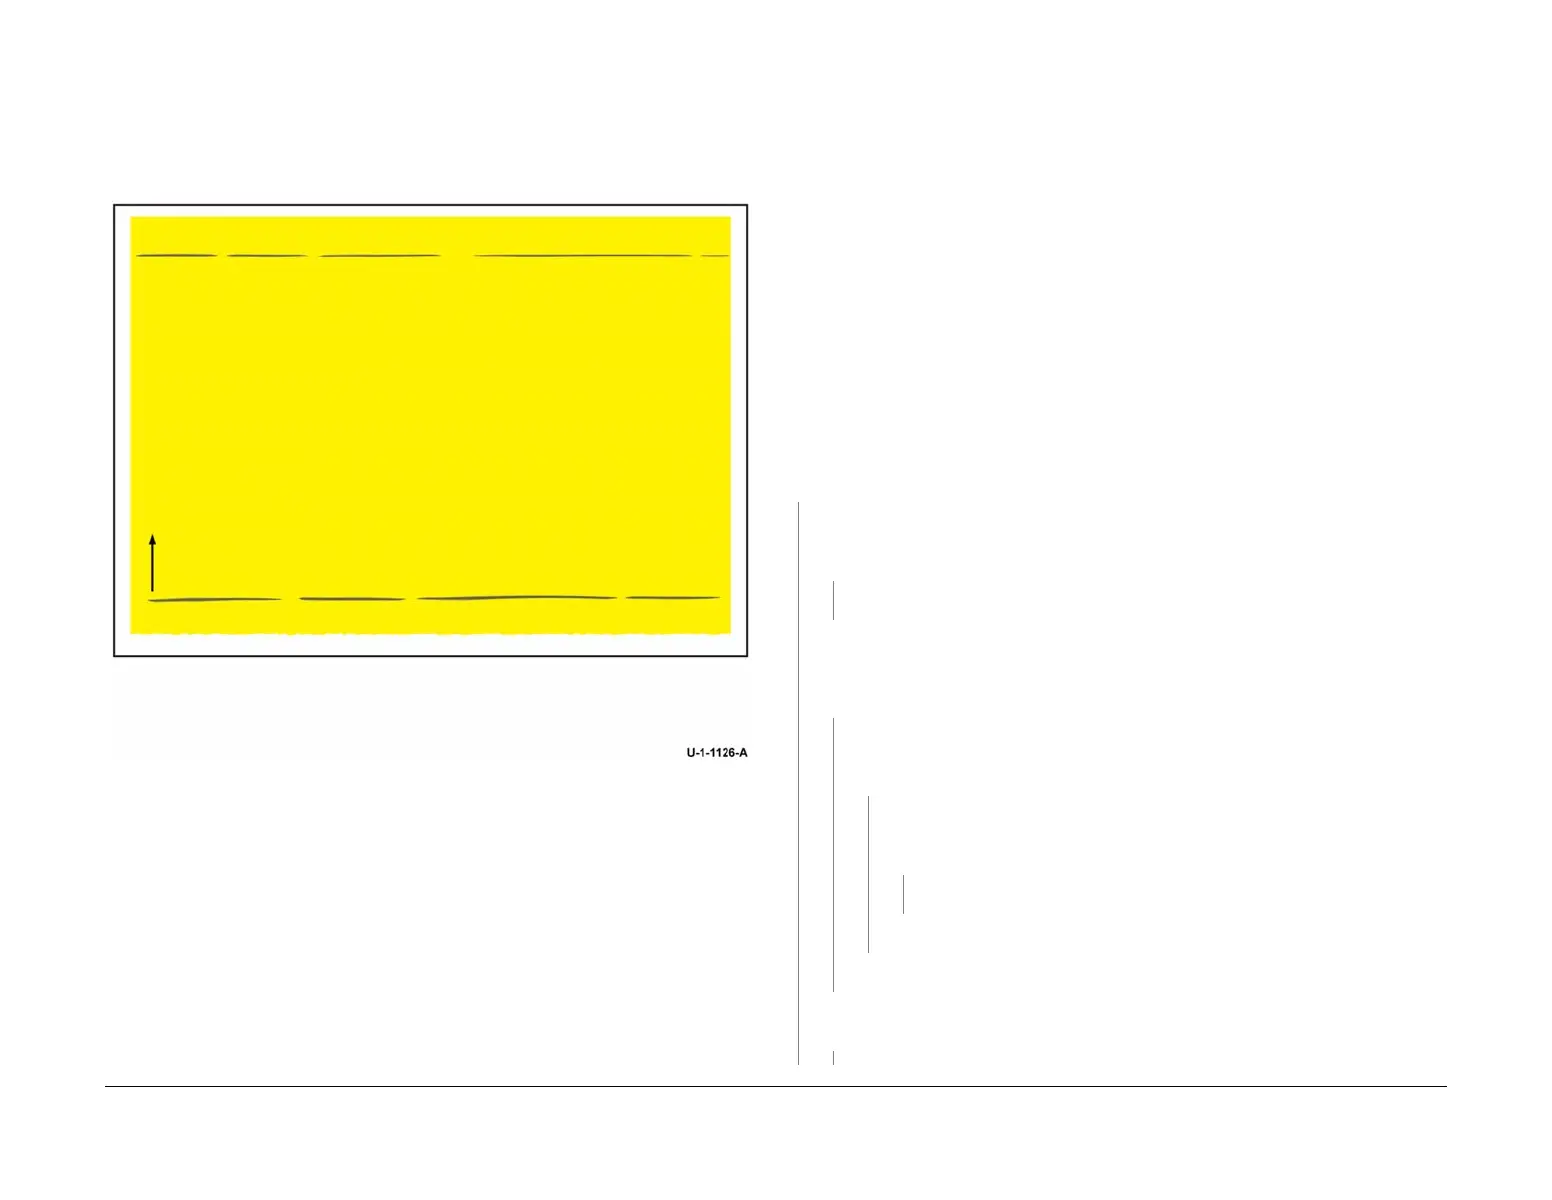
Figure 1.
Ensure IQ 1 Image Quality Entry RAP is performed before starting this RAP.
Figure 1 Cross process ink artifacts
Procedure
WARNING
Ensure that the electricity to the machine is switched off while performing tasks that do
not need electricity. Refer to GP 14. Disconnect the power cord. Electricity can cause
death or injury. Moving parts can cause injury.
WARNING
Take care during this procedure. The stripper blade is very sharp and can cause injury.
WARNING
Do not clean the stripper blade. The stripper blade is very sharp and can cause injury. If
the stripper blade is dirty a new blade must be installed.
WARNING
Take care during this procedure. Sharp edges may be present that can cause injury.
Open the stripper gate, GP 31. Inspect the drum stripper blade for ink accumulation.
NOTE: Occasionally, the combination of rough media, a high coverage image, and a long print
job creates a condition where stripper blade ink accumulation is unavoidable. Advise the cus
-
tomer to consider changing to smoother media.
Print three copies of TP 4 Yellow Solid Fill Test Pages (TP 2 to TP 10). The test pages are
good.
YN
Press the Machine Status button select the Fault tab on the UI and enter Current Mes-
sages. Check if the message ‘Cleaning unit life extended, image may be impacted’ is dis-
played. A different message is displayed.
YN
Install a new cleaning unit, PL 94.10 Item 21.
Open the front door and remove the inner cover. Enter dC959 and run the slow speed
exerciser. While this is running, check that the cleaning unit blade and roller are making
contact with the drum.
The cleaning unit blade and roller are making contact with
the drum.
YN
Check the front cam, PL 94.10 Item 9, rear cam, PL 94.10 Item 13, drive gear, PL
94.10 Item 23 and the cleaning unit motor, PL 94.10 Item 24
The components are
good.
YN
Install new components as necessary.
Perform dC969 Clean Ink Smears. Print three copies of TP 4 Yellow Solid Fill
Test Pages (TP 2 to TP 10).
The test pages are good.
YN
Install a new stripper blade assembly PL 10.12 Item 3.
Perform SCP 5 Final Actions.
Perform SCP 5 Final Actions.
Print TP 14 Drum Stripper Blade Test Print. The stripper blade releases between the
35 mm and the 50 mm mark.
YN
Install a new stripper blade solenoid, PL 10.10 Item 3.
A B
 Loading...


