February 2013
4-142
ColorQube® 9303 Family
REP 12.16-171, REP 12.17-171
Repairs/Adjustments
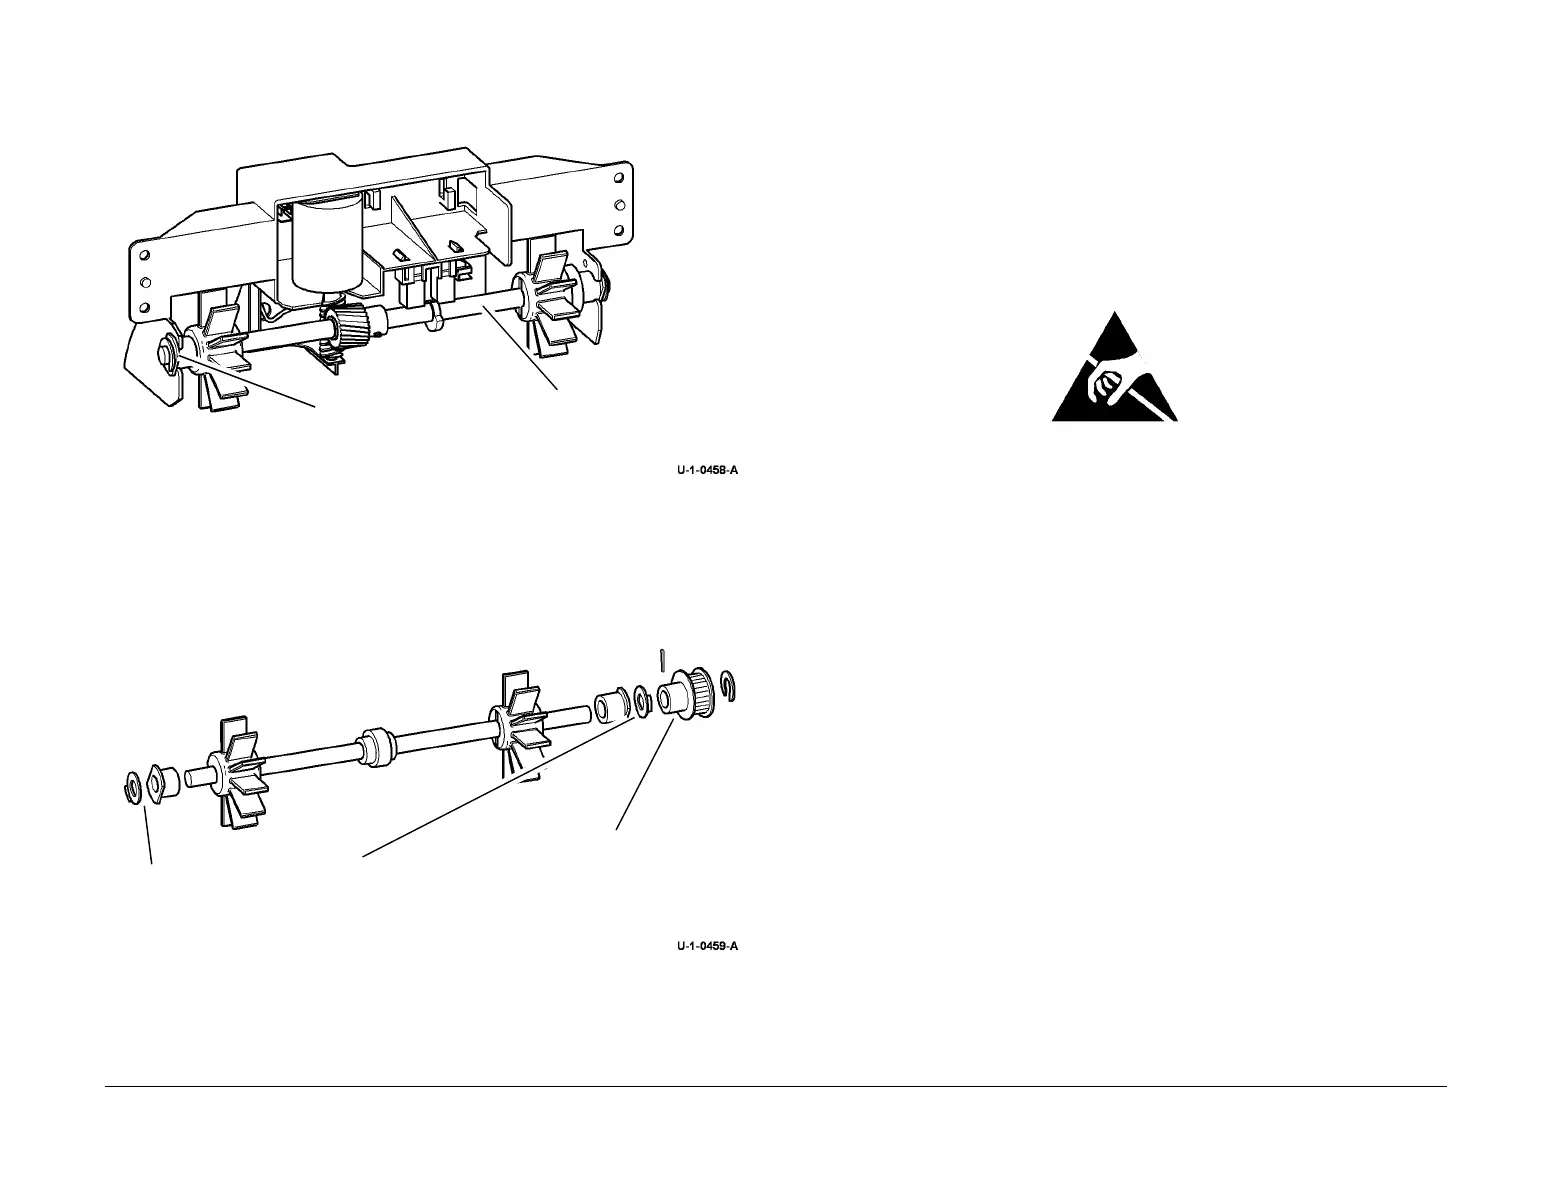
3. Figure 2, remove the BM flapper assembly.
Figure 2 BM flapper assembly removal
4. Figure 3, remove the BM flapper.
Figure 3 BM flapper removal
Replacement
The replacement is the reverse of the removal procedure.
REP 12.17-171 BM PWB
Parts List on PL 12.175.
Removal
WARNING
Take care during this procedure. Sharp edges may be present that can cause injury.
WARNING
Switch off the electricity to the machine GP 14. Disconnect the power cord from the cus-
tomer supply while performing tasks that do not need electricity. Electricity can cause
death or injury. Moving parts can cause injury.
Figure 1 ESD Symbol
CAUTION
Ensure that ESD procedures are observed during the removal and installation of the BM PWB.
1. Remove the top cover, then the rear cover, REP 12.1-171.
1
Remove the KL-clip and
the bearing.
2
Remove the BM flapper
assembly.
2
Remove the KL-clip, then
the bearing.
1
Remove the E-
clip, pin, then the
pulley.
3
Remove the KL-clip, then
the bearing.

 Loading...


