February 2013
4-377
ColorQube® 9303 Family
REP 91.31, REP 91.32
Repairs/Adjustments
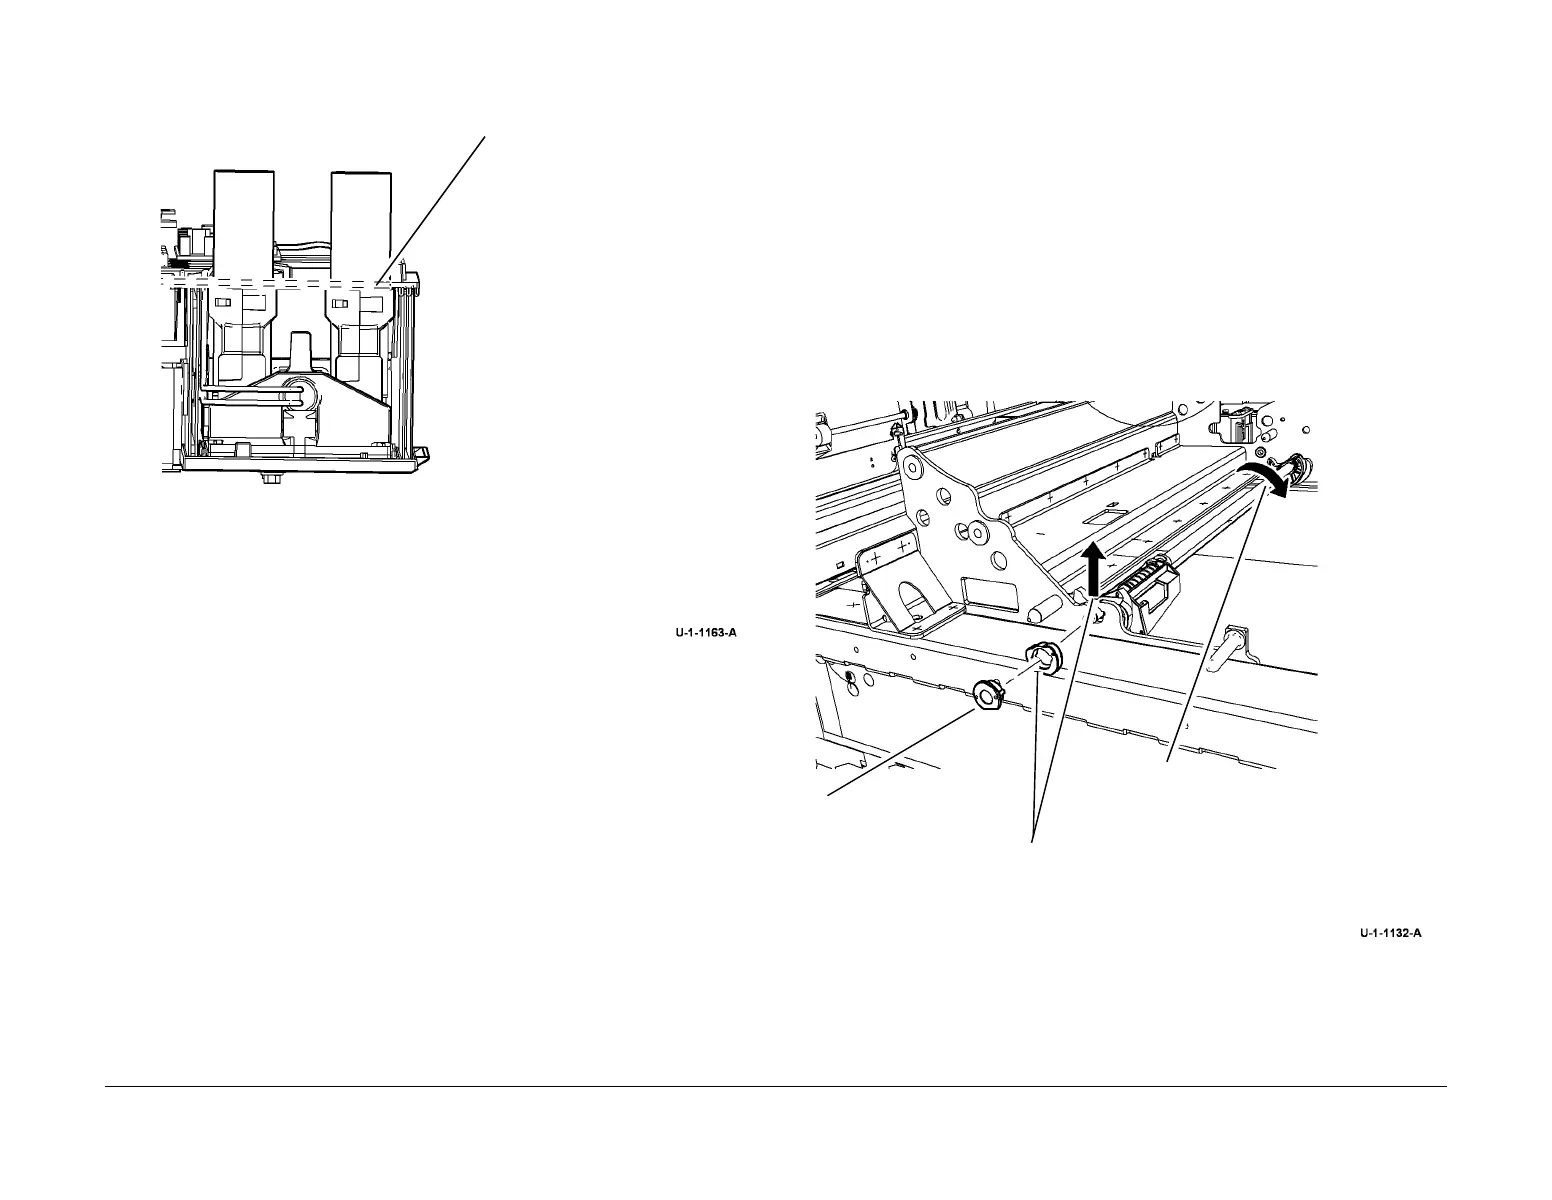
6. Ensure that the umbilicals are seated correctly, Figure 6.
Figure 6 Umbilical seating
7. Firmly tighten the screws on the umbilical clamp, failure to do so can result in ink leaks.
8. Ensure that both carriages are parked and the wiper is in the home position, all the way
up or down.
9. Ensure the harnesses are routed correctly, refer to GP 28.
CAUTION
Failure to properly prime the new umbilical will lead to permanent damage to the ink reservoir
and the new umbilical.
10. Power the machine directly into IME diagnostics mode, refer to GP 1. This will prevent the
thermals from warming up and delivering / pumping ink from the ink reservoir through the
umbilicals. When the machine has booted into IME diagnostics mode, log into diagnostics
and perform dC976 Ink Delivery Fault Recovery, to prime the umbilicals.
NOTE: If a new umbilical has been installed then run the routine a second time. A single
priming routine may not be sufficient in all cases.
11. Run the relevant diagnostic routines, refer to GP 37 Post Part Replacement Routines.
REP 91.32 Cleaning Unit Cam Shaft Assembly
Parts List on PL 94.10
Removal
WARNING
Switch off the electricity to the machine. Refer to GP 14. Disconnect the power cord
from the customer supply while performing tasks that do not need electricity. Electricity
can cause death or injury. Moving parts can cause injury.
WARNING
Take care during this procedure. Sharp edges may be present that can cause injury.
1. Open the front door.
2. Remove the inner cover, PL 81.11 Item 2.
3. Remove the cleaning unit, refer to REP 94.1.
4. Remove the cleaning unit cam shaft, Figure 1.
Figure 1 Cam shaft removal
Replacement
1. Replacement is the reverse of the removal procedure.
1
Ensure the top of the umbilical con-
nector is level with or slightly below
the top of the side insulation,
as shown by the dashed line.
1
Remove e-clip
and bearing.
2
Lift shaft at front until the front cam
clears the machine frame, then
remove the washer.
3
Pull outward and rotate until the drive
pin is released from the gear slot at
the rear.
 Loading...


