February 2013
4-58
ColorQube® 9303 Family
REP 5.19, REP 5.20
Repairs/Adjustments
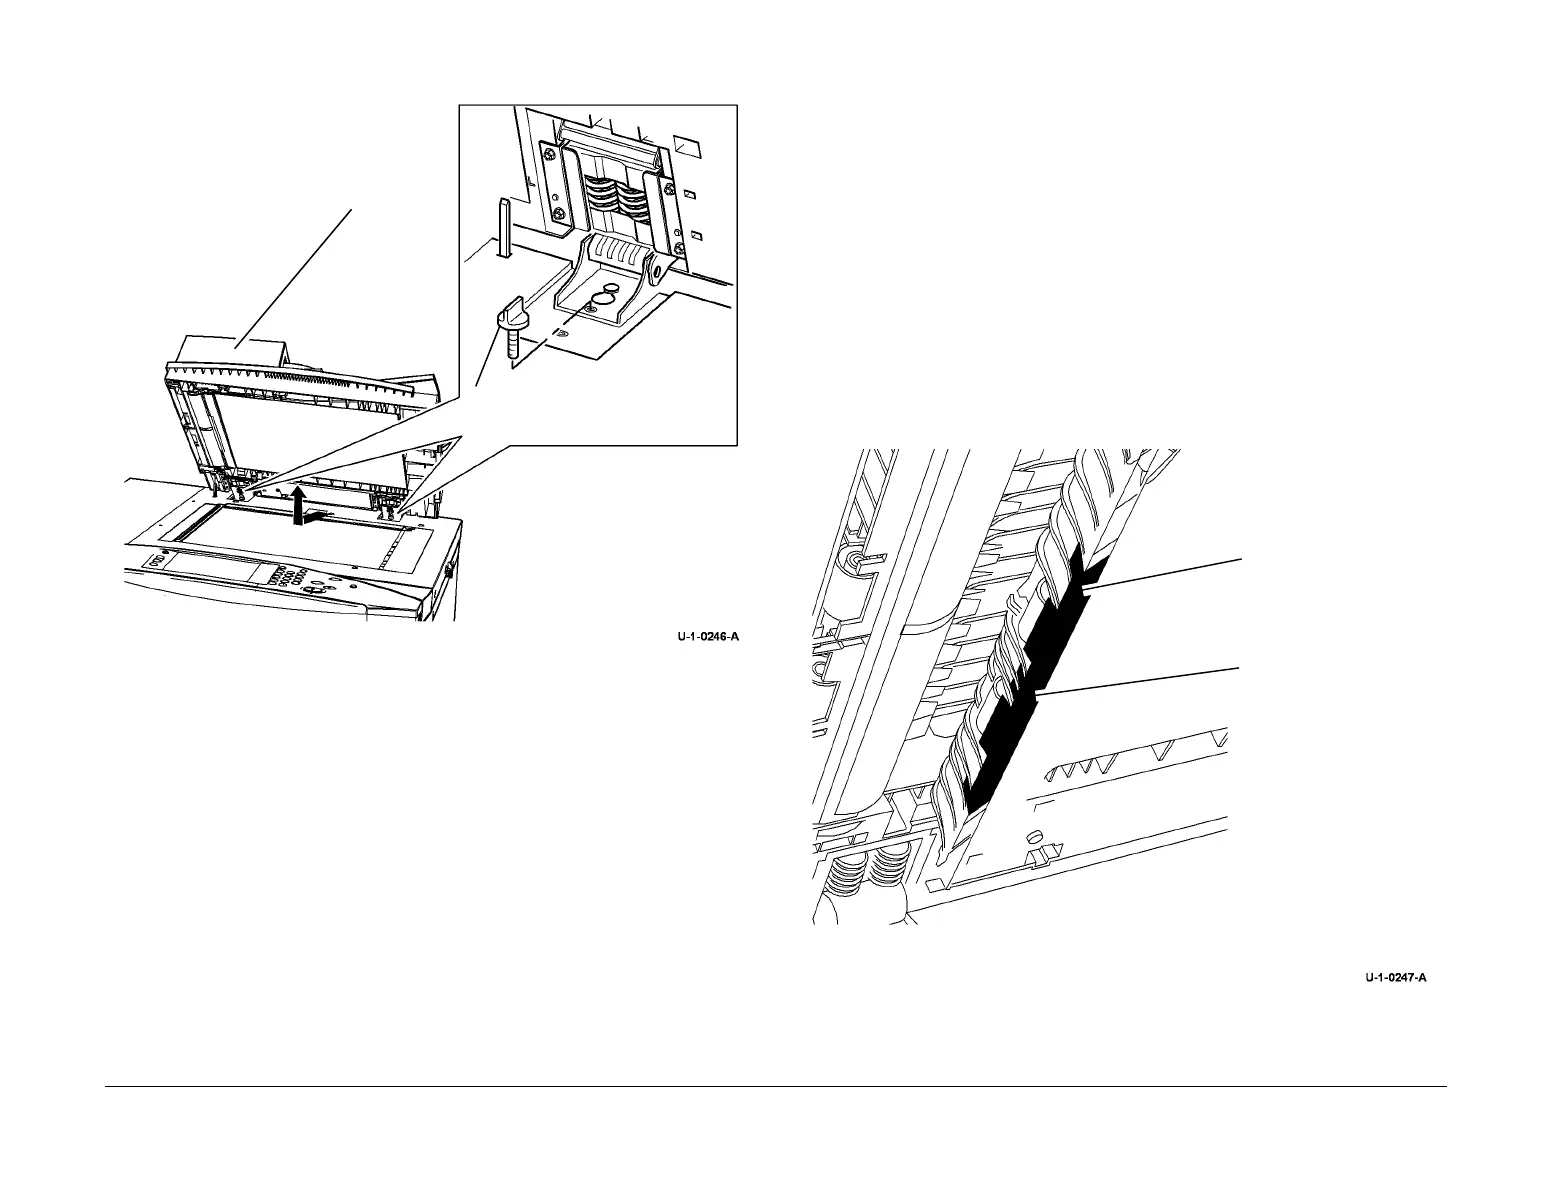
3. Remove the DADH from the machine, Figure 1.
Figure 1 DADH removal
Replacement
1. The replacement is the reverse of the removal procedure.
2. If a new DADH is installed, perform the steps that follow:
a. Attach the document pad, refer to ADJ 5.6.
b. Reset the DADH feed count to zero. Refer to dC135 CRU / HFSI Status.
c. DADH height adjustment, ADJ 5.2.
d. DADH registration adjustment, ADJ 5.5.
e. DADH skew adjustment, ADJ 5.3.
REP 5.20 Mylar Guide Strip
Parts List on PL 5.30
Removal
WARNING
Switch off the electricity to the machine. Refer to GP 14. Disconnect the power cord
from the customer supply while performing tasks that do not need electricity. Electricity
can cause death or injury. Moving parts can cause injury.
1. Raise the DADH.
2. Open the baffle assembly, PL 5.30 Item 14.
3. Remove the old mylar guide strip, PL 5.30 Item 12.
4. Use cleaning fluid to remove any contamination from the baffle assembly.
Replacement
1. Remove the 3 backing strips from the pressure sensitive adhesive tape on the mylar
guide.
2. Adhere the mylar guide to the baffle assembly, Figure 1.
Figure 1 Mylar guide
1
Remove 2 thumbscrews.
2
Remove
the DADH.
1
Bias the corner of the
mylar guide with the edge
of the baffle assembly.
2
Position the centre of the
mylar guide over the
centre rib.
 Loading...


