February 2013
6-123
ColorQube® 9303 Family
GP 47
General Procedures/Information
GP 47 Remote Diagnostics
Purpose
To show how to remotely log onto the machine and use diagnostics.
Procedure
1. Before starting this procedure, contact the customer to check that remotely accessing the
machine is convenient. Also ask the customer for the IP address of the machine.
NOTE: The IP address of the machine is printed on the configuration report.
It may also be necessary to get access to the machine through the customers firewall.
This procedure may be OPCO dependent. Contact your local OPCO.
2. Make sure that remote diagnostic login is enabled. Perform the following:
a. Open a web browser. Enter the machine’s IP address in the web browser Address
field, then press the enter key. The machine’s web page will open.
b. Select Support.
c. Select Remote Control Panel, then Edit.
d. In the Login window, enter the User Name ‘admin’ (case sensitive) and the Pass-
word ‘1111’ (default setting). Click Login.
e. In the Enablement window, select Enable, then For Admin and Diagnostic Users
Only. Click on Save.
NOTE: . Remote UI is disabled by default.
f. To prevent a local user overriding remote selections, in the Access window, select
Block Local Control Panel (user can only observe).
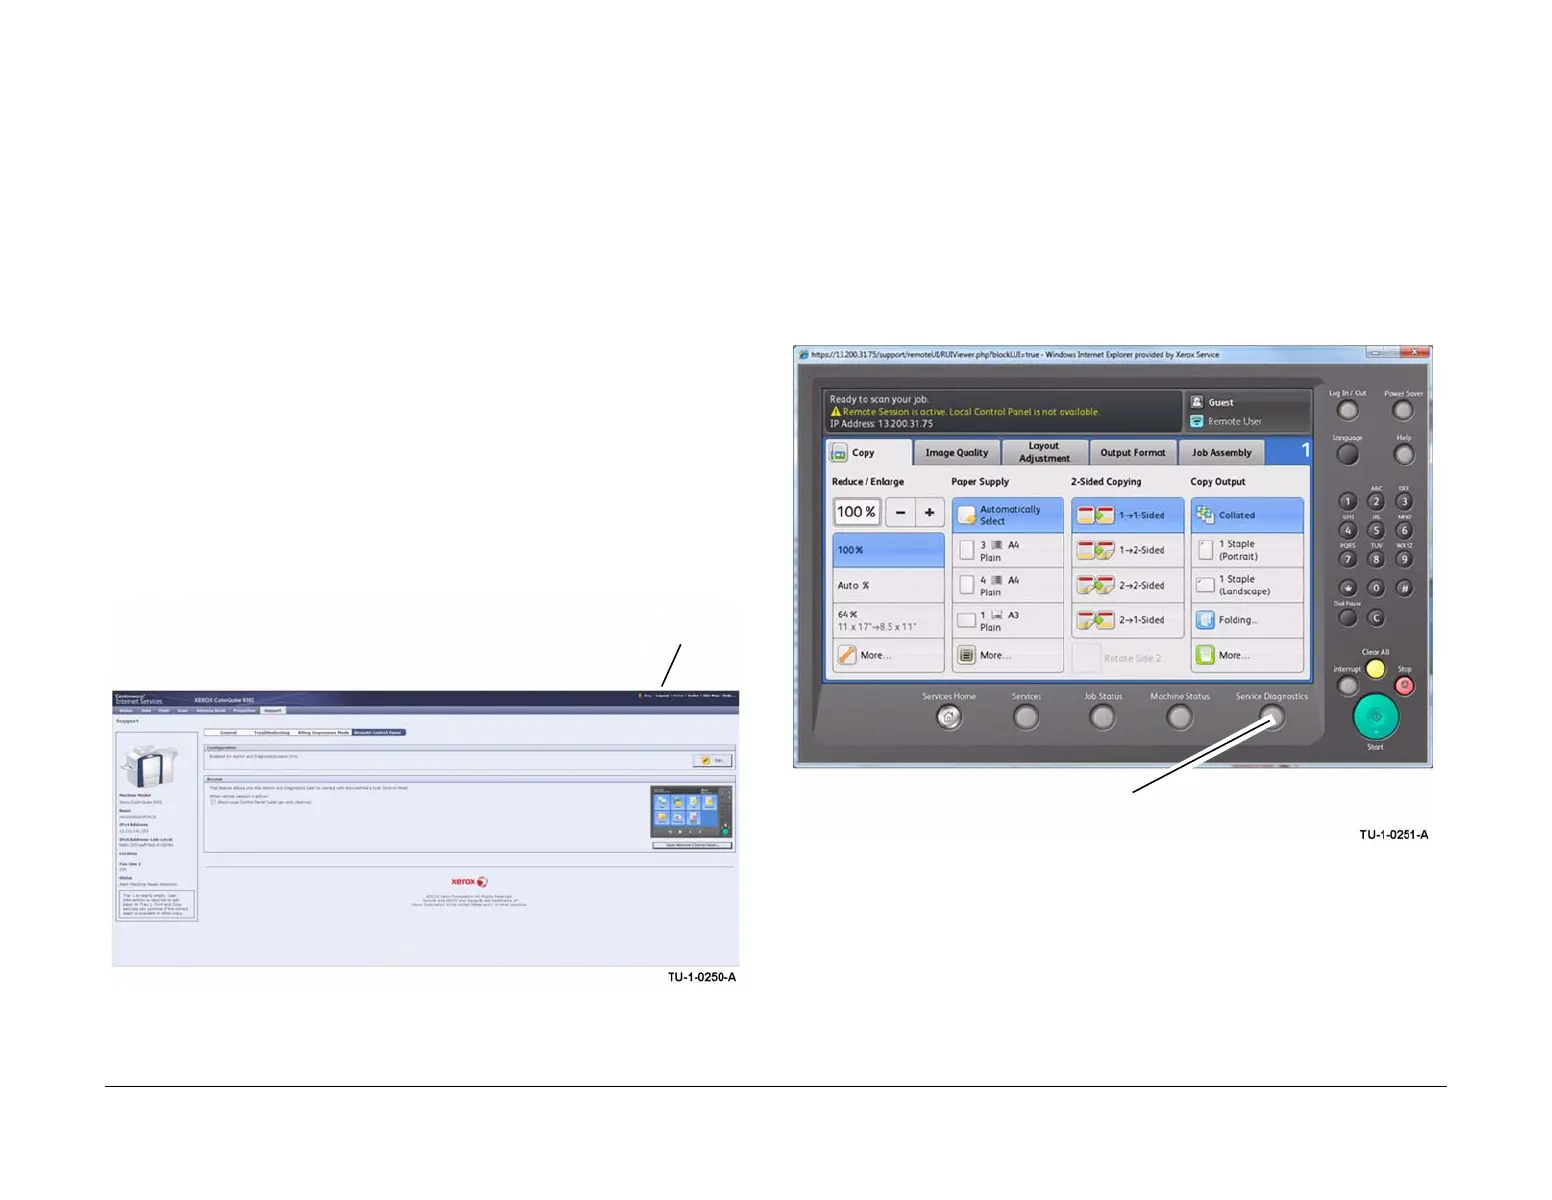
g. Select Logout, Figure 1. In the Logout window, click on Logout.
Figure 1 Logout / Login
3. Access remote diagnostics. Perform the following;
a. Select Login, Figure 1.
b. In the Login window, enter the User Name ‘diag’ (case sensitive) and the Password
‘3424’. Select Login.
c. Select Support.
d. If necessary enable the Remote Control Panel
e. Select Remote Control Panel.
f. To prevent a local user overriding remote selections, in the Access window, select
Block Local Control Panel (user can only observe). Click on Open Remote Control
Panel.
g. The remote UI will now open and a Service Diagnostics button is available on the
remote UI, Figure 2.
NOTE: The message ‘Remote session is active’ is displayed to inform local users
that the machine is being accessed remotely.
Figure 2 Service Diagnostics button
h. Click on Service Diagnostics. In the Login window, enter the passcode ‘1991’. Select
Enter.
i. The machine will enter diagnostics (Service Mode). All diagnostic functions are
available, refer to GP 1 Service Mode.
j. To exit Service Mode, select Call Closeout, then Exit.
NOTE: . If the remote UI session is closed without exiting diagnostics, the machine
will remain in diagnostics and the remote UI will not be accessible.
k. Close the remote UI window.
l. Select Login, Figure 1. In the Logout window, click on Logout.
Logout /
Login
Service Diagnostics button
 Loading...


