February 2013
4-251
ColorQube® 9303 Family
REP 62.7
Repairs/Adjustments
REP 62.7 Scan Cables
Parts List on PL 62.16
Removal
WARNING
Switch off the electricity to the machine. Refer to GP 14. Disconnect the power cord
from the customer supply while performing tasks that do not need electricity. Electricity
can cause death or injury. Moving parts can cause injury.
WARNING
Take care during this procedure. Sharp edges may be present that can cause injury.
1. Remove the scan carriage, REP 62.5.
2. Remove the scan motor cover, (2 screws).
3. Slide the cables off the pulleys or capstan.
4. Remove the springs and lift out the cables.
Replacement
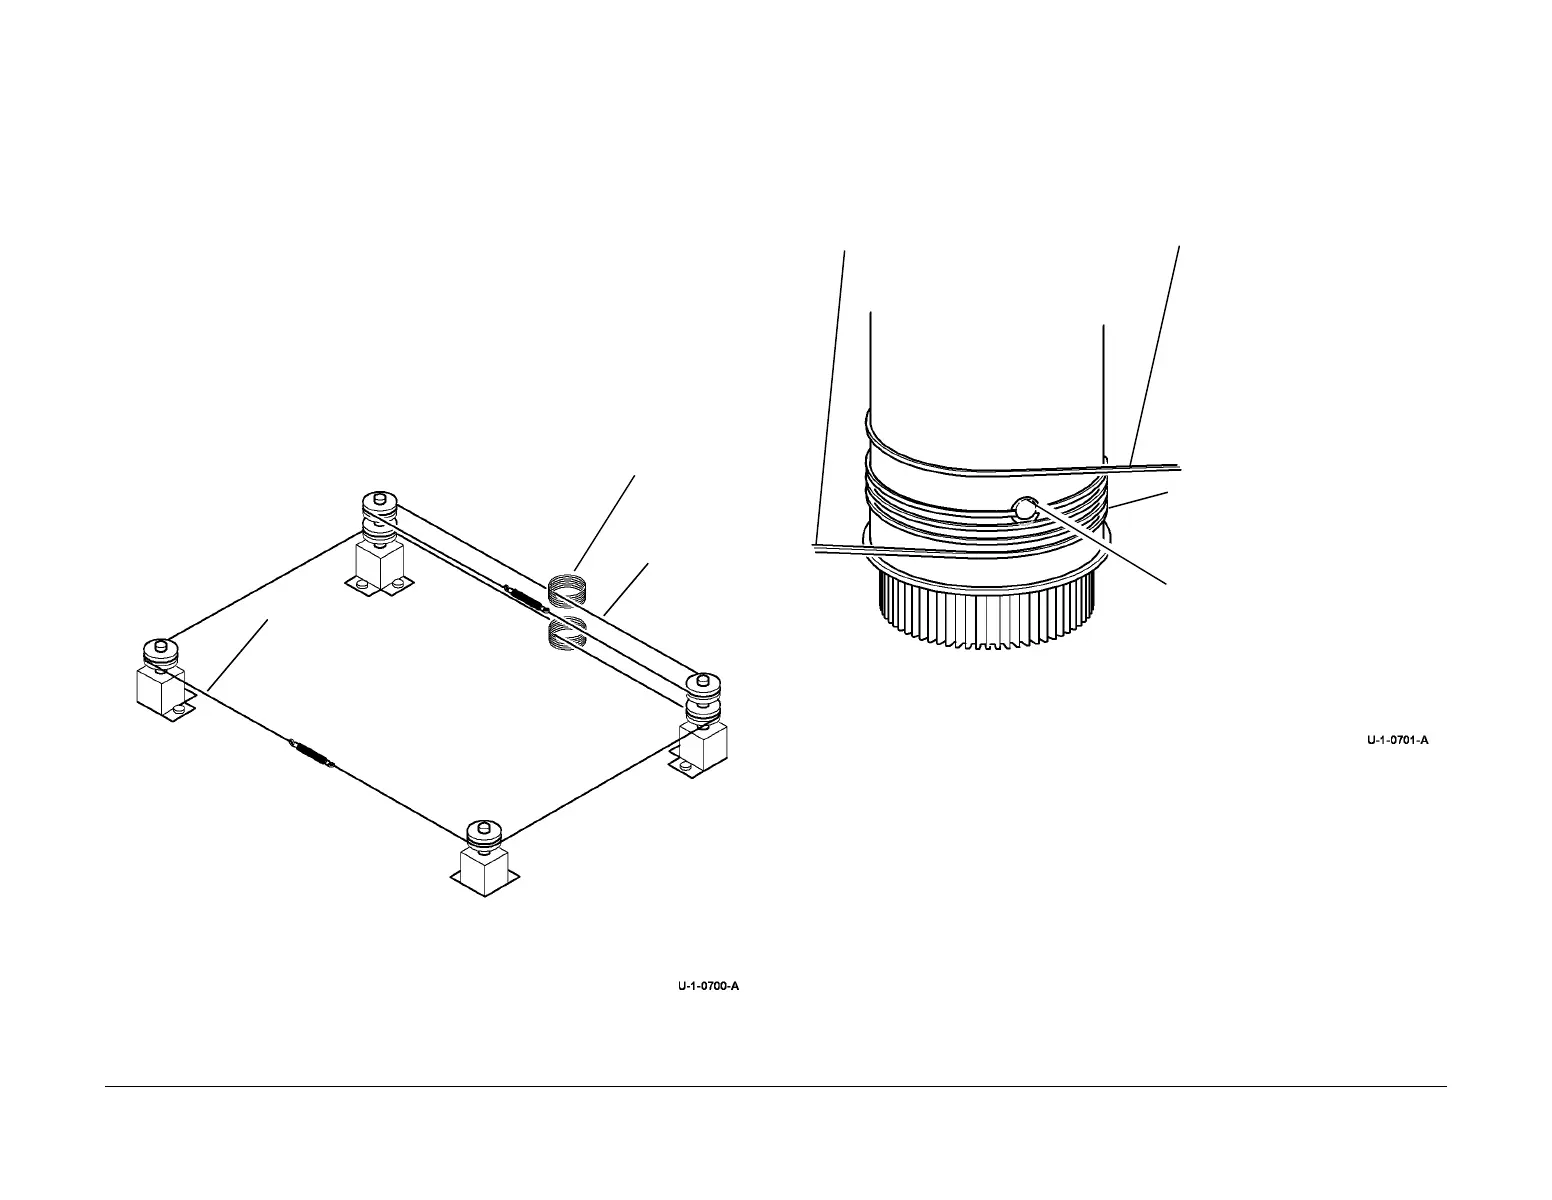
1. Figure 1 shows the general arrangement of the scan cables, when correctly installed.
Figure 1 Scan cable arrangement
2. Figure 2. Prepare to install the lower scan cable.
NOTE: The lower scan cable is black and is longer than the upper scan cable.
NOTE: The anchor ball is not installed centrally on the scan cables.
NOTE: To assist in holding the scan cables in position, use adhesive tape.
Figure 2 Mount lower scan cable on the capstan
6 turns on
each cable.
Upper scan
cable.
Lower scan cable.
Note that the springs are in
the same relative position.
2
Wind three turns below the anchor
point on the capstan.
1
Install the anchor ball in the anchor
point.
3
Use adhesive tape to secure the anchor ball in the anchor point.
longer, black cable.
short end.
long end.

 Loading...


