February 2013
4-68
ColorQube® 9303 Family
REP 10.6
Repairs/Adjustments
REP 10.6 Transfix Blade
Parts List on PL 10.20
Removal
WARNING
Switch off the electricity to the machine. Refer to GP 14. Disconnect the power cord
from the customer supply while performing tasks that do not need electricity. Electricity
can cause death or injury. Moving parts can cause injury.
WARNING
Take care during this procedure. Sharp edges may be present that can cause injury.
CAUTION
Do not hit the drum. Use care when you are working near the drum. The drum can be damaged
easily, which will cause print quality defects.
1. Open the front door.
2. Remove the inner cover, PL 81.11 Item 2.
3. Open the stripper gate, GP 31.
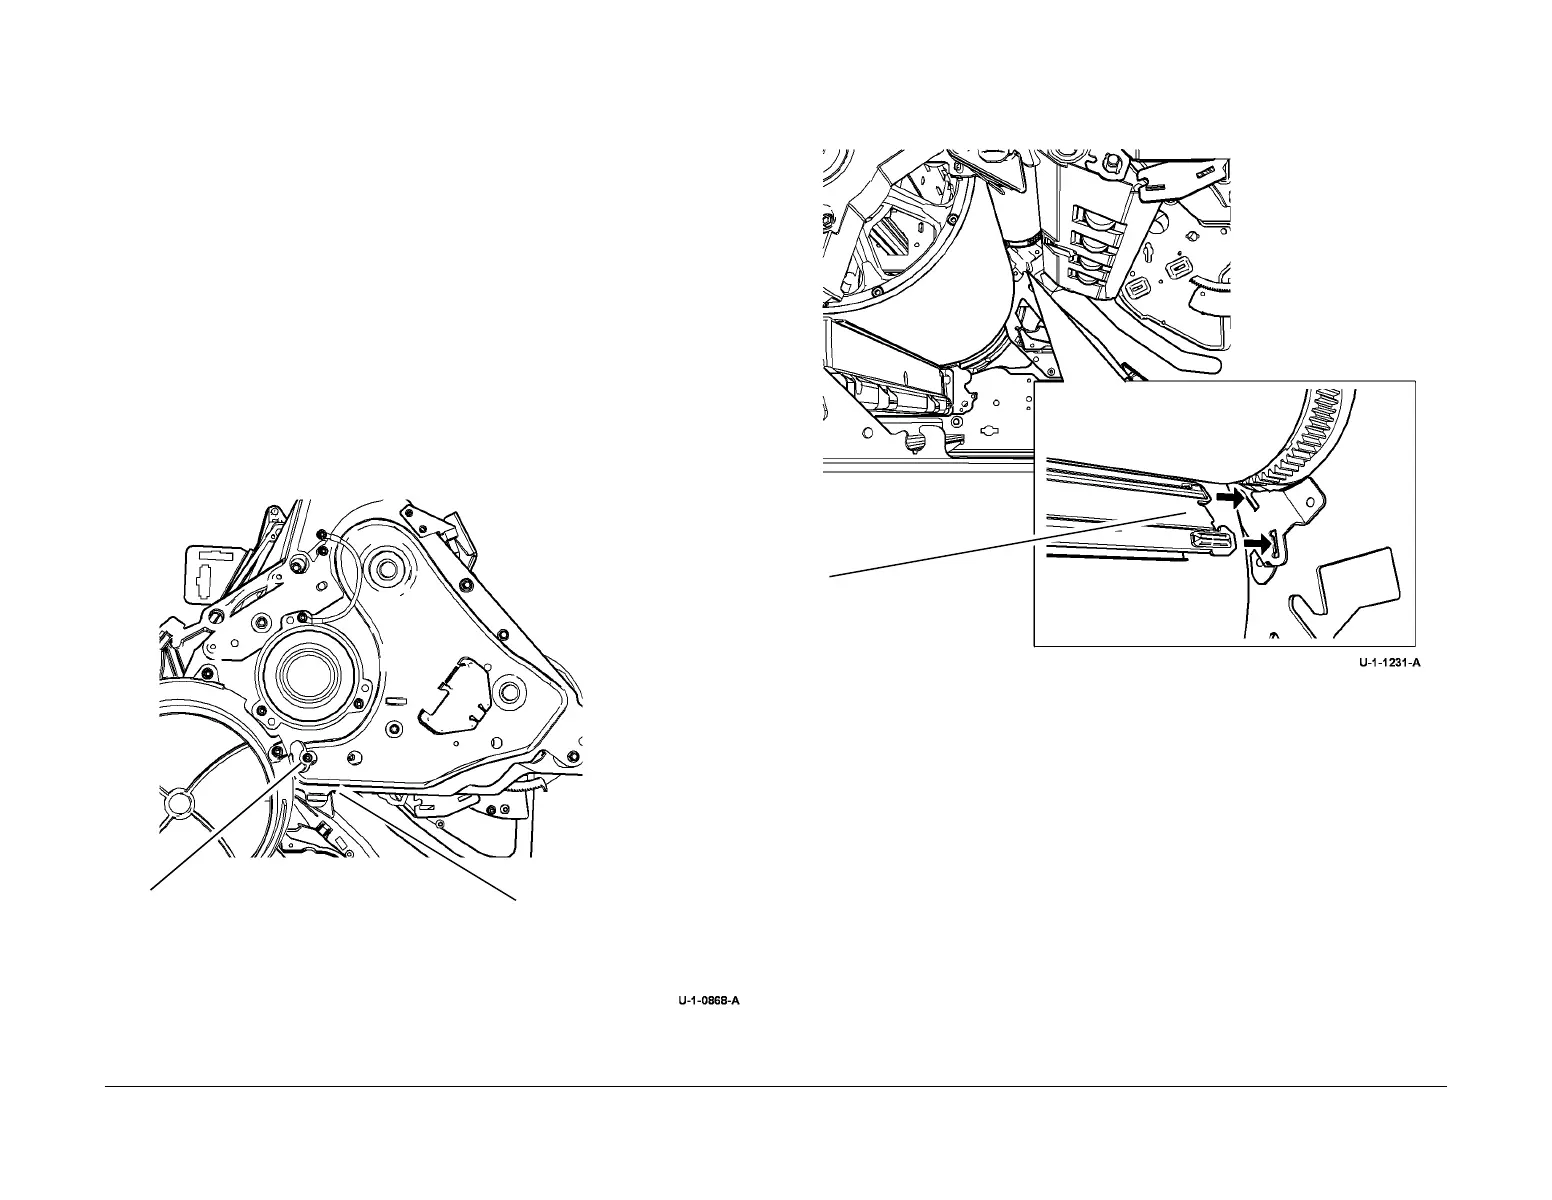
4. Remove the transfix blade, Figure 1.
Figure 1 Transfix blade removal
Replacement
1. Insert the transfix blade into the machine, Figure 2.
Figure 2 Transfix blade replacement
2. Raise the front of the transfix blade until it interfaces with the pins in the front machine
frame.
CAUTION
Be careful when the self tapping screw is installed into a plastic component. Do not over
tighten.
3. Install the screw removed in Figure 1.
4. Close the stripper gate, GP 31.
5. If a new transfix stripper assembly is installed, reset the transfix stripper count to zero.
Refer to dC135 CRU / HFSI Status.
1
Remove the screw.
2
Remove transfix blade by
pulling it down.
1
Insert the tabs on the transfix
blade into the slots on the
machine frame
 Loading...


