February 2013
3-53
ColorQube® 9303 Family
IQ 14
Image Quality
IQ 14 Some Colours Uneven RAP
Use this RAP to troubleshoot the following defects:
• Light lines in the process direction
• Dark lines in the process direction
• Light discolouration in wide bands across a whole printhead in the process direction
• Dark discolouration in wide bands across a whole printhead in the process direction
• Discolouration in a single colour primary across the whole page
• Banding in the process direction
Ensure IQ 1 Image Quality Entry RAP is performed before starting this RAP.
Initial Actions
• Enter the customer administration tools, GP 5. On the Tools tab select Troubleshooting
then Automatic Light Lines Fix. Set Quick Fix to On. Set Full Fix to Eco Fix.
NOTE: Ensure that the customer’s Automatic Light Lines and Full Fix settings are
restored to the original settings when the image quality defect has been corrected.
Procedure
WARNING
Ensure that the electricity to the machine is switched off while performing tasks that do
not need electricity. Refer to GP 14. Disconnect the power cord. Electricity can cause
death or injury. Moving parts can cause injury.
CAUTION
Use care when moving the marking unit into the service position when hot. Ink can spill from
the ink reservoir located at the back of the unit if opened with too much force. Cross-colour ink
contamination could also occur.
CAUTION
Do not touch the exposed face of the printheads. Surface contamination or minor damage can
easily make the printhead unusable.
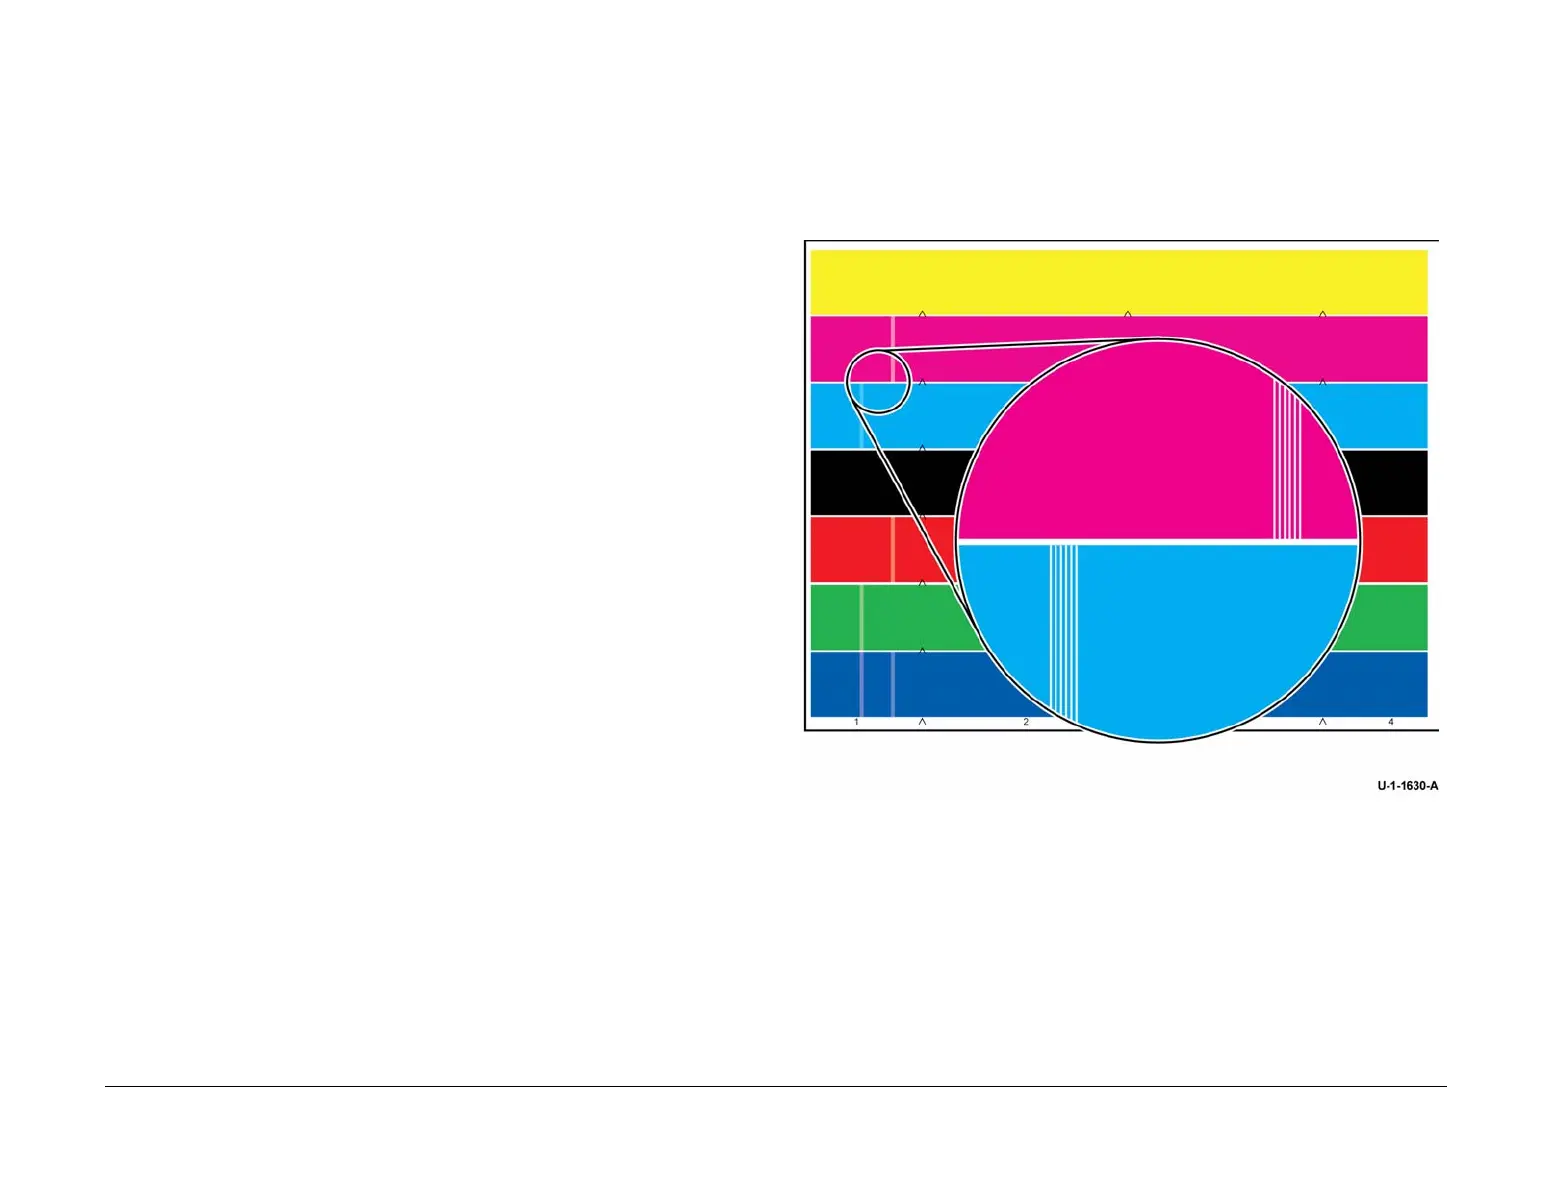
Evaluate the colour bands test page, TP 26. Check for the following defects:
• Light lines in the process direction in a primary colour with corresponding light lines in
secondary colours, Figure 1. Distinct parallel lines, often in groups of six lines, within a
single primary colour and the corresponding secondary colours. If observed, go to the
Missing Jet Checkout.
• Dark lines in the process direction in a primary colour with corresponding dark lines in
secondary colours, Figure 3. Distinct parallel lines, often in groups of six lines, within a
single primary colour and the corresponding secondary colours. If observed, go to the Ink
Mixing at the Printhead Faceplate Checkout.
• Dark discolouration in wide bands across a whole printhead in the process direction, Fig-
ure 4. Uniform dark discolouration across a whole printhead. If observed, go to Ink Mixing
in the Printhead or in the Ink Melt Reservoir Checkout.
• Discolouration across the whole page, Figure 5. Uniform discolouration in a single colour
across the whole page. If observed, go to Ink Mixing in the Printhead or in the Ink Melt
Reservoir Checkout.
• Light discolouration in wide bands across a whole printhead in the process direction, Fig-
ure 5. Uniform light discolouration across a whole printhead. If observed, go to Ink Mixing
in the Printhead or in the Ink Melt Reservoir Checkout.
• Banding in the process direction. Faded bands in the process direction across all colours,
Figure 6 or visible as coloured bands on single colour dithers, Figure 7. If observed, go to
the Banding Checkout.
• If the defect is apparent in all four primary colours, go to the IQ 13 Uneven in All Colours
RAP. If the colours are spatially uniform but incorrect, go to the IQ 15 Wrong Colour RAP.
Figure 1 Missing jet example

 Loading...


