February 2013
4-381
ColorQube® 9303 Family
REP 91.34, REP 91.35
Repairs/Adjustments
CAUTION
Take care not to insert the screw driver handle too far into the drum as damage to the heater
may occur.
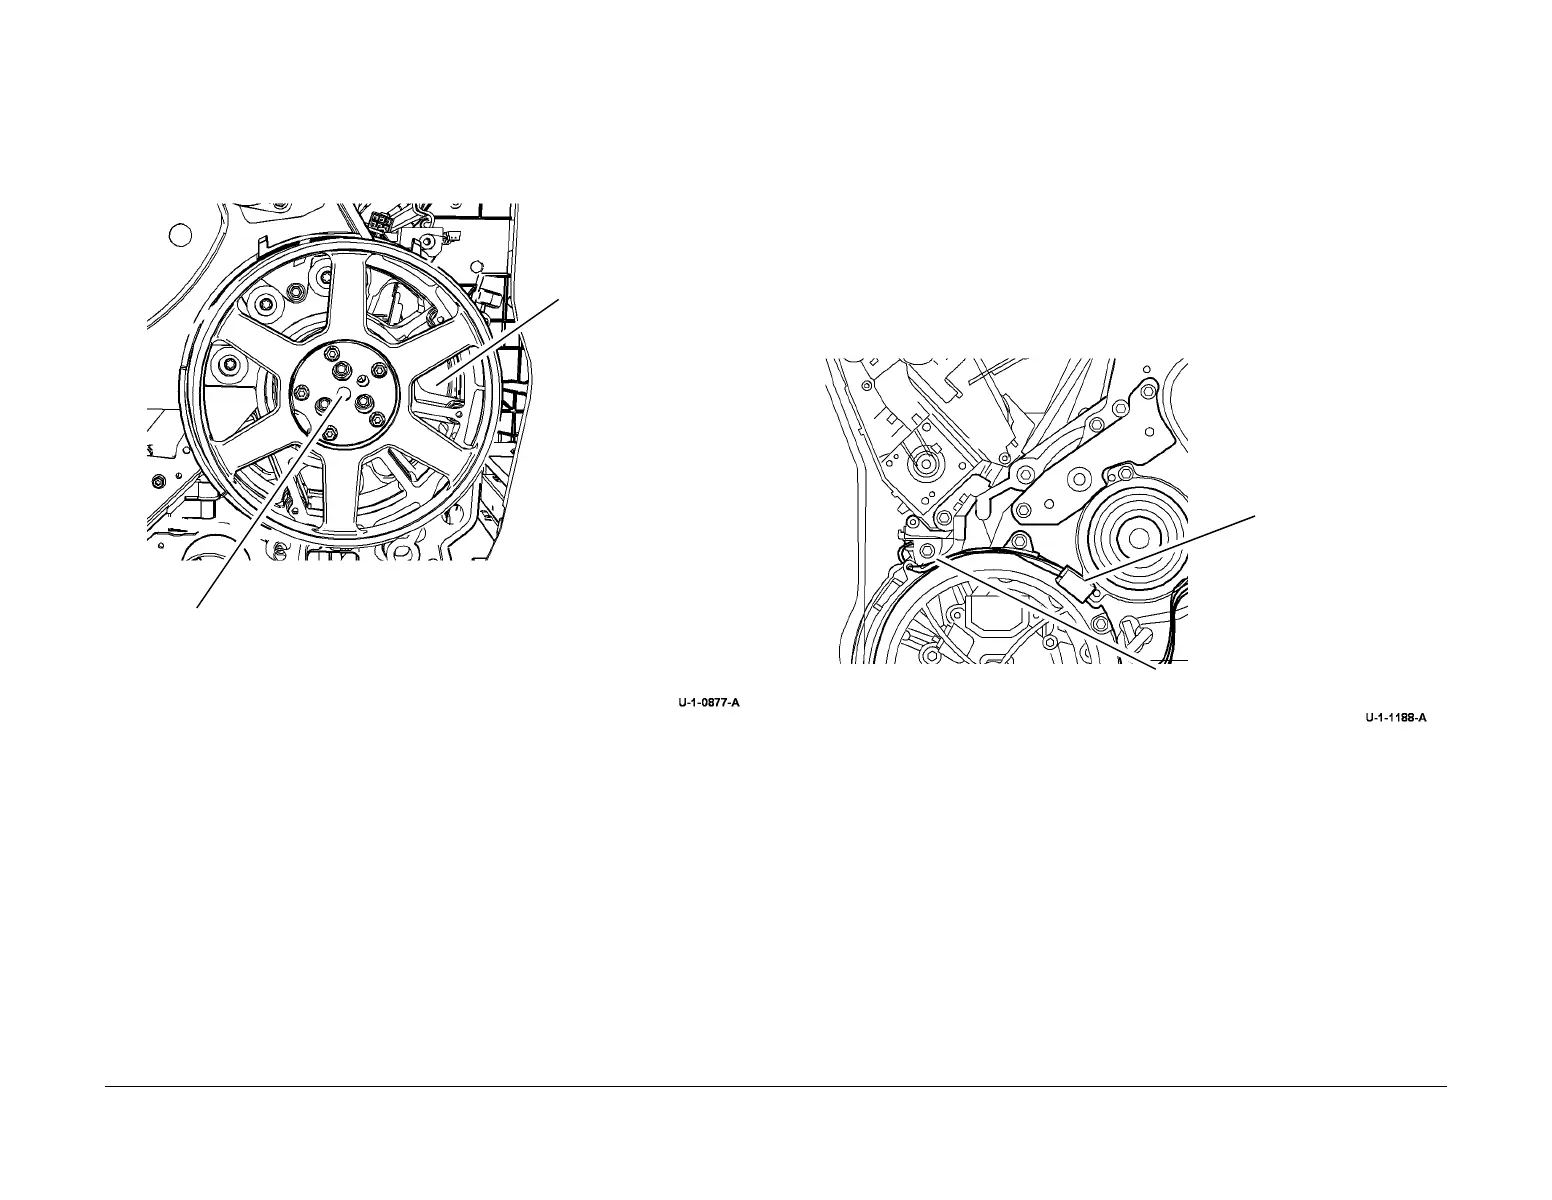
7. Remove the drum pulley, Figure 3.
Figure 3 Drum pulley removal
Replacement
1. Replacement is the reverse of the removal procedure.
2. If a new drum pulley is to be installed, remove the 5 securing screws, plate and T30 screw
from the old drum pulley, then install them onto the new drum pulley.
3. Ensure the guide pin is at 12:00.
CAUTION
Do not force the pulley on. If there is any resistance, remove the pulley and start again. The
pulley must go on smoothly.
4. Ensure the pulley centre is straight, then push evenly into the machine until it is almost
flush with the assembly.
5. Finish seating the pulley by tightening the T30 centre screw.
6. Secure the pulley with the 3 long screws.
7. Remove the 5 securing screws, plate and T30 screw from the drum pulley for future use.
8. Run the relevant diagnostic routines, refer to GP 37 Post Part Replacement Routines.
REP 91.35 Front and Rear Drum Thermistor
Parts List on PL 94.20
Removal
WARNING
Switch off the electricity to the machine. Refer to GP 14. Disconnect the power cord
from the customer supply while performing tasks that do not need electricity. Electricity
can cause death or injury. Moving parts can cause injury.
WARNING
Take care during this procedure. Sharp edges may be present that can cause injury.
1. Remove the inner cover, PL 81.11 Item 2.
2. Remove the front drum thermistor, Figure 1.
Figure 1 Front thermistor
3. Remove the rear cover, PL 81.10 Item 1.
1
Insert a screwdriver han-
dle to prevent the drum
pulley from rotating when
turning the centre screw.
See CAUTION
2
Support the drum pulley.
3
Use the T-handle T30 driver to
unscrew the centre screw. Thread
resistance increases as the drum
pulley is released.
1
Disconnect harness
2
Remove securing screw
 Loading...


