February 2013
4-102
ColorQube® 9303 Family
REP 12.4-110
Repairs/Adjustments
REP 12.4-110 Paper Output Drive Belt and Transport Motor
2
Parts List on PL 12.60.
Removal
WARNING
Switch off the electricity to the machine. Refer to GP 14. Disconnect the power cord
from the customer supply while performing tasks that do not need electricity. Electricity
can cause death or injury. Moving parts can cause injury.
WARNING
Take care during this procedure. Sharp edges may be present that can cause injury.
1. Remove the LCSS rear cover, REP 12.1-110.
2. Remove the intermediate drive belt, REP 12.3-110.
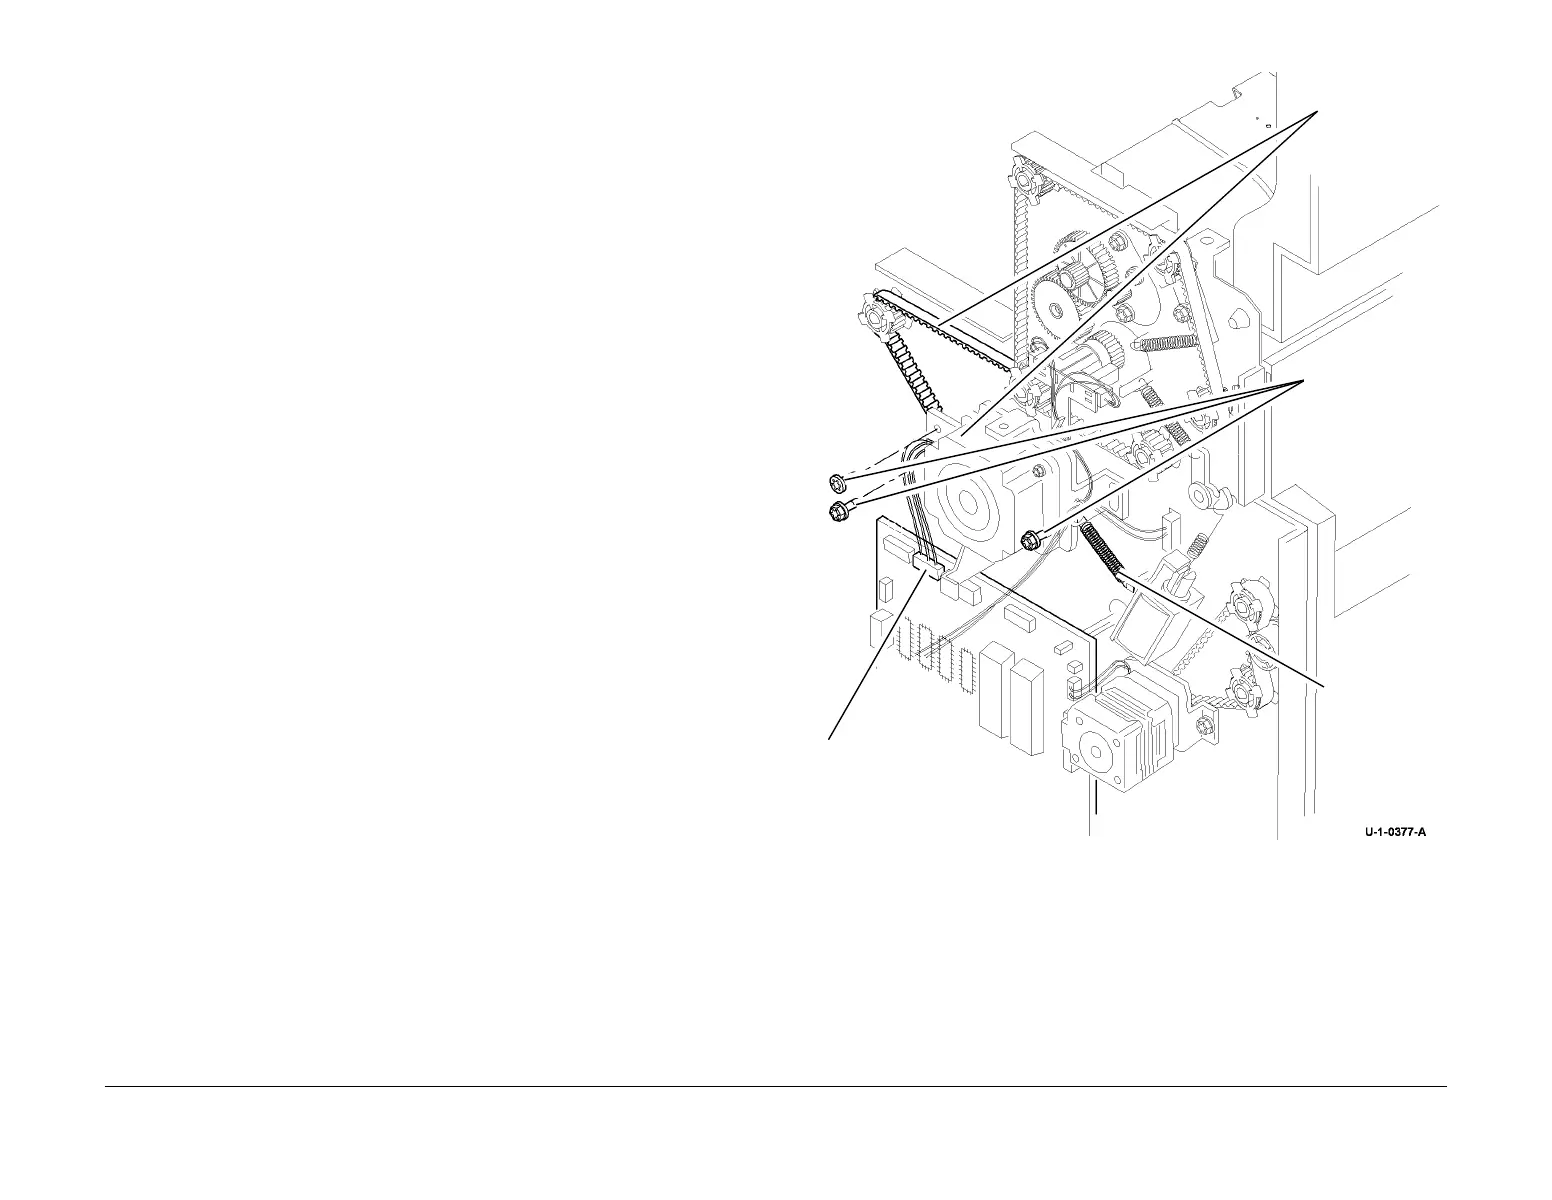
3. Remove the output drive belt and motor, Figure 1.
Figure 1 Removing the drive belt
Replacement
1. Install the belt over the pulleys.
2. Install the motor pivot shouldered screw and fully tighten.
3. Install the two motor mounting bracket securing screws but do not tighten them.
4. Install the belt tensioner spring.
5. Rotate the belt by hand to allow the spring to tension the belt, ADJ 12.4-110. Tighten the
screws.
6. Install the intermediate drive belt, REP 12.3-110.
7. Install the LCSS rear cover, REP 12.1-110.
3
Support the moto
and remove three
screws.
4
Remove the
motor and
belt.
1
Disconnect PJ309.
2
Remove the
belt tensioner
spring.
 Loading...


