February 2013
4-359
ColorQube® 9303 Family
REP 91.24, REP 91.25
Repairs/Adjustments
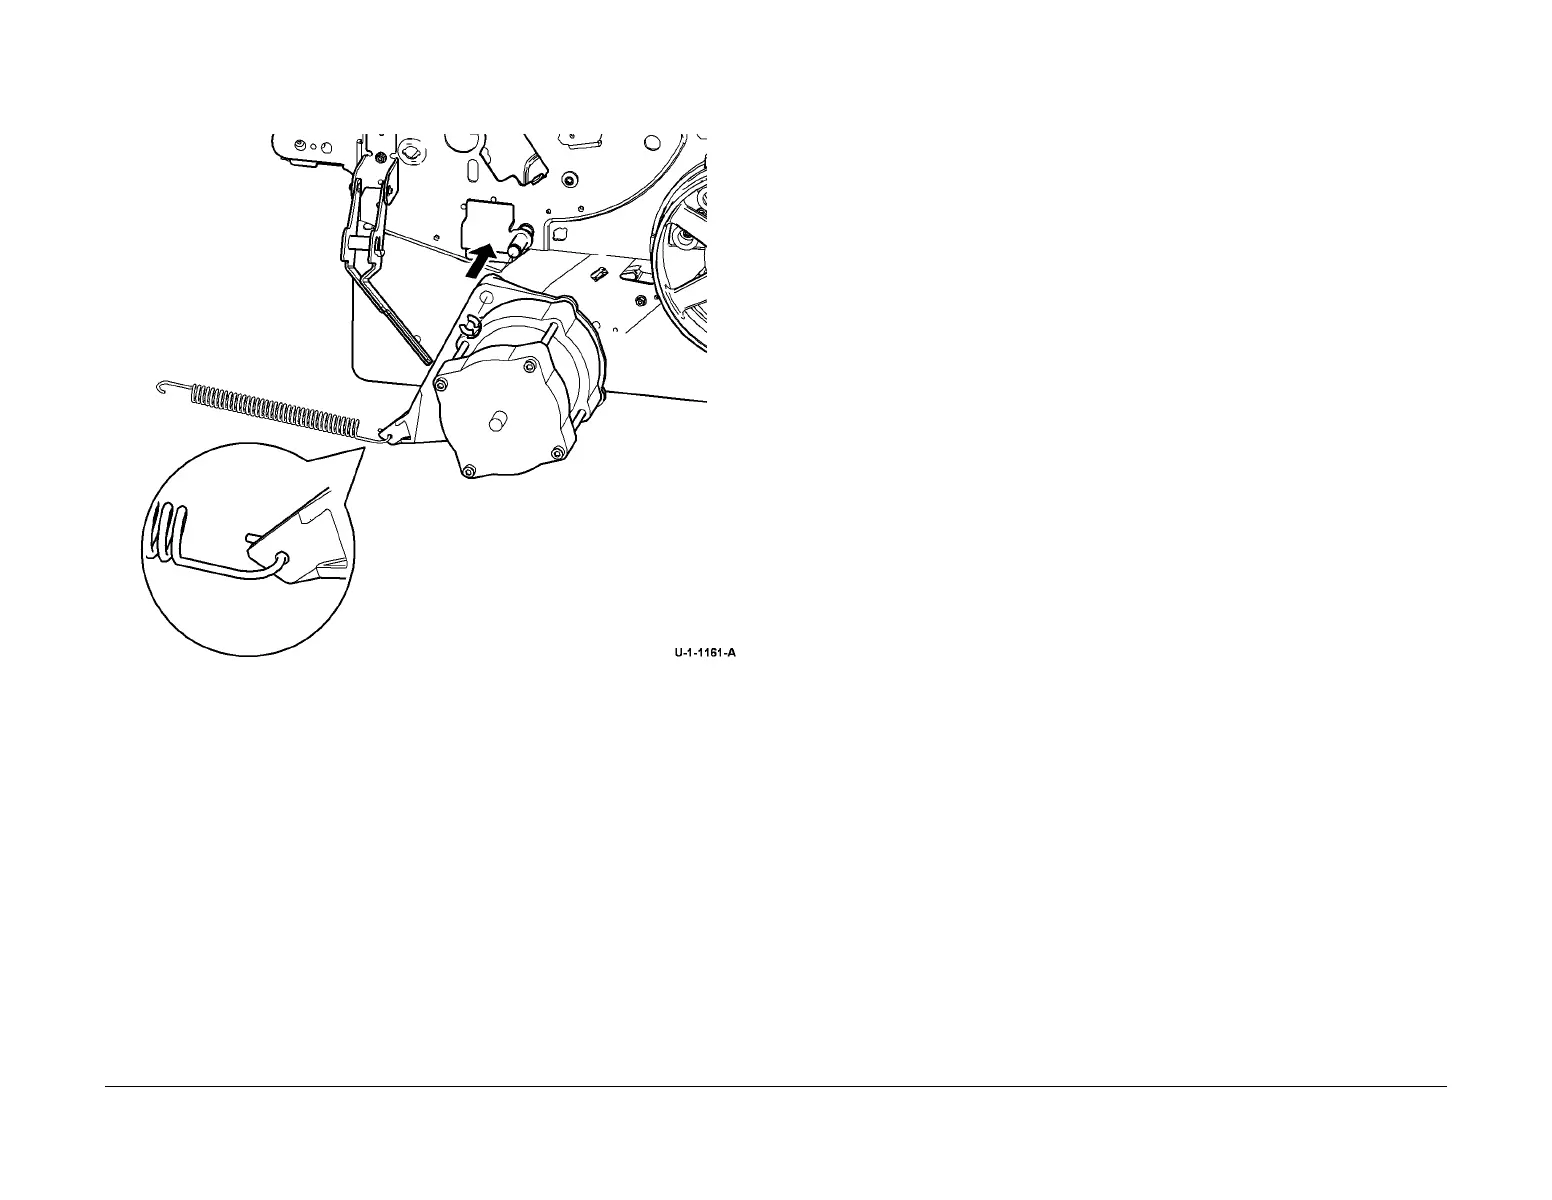
3. When installing the motor, first rotate it counter clockwise before pushing onto the shaft.
Refer to Figure 4.
Figure 4 Motor installation
CAUTION
Ensure that the inside surface of the drive belt does not become contaminated with oil, ink or
paper debris during removal or installation. Clean the drive belt as necessary, refer to GP 27.
4. Ensure the ribbed side of the belt faces inward when replacing it.
5. Check when tensioning the drive belt not to trap or damage the adjacent wiring harness.
6. Run the relevant diagnostic routines, refer to GP 37 Post Part Replacement Routines.
REP 91.25 Drum and Front Drum Frame Assembly
Parts List on PL 94.20
Removal
WARNING
Switch off the electricity to the machine. Refer to GP 14. Disconnect the power cord
from the customer supply while performing tasks that do not need electricity. Electricity
can cause death or injury. Moving parts can cause injury.
WARNING
Take care during this procedure. Sharp edges may be present that can cause injury.
CAUTION
Do not touch the exposed face of the printheads. Surface contamination or minor damage can
destroy the printhead.
1. Remove the inner cover, PL 81.11 Item 2.
2. Remove the rear cover, PL 81.10 Item 1.
3. Remove the horizontal paper path assembly, REP 83.1.
4. Remove the exit paper path assembly, REP 10.20.
5. Remove the registration / preheat assembly, REP 89.1.
NOTE: Removing the marking unit is optional. If space to store the marking unit is limited then
the unit can be left in the machine. But the removal does allow more space to remove the drum
unit.
6. Remove the marking unit, REP 91.28.
7. Remove the transfix roll, REP 10.1.
8. Remove the IOD front track guide, REP 91.23.
9. Remove the front drum fan shroud, PL 94.20 Item 7.
10. Remove the front drum thermistor, REP 91.35.
11. Remove the drum position encoder, REP 91.30.
12. Remove the stripper blade and store in a safe place. Refer to REP 10.21.
13. Cover the drum with the drum protector, PL 94.20 Item 13.
14. Remove the drum pulley, REP 91.34.
15. Remove the rear drum thermistor, REP 91.35.
16. Unplug the front transfix motor harnesses, REP 10.4.
1
Rotate the drum drive motor then push it
onto the shaft. The motor should slide on
without snagging.

 Loading...


